
PRODUCTION LOG
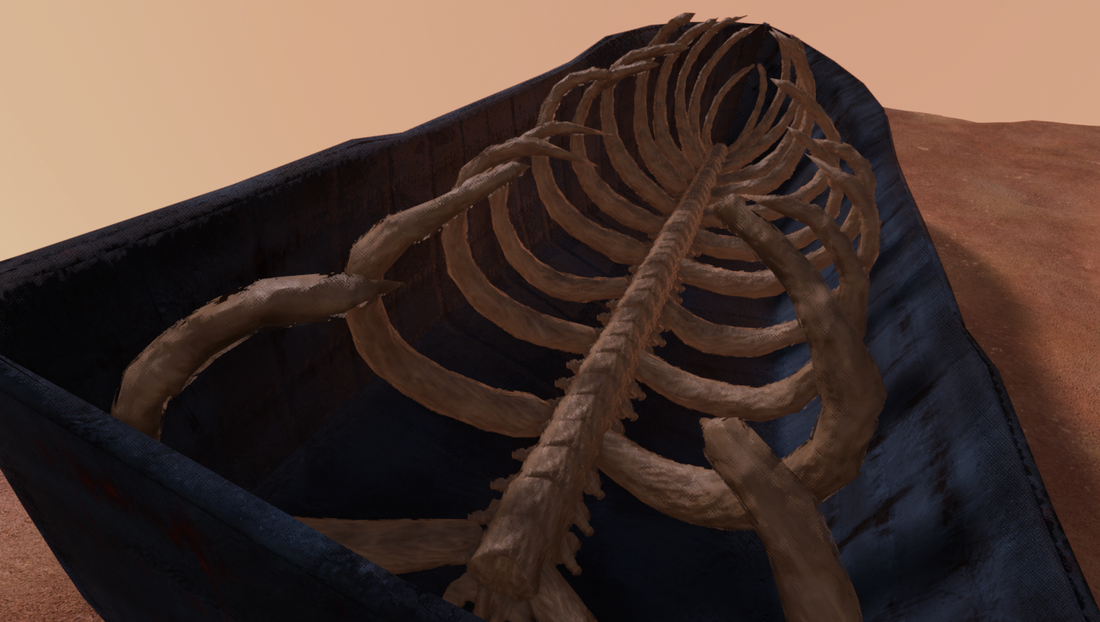
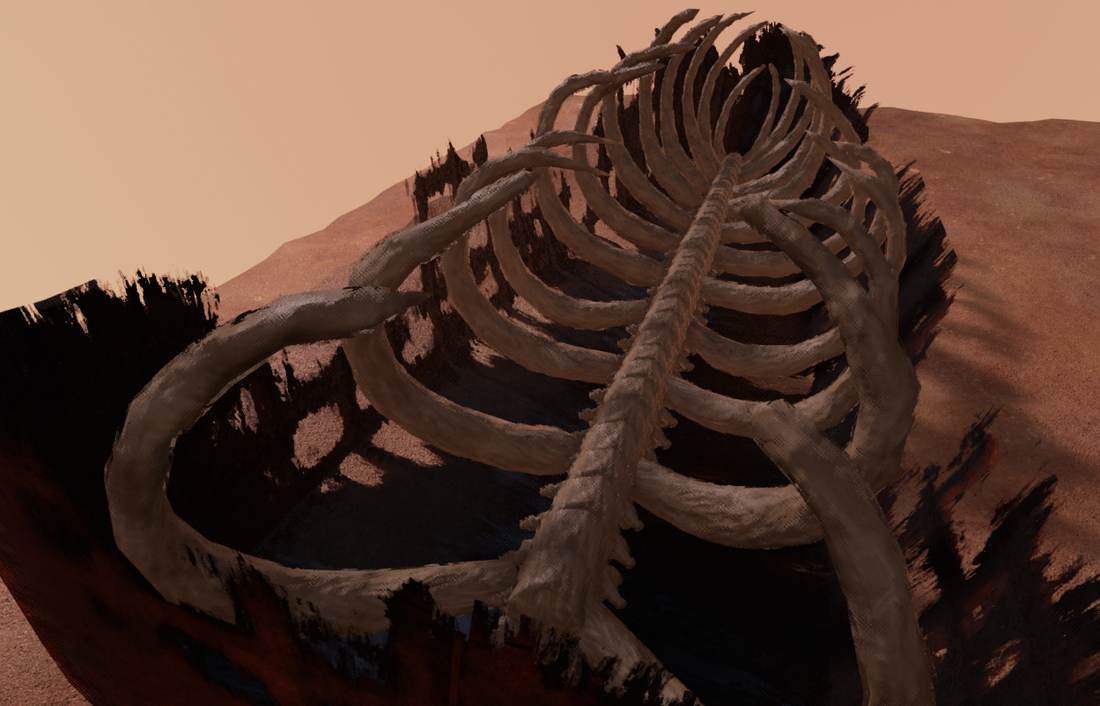
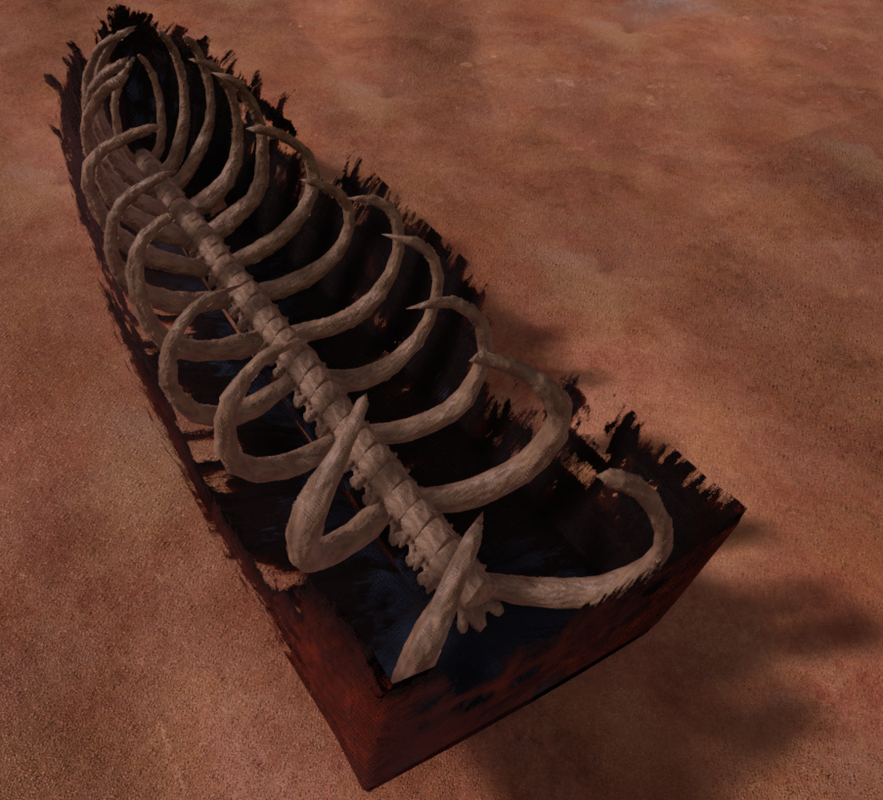
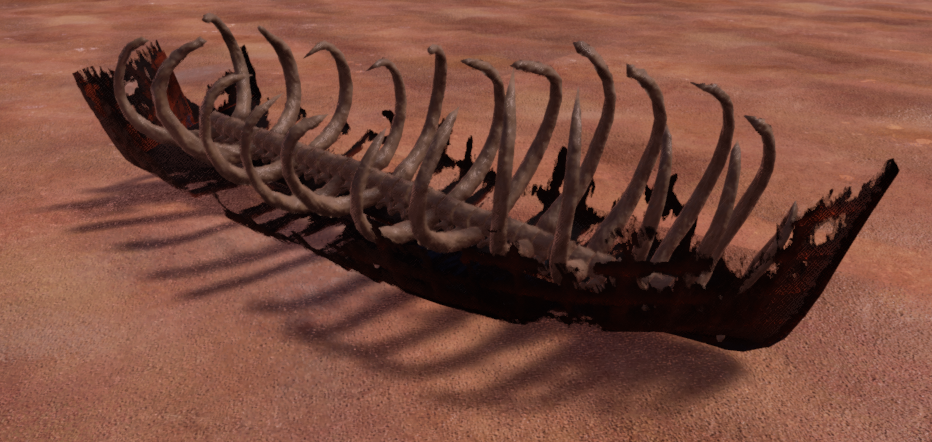
Added the rib bone structure underlying the boat hull (25+ hours)
PRODUCTION LOGAdded the rib bone structure underlying the boat hull (25+ hours)
0 Comments
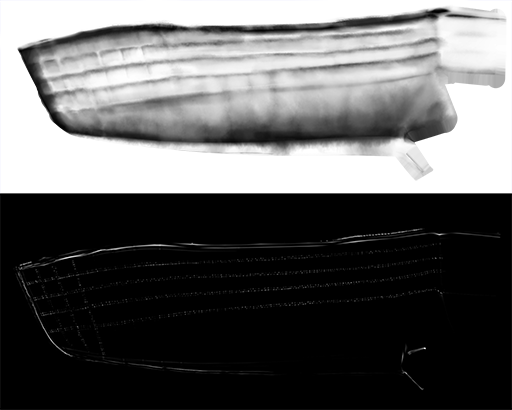
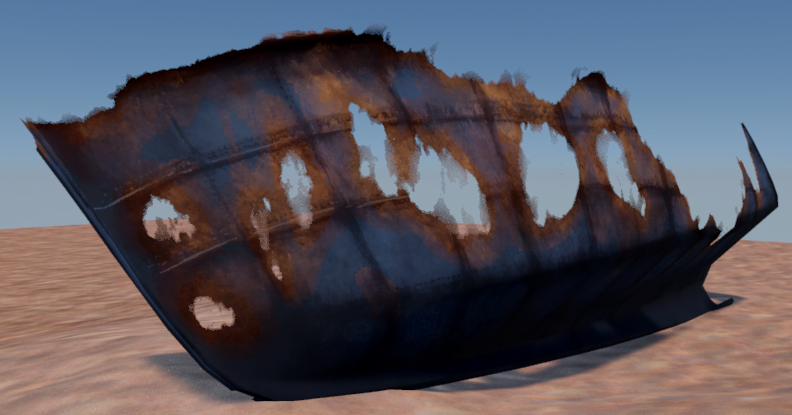
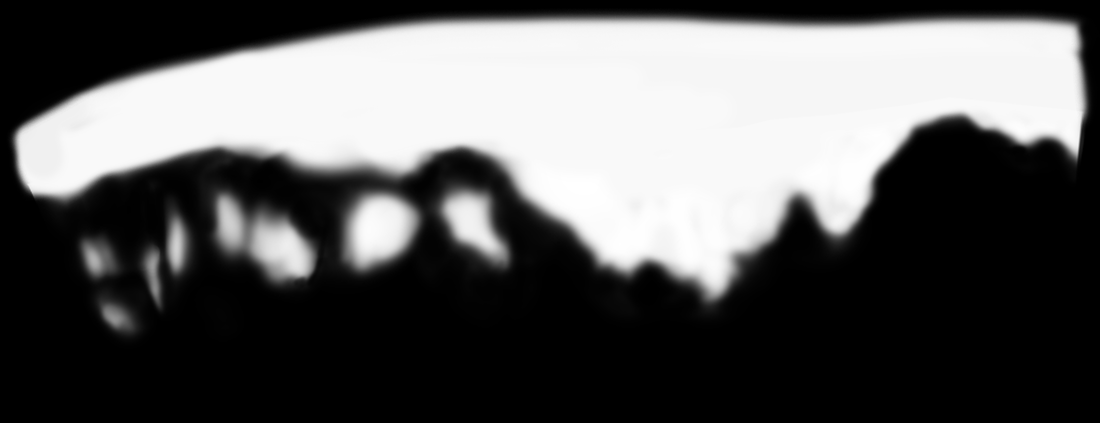
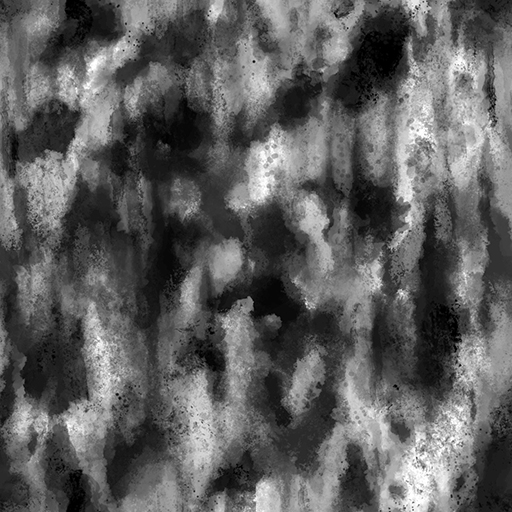
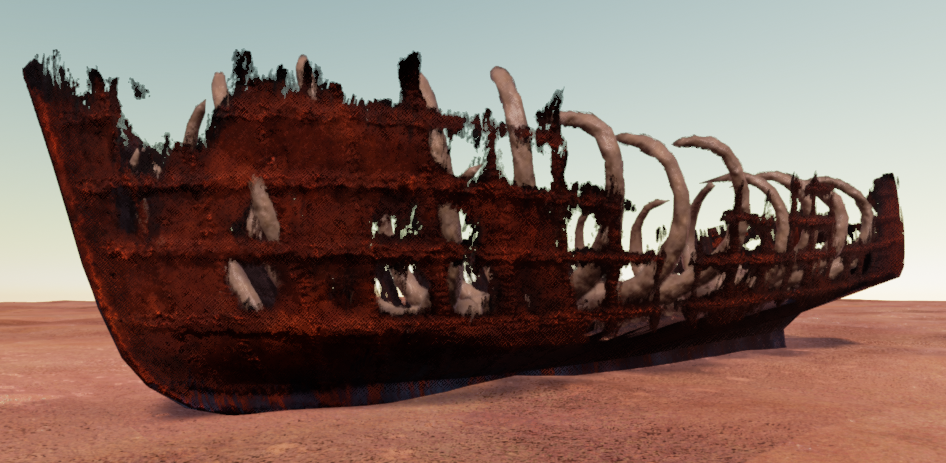
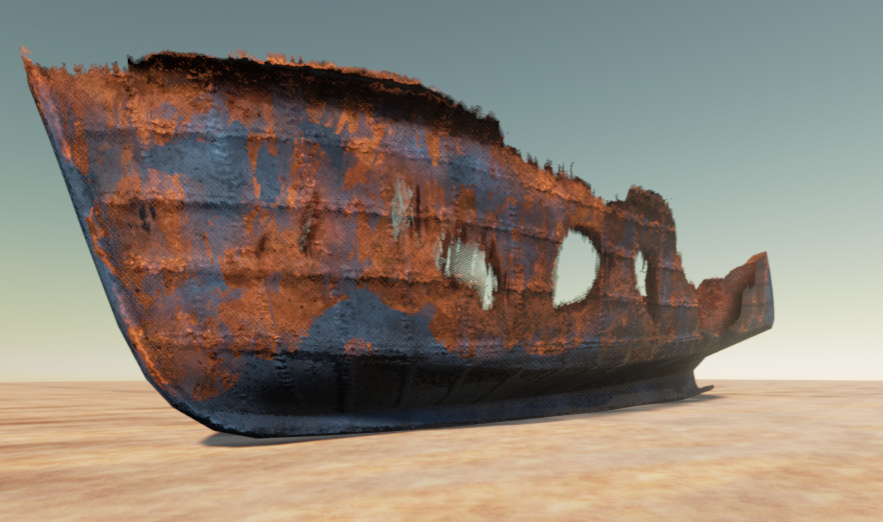
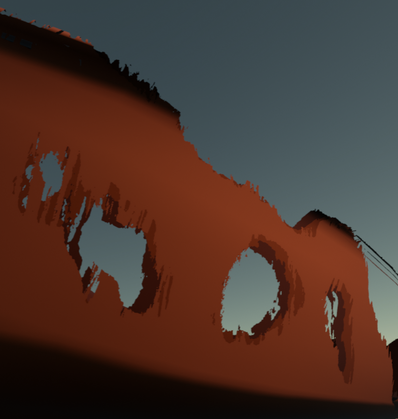
Some progress on the boat hull rusting away sequence. I hand-painted mask keyframes that denote where rust forms and where deterioration starts to happen. Black on the mask is solid, black to 50% gray is rust forming, and 50% gray to white is where deterioration occurs. There are 8 keyframes in total. The result is getting there, but I still would like to do a bit of tweaking. Some of the keyframes towards the end jump a bit too much from one step to the next. This week I focused on developing this shader-based rusting/deterioration transition (23+ hours.) I had attempted a few different methods for making this happen. I originally was working with two separate masks to make this transition happen - one large detail control map (the overall, top to bottom rusting of the boat, holes, etc.) and one small detail control map (the ribbing of the boat.) This method I was first going with allowed for a lot of versatility in the timing of the transition and the blending, since it was all blended together in the shader, but finding a way to blend them together well in the material turned out to be probably too much overhead without necessity to get the visual result I needed. Painting all of these details in one mask and separating them by value seemed to allow for a more natural, organic blending across the whole boat.
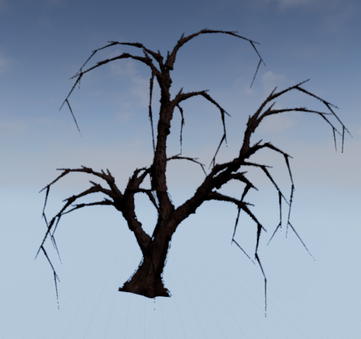
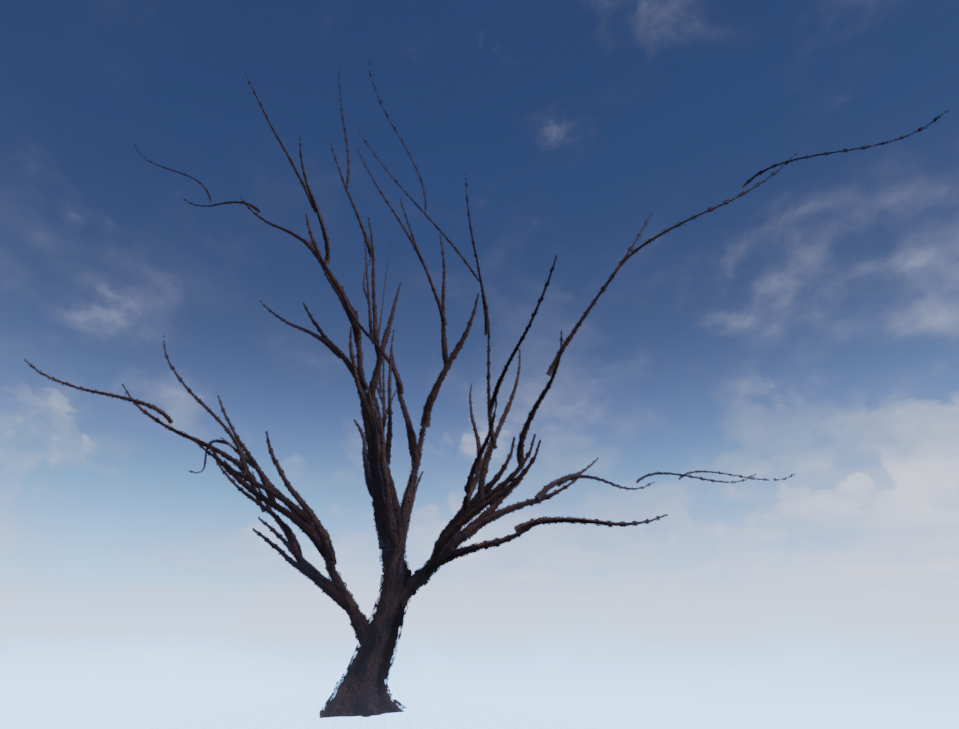
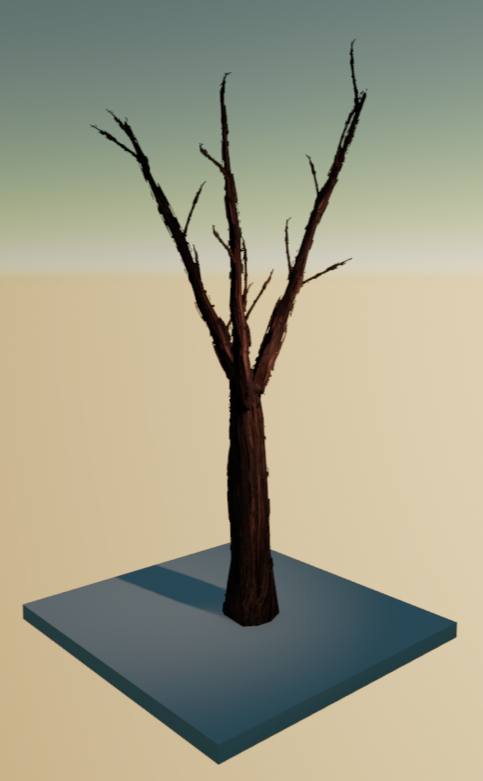
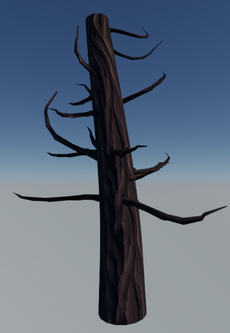
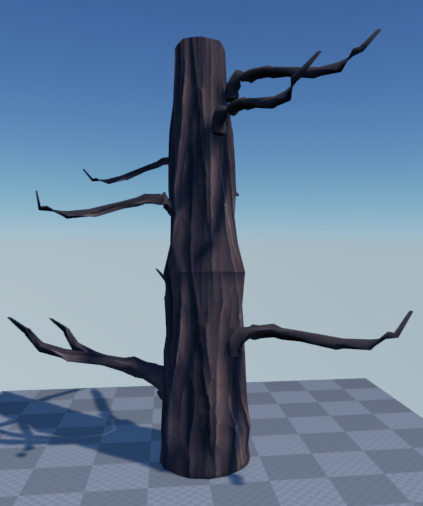
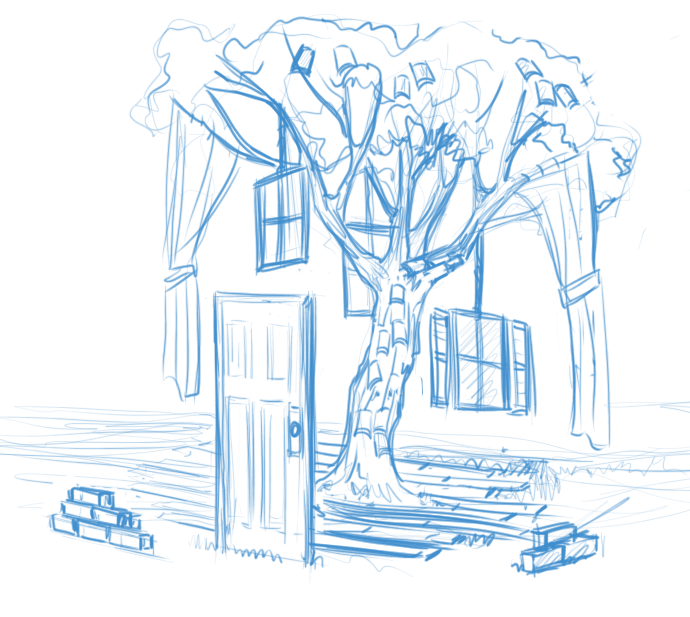
These last trees are still broken in many ways, but I've been working a lot on the Blueprint to consolidate into functions that are able to perform the repeatable processes of placing child branches on parent branches randomly. For example, now you can just up the number of tiers of branches and see the branches increasingly split off from each other, getting smaller and smaller. I also realized that, before, my child branches weren't being rotated relative to the parent branch, so this has that fixed, which is a major improvement. Something seems to have messed up in my branch aware placement, because some of the branches are looking pretty crowded. This is something I need to look into. The system is much more organized than it used to be, but these trees lack a lot that I'm still looking to implement. Some branches still aren't being placed on the spline correctly (if a branch bends too far from its spline.) I've also been trying to decide how to modify the tangents of the randomly placed branches so they aren't straight sticks like in the first image. I think the most exciting part of working on procedurally constructed assets is being surprised by the types of results that your system yields. Although you build the system with intention, there's a ton of room for error and unexpected combinations that can inspire you to strive for new visual goals, especially while testing. Neither of these trees look like how I planned, but the forms they created are inspiring alternatives to explore. PRODUCTION LOGBringing the boat into the same painted style I was able to achieve last week on the tree was a major development this week. Now that the look development for the boat is mostly figured out, I've been working on the masks to make the boat rust away as you come closer to it. I'm looking to finish the rusting away of the hull by the end of this week. (18 hours)
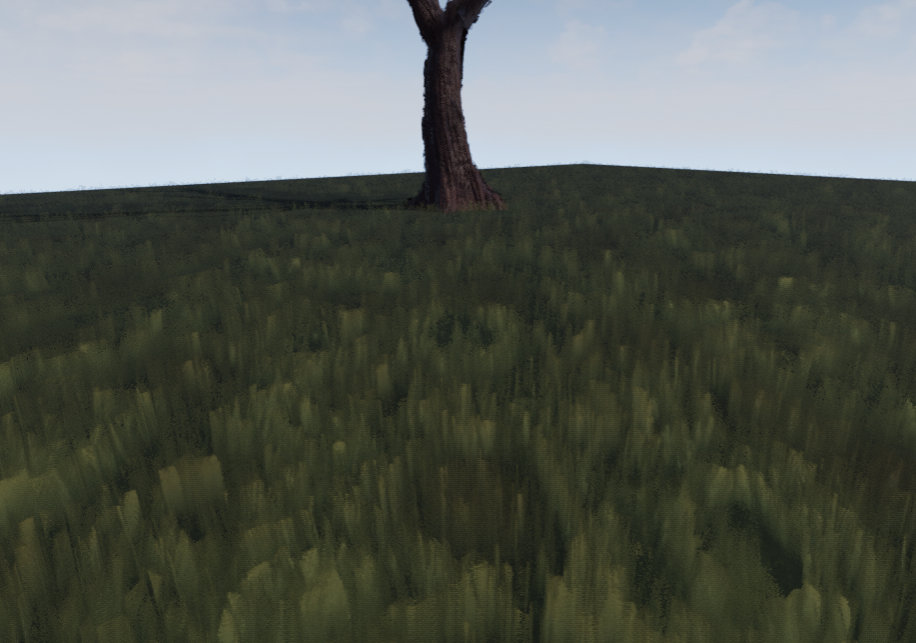
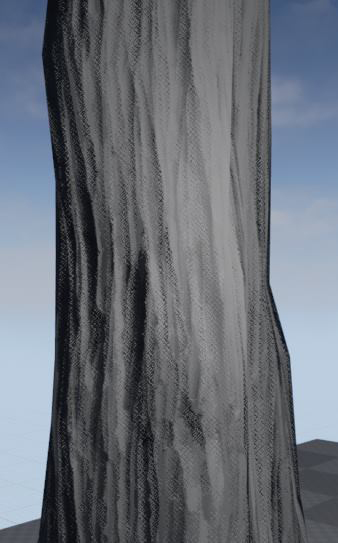
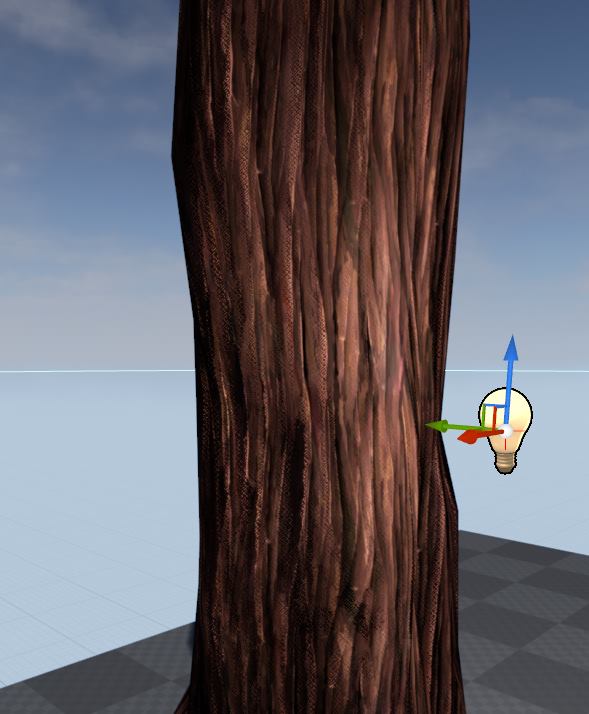
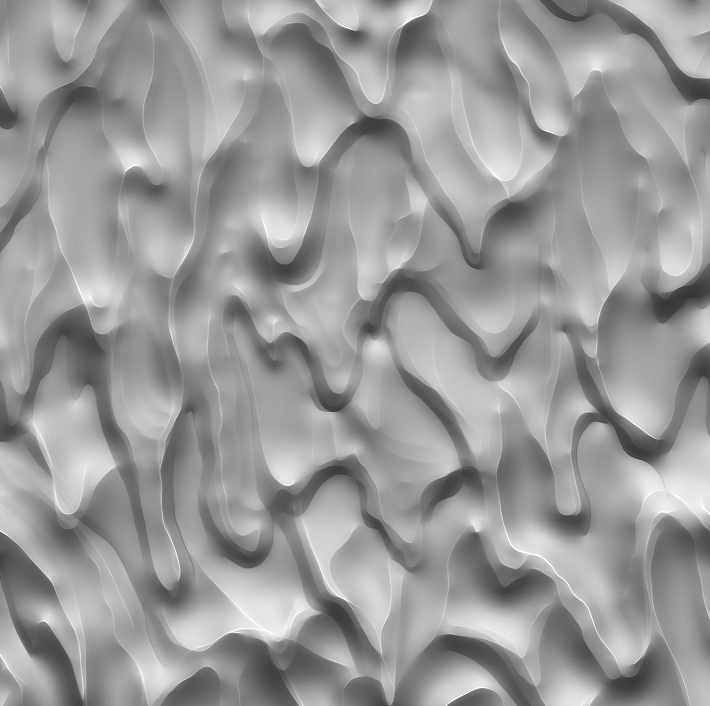
My tree system underwent some much needed cleanup and restructuring, but still has a long way to go. It's more downhill than uphill from here though. (16 hours) The results of my grass tests were surprising. I was playing around with this on a whim. I set up cross section layers in a Blueprint that controls how many layers there are and the overall height of the grass to pack those layers into. Each of these layers has the grass material applied. The Blueprint is able to feed information into the material. For example, the material can have a different effect on the top layer than the bottom layer by taking in the current layer from the Blueprint. The opacity mask for each layer is actually the same painted mask, but clamped slightly differently at the top so the top thins just a bit. This grass also moves very slightly in a sort of dreamy way by just offsetting the UVs by a noise that shifts over time. (2-3 hours) I've been playing around with materials to keep working at achieving the painted style I want for this project. Although I enjoy the look of hand-painted textures, my goal is to take this style beyond the typical flatly painted look by making it a convincing part of a 3D world with dynamic lighting. Particularly, I've been trying to create custom painted looking normal maps to accomplish this. In my attempt to sculpt normal maps, I still hadn't been getting the look I wanted. Normal maps seemed to kill any painted illusion and overwhelmed my hand painted textures. Also, the chunkier style of my sculpts conflicted a bit with the more textural quality of my paintings. While revising the material for my tree bark, I made a bit of a breakthrough in my method.
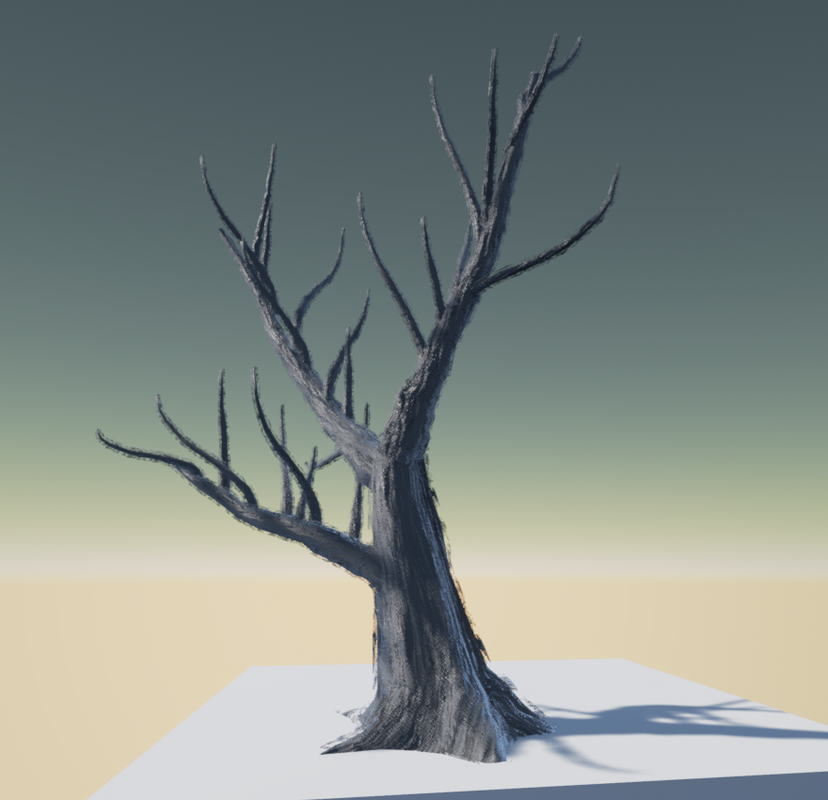
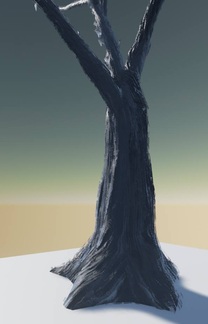
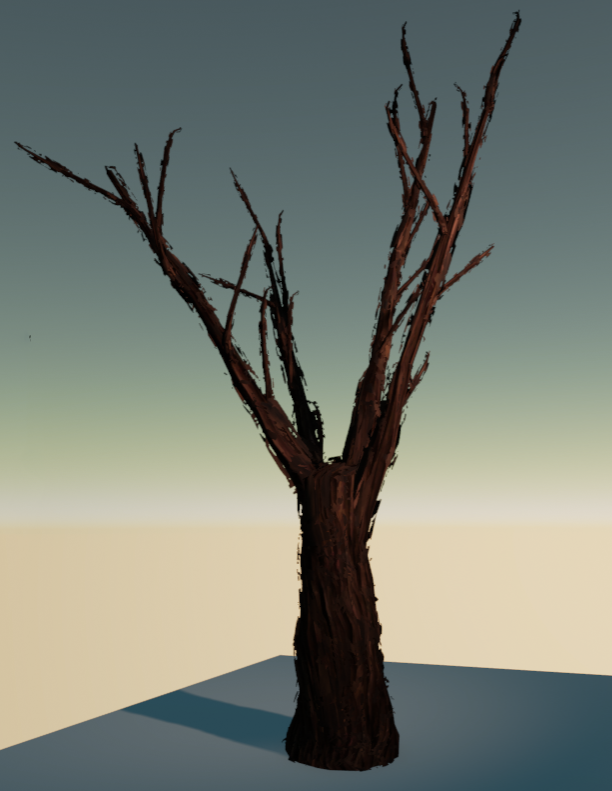
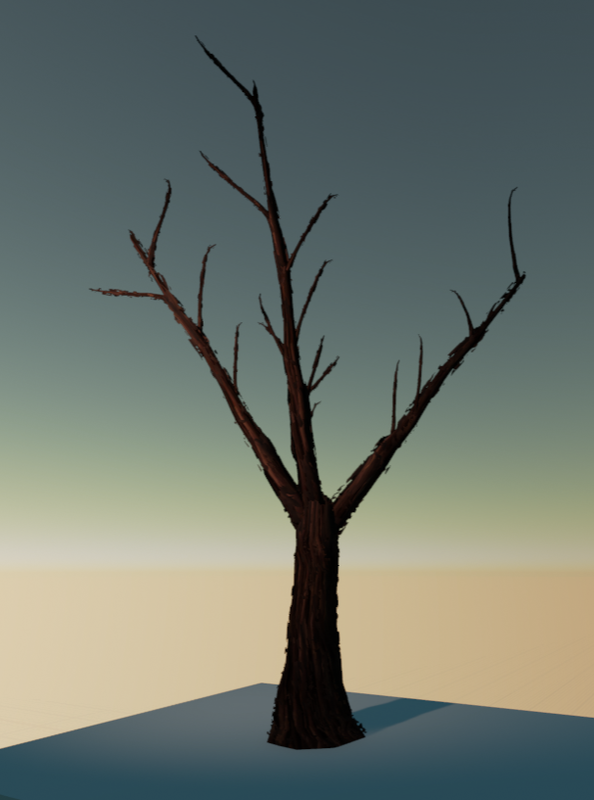
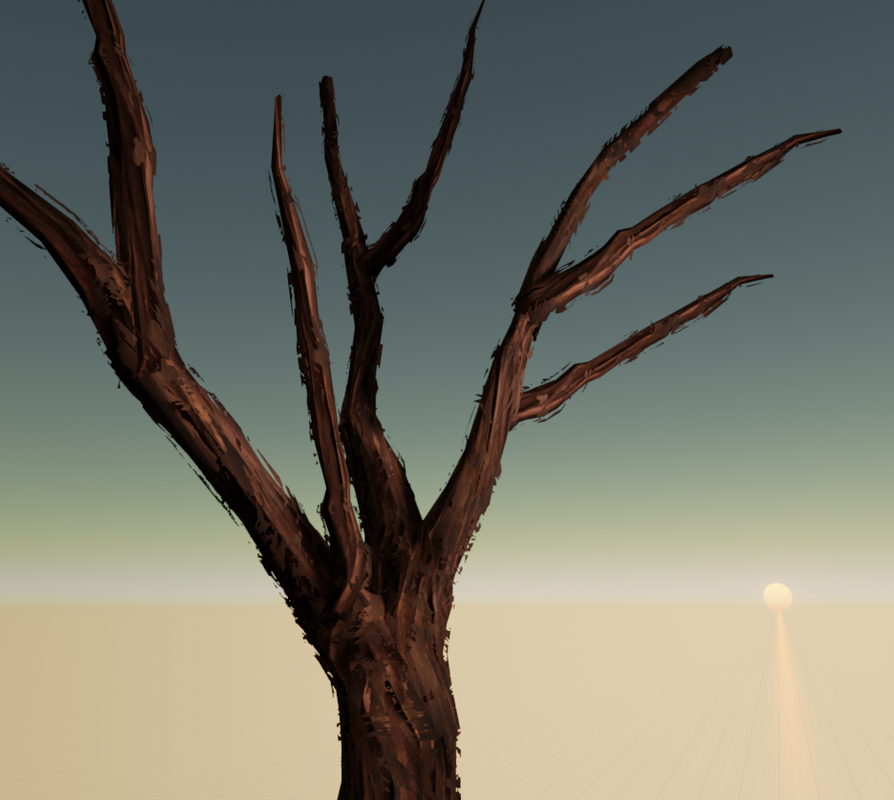
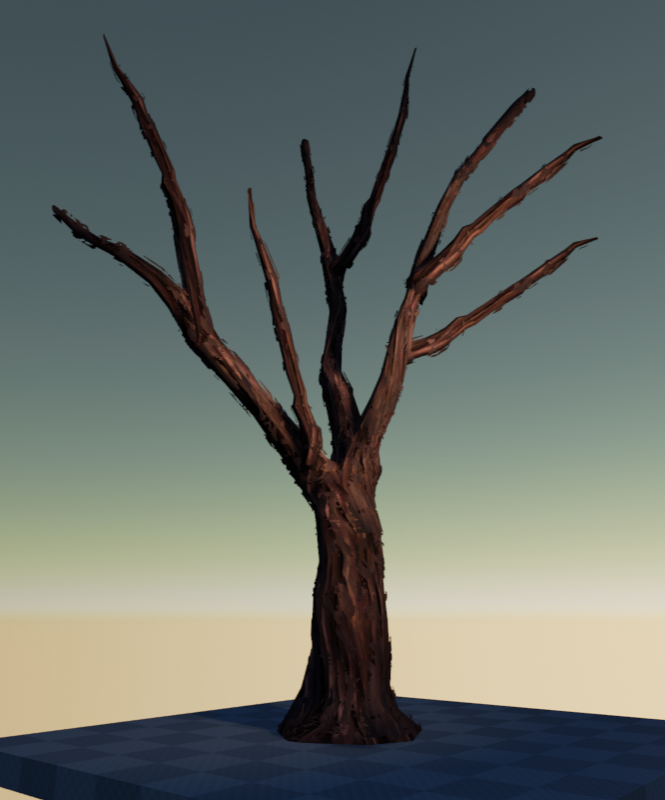
These images are of the full tree with a modified, painted looking normal map. These also have the additional opacity mapped shell of the mesh over top, adding the textural edges on the silhouette.
PRODUCTION LOGI spent the majority of this week working with materials to find this painted style (18 hours.) I also completely revised and reorganized my tree Blueprint (13 hours) and some things still need to be done to unbreak some things I broke in the process. I spent a bit of time with post process materials to soften the edges of objects (5 hours.) Lastly, I spent a lot of time trying to refine the look of my boat by painting model-specific detail maps, only to find that so far, I still like my iteration from last week better (12 hours.) Also, the development in my process with the normal maps makes the work I was doing on the look of the boat a bit unusable now, so I'll be working next week on applying this method to the normal maps I'll be creating for the boat.
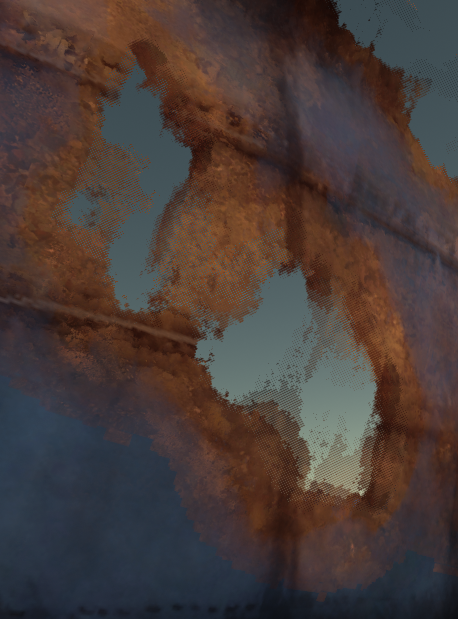
My goal for this week has been to push the look of my boat further through defining its material and to work on the material blending between the painted boat material and the rusted boat material. The opacity masked look has been working decently to get a sense of a painted edge quality, but something I have been lacking that I really admire about paintings is the mix between hard edges and lost edges. The brush strokes on an edge aren't always all completely hard and opaque. The problem is UE4 masked materials don't allow for grayscale alpha values, they clip black and white- it's either 100% or 70% opacity. Translucent materials can provide this, but they're more intensive. I discovered that in the UE4 content examples, they demonstrate a technique used to fake translucence with masked materials by dithering. Dithering is a graphics technique used to simulate value using the density of a bunch of tiny dots when a color palette is limited. The DitherTemporalAA node in the material editor provides that kind of effect. This same method seems to work to my advantage to give my opacity masks a softer look. Even though the little dots might technically be considered an artifact, it unexpectedly works to my advantage to give my opacity masks a softer, posterized/quantized look that aids in the painted style.
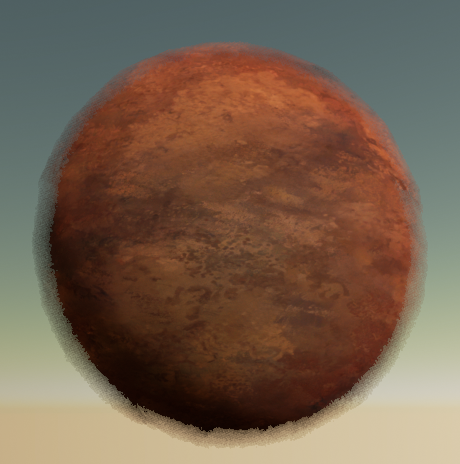
These images show a sphere with the dithered opacity masked by fresnel so it only shows up on the view angle dependent edges of the sphere. Here I've also tried multiplying that dithering by different brush stroke opacity masks to yield slightly different edge qualities. I had tried this same technique before with translucent materials to soften the edges by decreasing their opacity with fresnel as a mask, but the transition was very soft and it tended to look like the object was fading away. Thinking forward, I would love to create a universal Material Parameter that can be modified by Blueprints across all materials to modify their edge quality, globally or locally. As things become more intense, the brush strokes at the edges might become less calm and more hard-edged and haphazard. I'd also like to do some modification to this edge effect based on how much light is hitting the object. I find in paintings, areas that fall into shadow tend to have lost edges more so than ones in the light. This kind of subtlety might really add depth to the visuals. Another parameter this effect could be dependent on would be distance or even focal point. Paintings use strongly defined edges to emphasize a focal point. Usually foreground elements might also be sharper, and background elements might have more lost edges if they are not the focus. I've been trying to find a good way to get the model specific detail I need to define the structure of the boat with more than just tiling textures. A method of sculpting or modeling a high poly and baking it down for additional normal detail doesn't really work well here. Normal maps I have tried to create so far all seem to break the loose painted look I'm going for. I hope to continue investigating non-traditional ways I can apply normal maps to bend light and enhance the painted look rather than diminish it.
I've found tremendous use in my work so far compiling assets within a Blueprint that can be dragged into the editor with all of the components it needs to be a complete asset. For example, for my boat, I have a few duplicate shells of the original mesh. This allows me to keep them all hooked up to one master asset I can drag around.
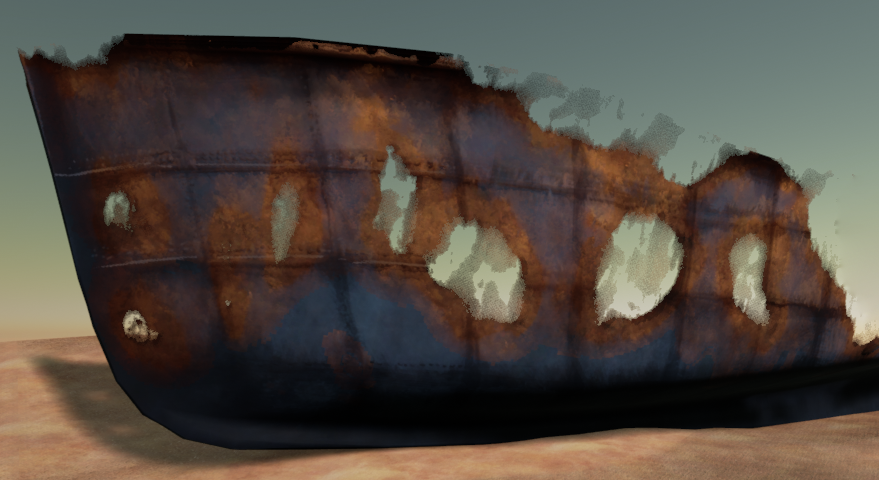
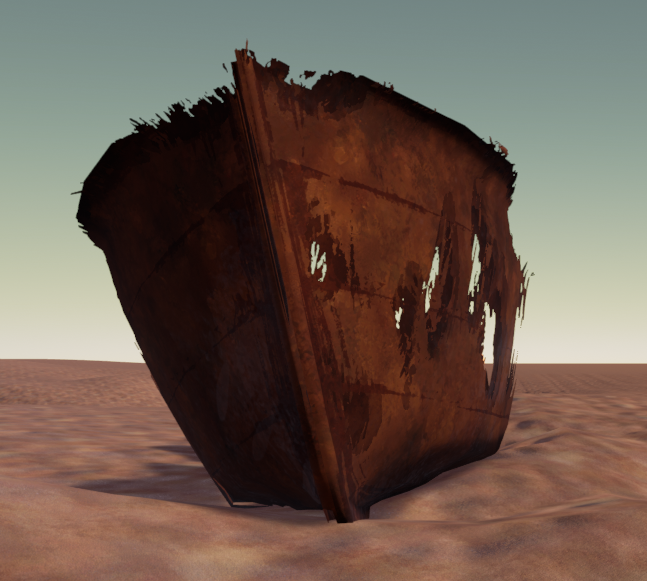
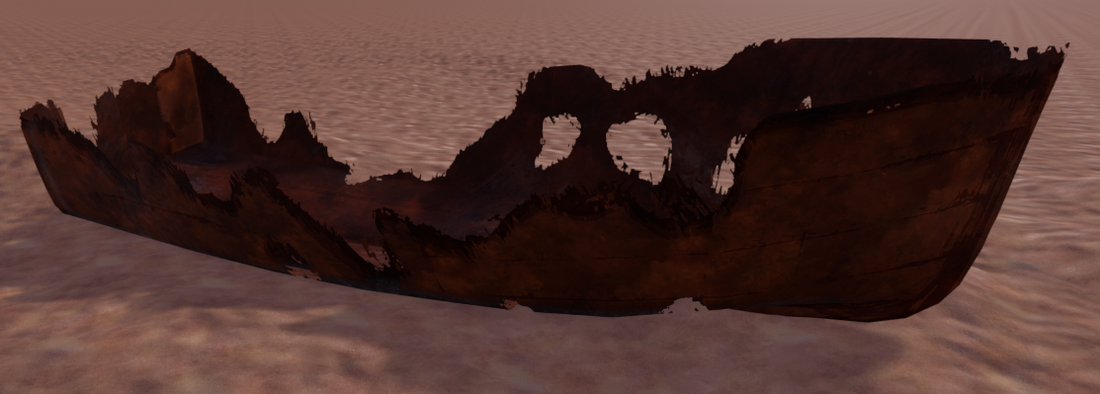
Another benefit is that any global Material Parameter Collection values can be exposed to the Blueprint, so that I can modify material effects by clicking on the boat blueprint and changing values in the details panel. This is how I plan to manage and test the different sequential stages of deterioration that I've allowed for in the material. The transition will happen by blending/lerping the hand-painted mask that designates areas of deterioration to the next hand-painted mask with increased area of deterioration (the next stage or "keyframe" of the transition.) So to control the transition, I'll divide up 0 to 1 into the stages of the sequence, and at the end have one controllable value to slide back and forth between 0 and 1 to make the transition happen. This makes it easy to hook up to anything - distance, triggers, timelines or matinee. Progress on the rusted boat in combination with painted style. Still quite a ways to go in terms of blending between the not rusted boat and getting the right amount of material definition with the painted style.
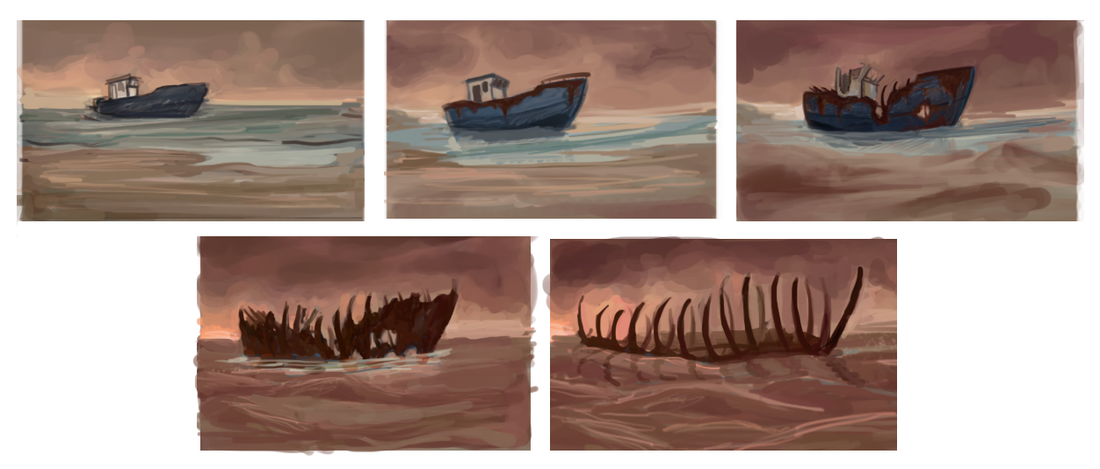 Some thumbnails illustrating the key points in the sequence. The boat rusts over as you approach it. The sand closes in on the ocean in waves, leaving the boat in a puddle. The sky becomes increasingly darker and overcast. Finally the boat has deteriorated to skeleton bones sticking out of the sand.
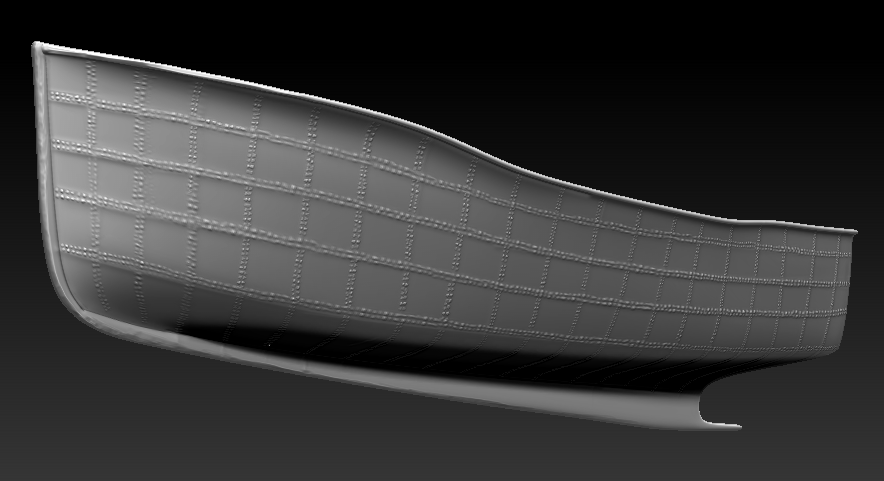
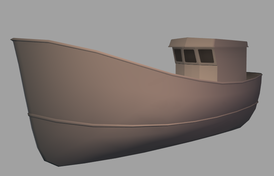
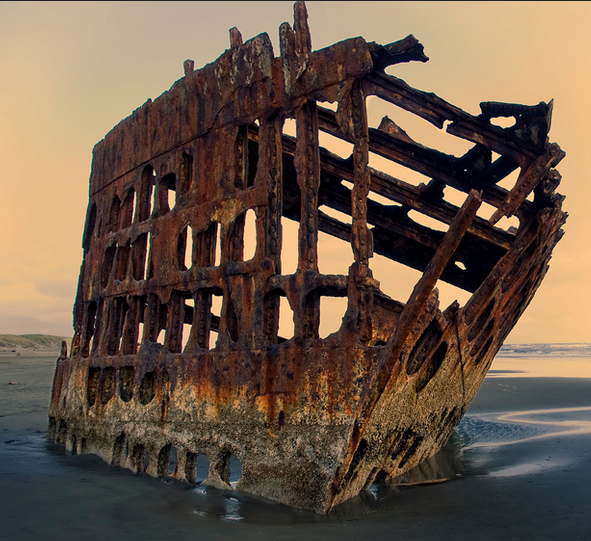
PROCEDURAL SPLINE TREES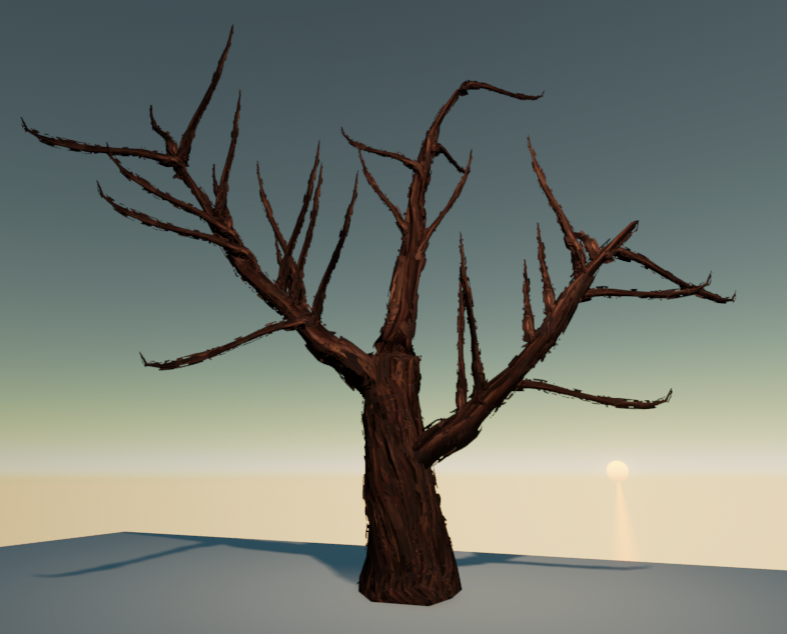 • Splines for primary branches can be dragged out. • Tangents of splines can be rotated and scaled. • User can add up to 10 primary branches that split form trunk. • Secondary branches are generated randomly along primary branches with awareness for other branches. • Implemented random streams so you can modify a random seed to change the tree rather than have it change every time the Blueprint recompiles. Next steps: • As the tree branches out to further tiers with smaller branches, more small branches will be included in one piece. Experiment with what these pieces are. • Continue tweaking parameters on randomly placed branches to get a more natural result. • Figure out what the loose style should be to generalize detail as it becomes more busy (tiny branches and leaves.) BOAT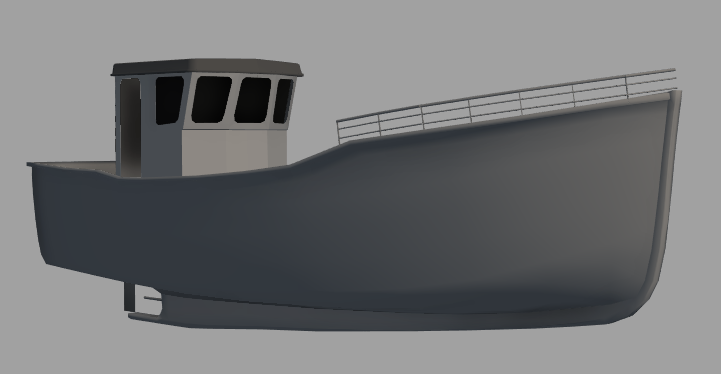 • Modeled the boat to prepare for the boat deterioration dream sequence - this is an understatement. The modeling was the easiest part once I figured out how a boat actually works, which has been the majority of the problem solving. They have a very specific and subtle form and curvature that was a bit hard to capture initially until studying a variety of different boats. The shape of the hull is complete, everything else is in progress (railing is a stand in for scale.)
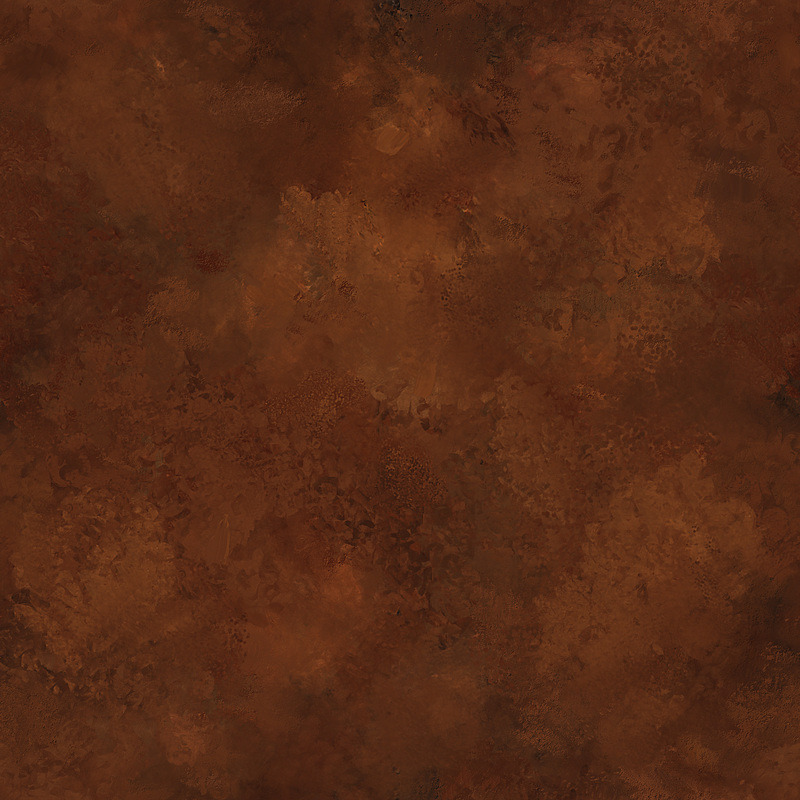
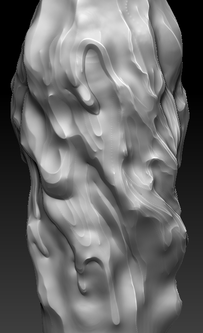
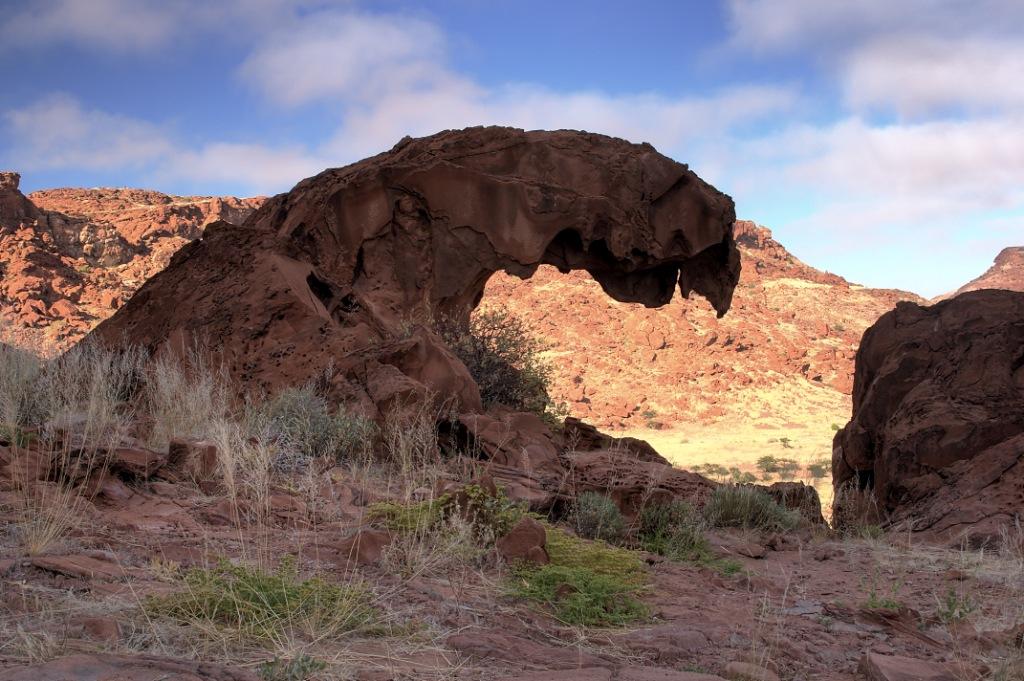
 Very early tests just to demonstrate the concept of layered meshes to get a painted look with expressive detail (i.e. a rusted boat showing through to an underlying skeleton.) • Mesh is added to a Blueprint as a component, duplicated multiple times (in this picture, 3x) • Each duplicate has a different material instance applied of the main material. • The main material is a hand painted B+W mask with a smooth falloff from black to white. This is to get enough of a gradient in the gray values to multiply in a tiling hand painted B+W brush stroke mask, that adds the textural quality to these masked edges. • Rather than hand painting the mask for the boat in the exact way I want it, I compile the mask in the shader to allow for different levels of clamping on each material instance. This is what allows for the dynamic transitioning of the deterioration of this boat. • Parameters for UV offset and tiling multiplier to ensure the brush stroke pattern is not repeated on each "layer" of the material instance. • Each mesh is "pushed" in on within the shader on the vertex normals of the mesh. Each layer/material instance is pushed in an increasing amount. This makes it so the mesh does not have to have these layers baked in, so every time I want to modify the distance between each layer, I don't have to tweak the model in Maya and re-export. ROCKS AND WAX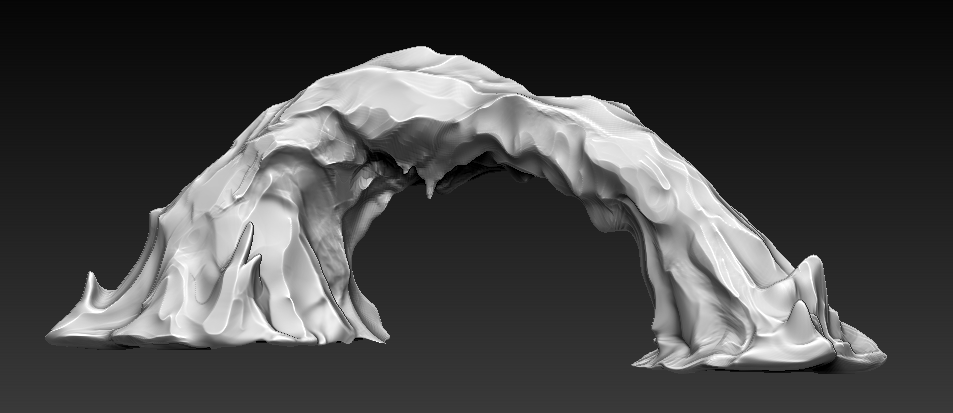 Concept Zbrush sketch of a rock arch and its waxy form. Next steps are making a model for this and experimenting with painterly silhouette additions to get this look.
Concept wax sculpts to use in the creation of tiling textures. Not sure I like the result of these - they might be too sculpted and detailed for the painted style I am going for.
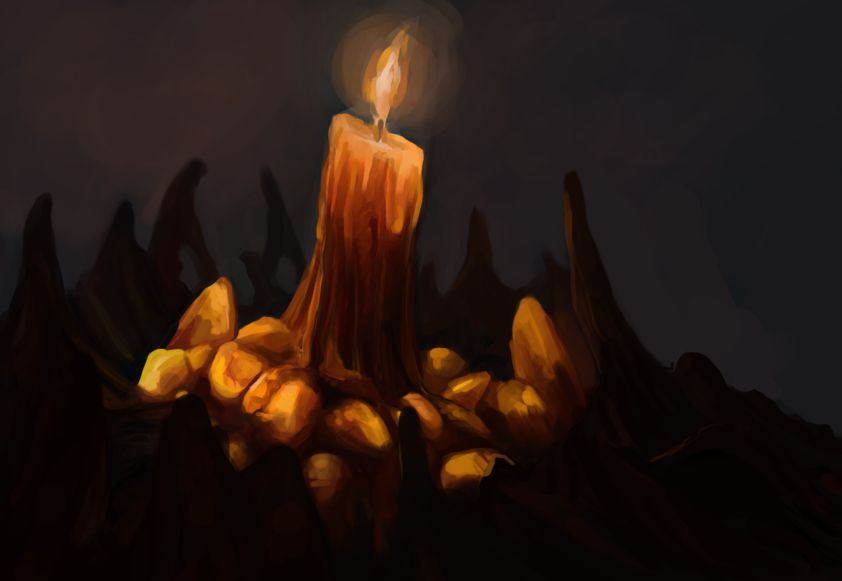
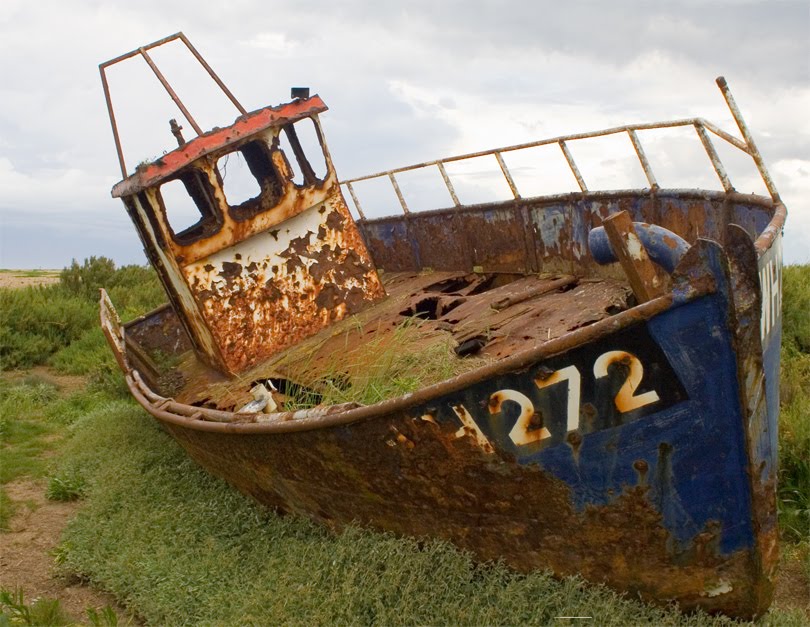
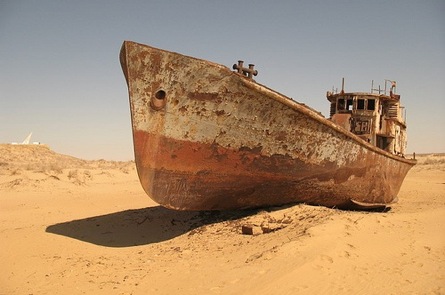
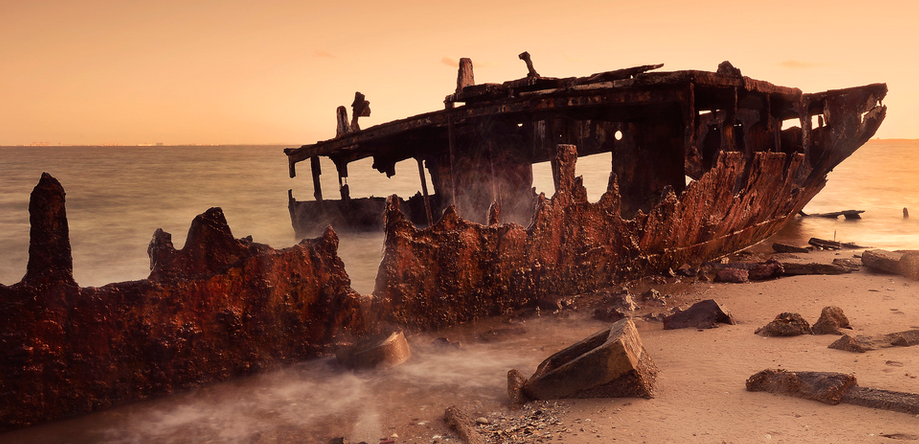
I had a thought that I could use Substance Designer FX maps to generate procedural tiling brush stroke maps that follow a hand painted flow map for their directionality - a similar approach to this . This might be somewhere I start to explore, especially to gain better control with the B+W brush stroke maps. Hand painting is great for some things, but hand painting tiling textures can often be a painstaking process, only to find you don't like the result after hours of painting. It is also hard to get a very evenly distributed level of detail when hand painting tiling textures. Naturally you hand craft some areas more than others, and these tend to be the areas that stick out when the texture tiles a couple of times. The procedural tree system is now working. Here's a quick demo showing the tree Blueprint recompile and randomly generate new locations for the branches. Right now, the tree has parameters for how many primary branches there are. You can bend, twist, and stretch the trunk along the spline. This is good for being able to generate a variety of trees right now, but I'd like to figure out how to expose variables from nested Blueprints to the main Blueprint. The next steps here in refining the look of it are getting more variety in the curvature of the branches, adding the smaller branches, and leaves. Then, I'd like to try switching out branches for other things, like pipes. Starting on the development of the rocky beach environment. Here are some images that have inspired the way I'm creating the rocks and mountain to look waxy and melty. These rocks will have bits of amber mixed in, giving the impression that the amber is hardening/fossilizing into these rock structures. The pieces of amber will contain bits of junk that look like they belong in a junkyard - mechanical and electronic elements. All of these rock structures will be forming a huge mountain with a melting candle at the top. The flame of this candle will reveal itself to be the light source of this environment, the sun. I feel like having this as the primary light source might help with the ambigious "indoor or outdoor" feeling I'm trying to create. The candle will be melting the amber substance that is encapsulating the junk. Some references I've been using to start to build the boat dream sequence for this environment. In this sequence, you would be on the beach and notice a boat on the water in the distance. As you came closer to it, the water would start seeping away and become sand, the sky would go overcast, and the boat would begin to rust over into a skeleton. The skeleton of the boat would look like a cage/shell made out of actual bones. By time you reach the boat, it will have completely disappeared, leaving only sand. WORK LOGTree system: 14 hours
Environment planning, references, sketching: 4 hours Experimenting with new workflows for texture creation and hard surface modeling: 3 hours Modeling boat: 5 hours Working more on the spline mesh trees this week. My original idea was to be able to drag out spline branches to an end transform point, but I've found that it's not possible to show widgets in editor for the Blueprints that are generated by other Blueprints. So, the end points have to be randomly determined (guided by parameters) instead of being able to freely drag out the end transform widget. This was a bit of a disappointment.
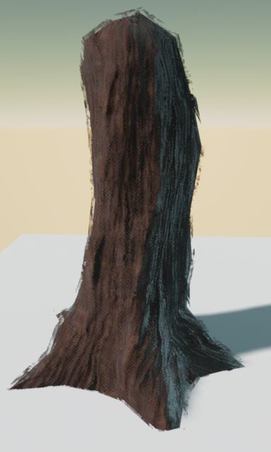
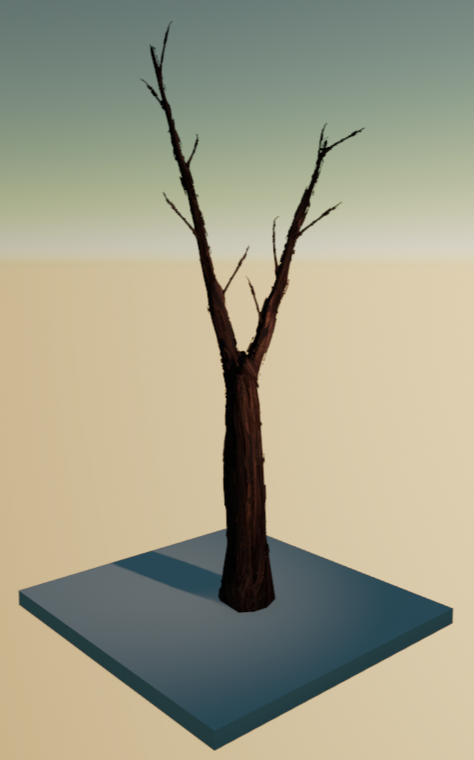
I took a break from trying to procedurally generate the branches and decided to make an example tree that demonstrates what look I am going for in the end. I figured it would help a lot to have an end result to strive for when trying to get these branches to generate correctly.
I started creating this tree using Zspheres to form the armature of a trunk and the main three branches that the trunk split up into. I sculpted the base trunk at a low subdivision to get an organic feeling to the mesh and get the silhouette I wanted. This is actually a relatively fast process. In Unreal, this is loaded into a Blueprint as a static mesh component with my bark material applied, in addition to a duplicated version of the same mesh that has a different material instance of the bark material applied. The material instance pushes out the vertices of that second mesh along the vertex normal using World Position Offset. This creates an exterior shell identical to the original mesh.
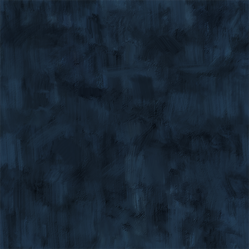
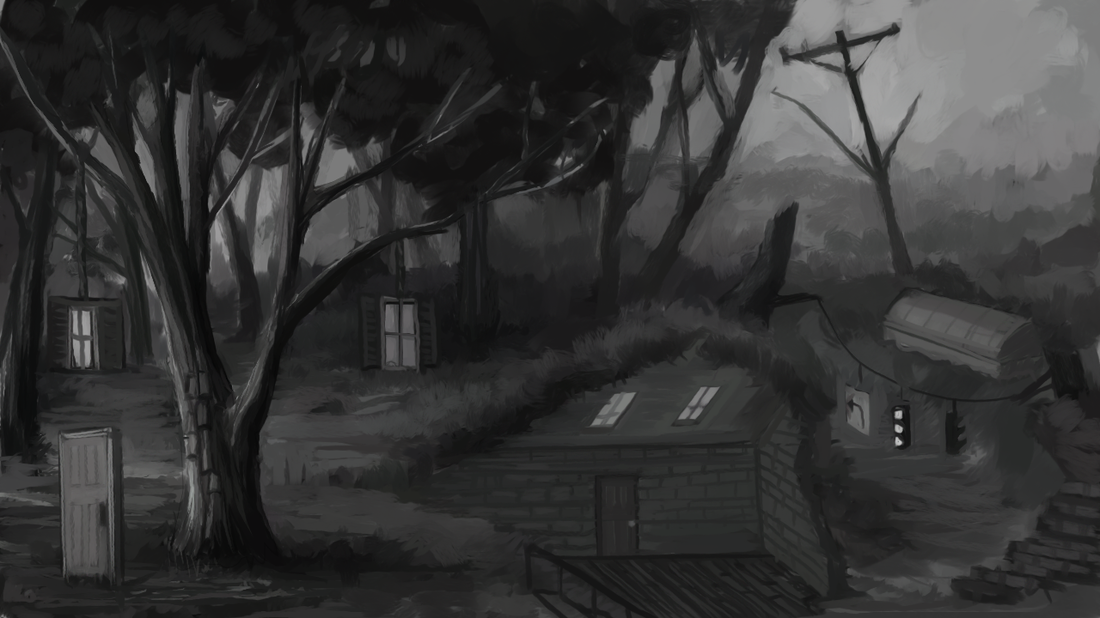 Here is another concept painting I did this week to outline some of my ideas for the familiar dream environment I'll be pursuing. Next week I'll be working on something else-- a more static, visually based asset -- alongside my trees. Working with procedurally generated assets can be a bit frustrating after spending hours troubleshooting and cleaning up for little visual result. WORK LOGProcedural spline trees: 12 hours
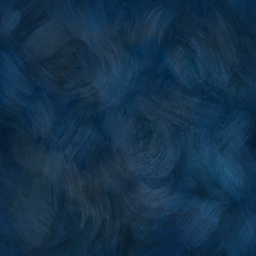
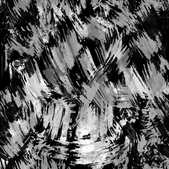
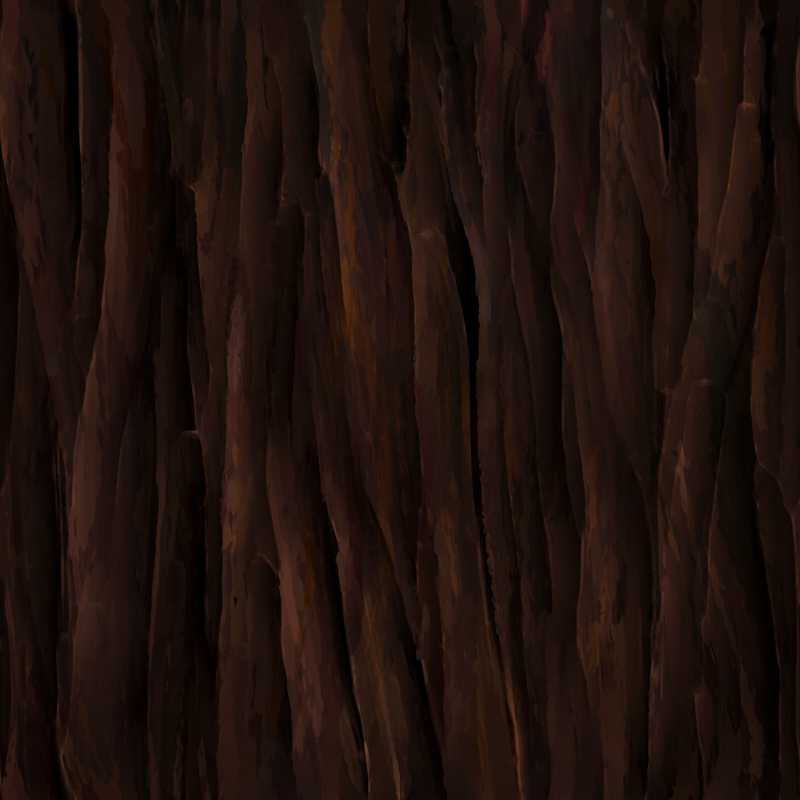
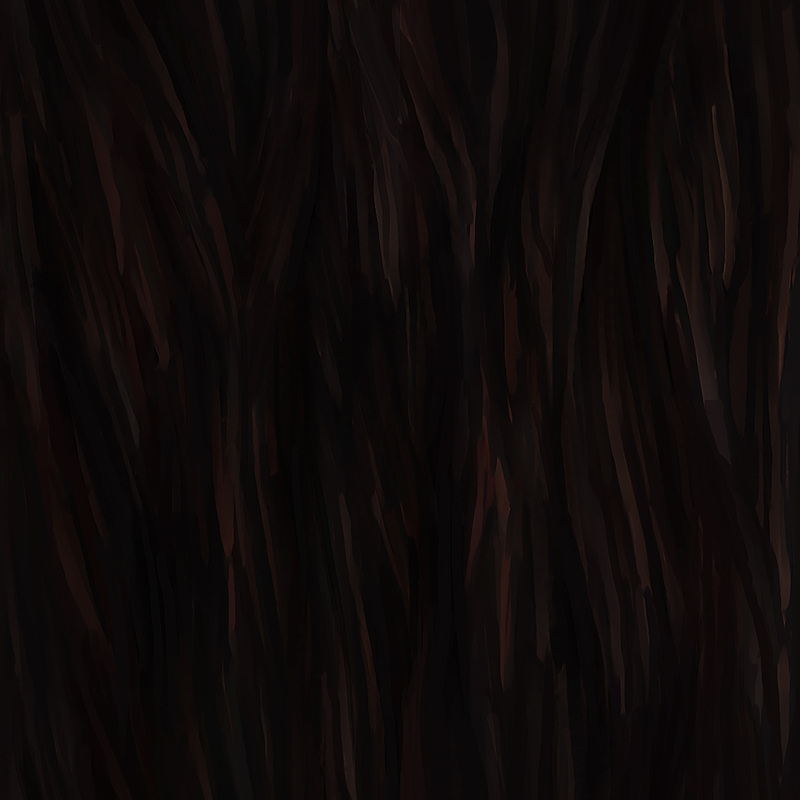
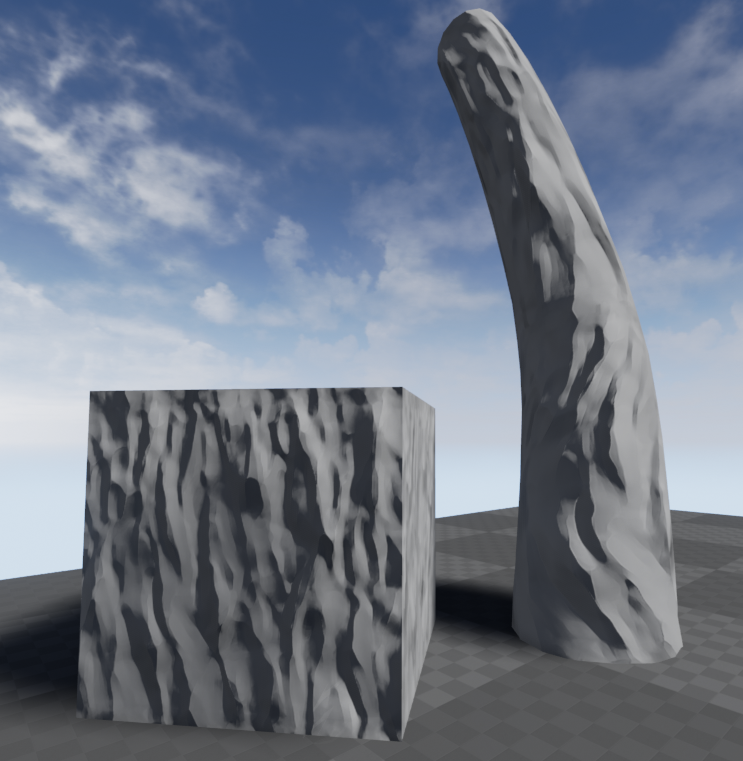
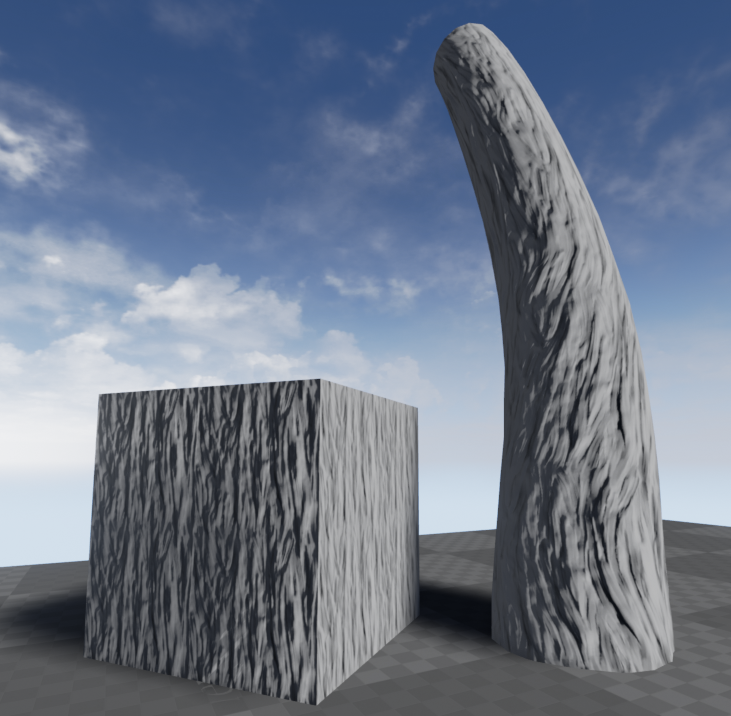
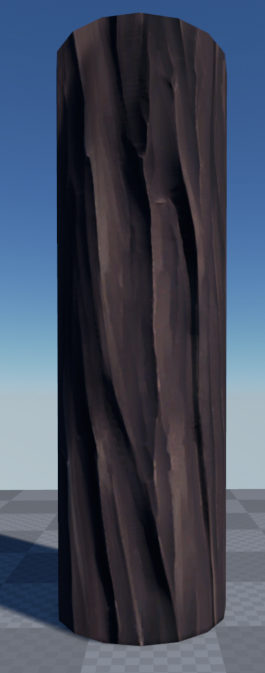
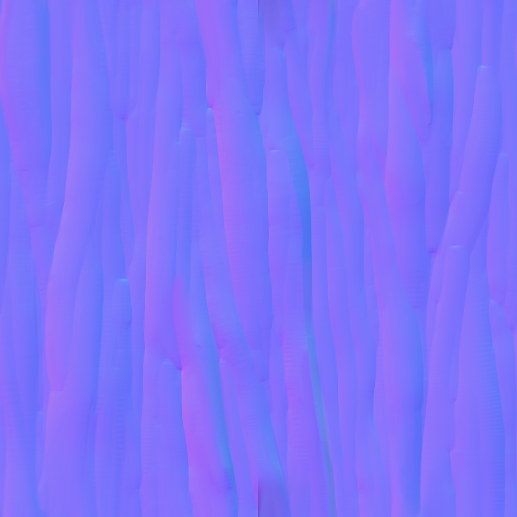
Texture painting and material creation: 10 hours Painting: 5 hours Presentation, design doc, blog: 11 hours MATERIALSThis week I focused on material creation, using the tiling tree bark material as my guinea pig for testing. Developing the look of the materials is something I'm really invested in with this project. I've been trying to find the balance between realistic material definition and painterly stylization. One of the main downfalls with the typically seen hand-painted style is often that the light is permanently painted into the diffuse texture. Sometimes this looks nice, but it doesn't allow for the light to change and can come off as a bit flat. It's been especially important for me to find a method for creating normal maps that are a bit chunkier and planar looking, because that's sort of the way light hits are depicted in painting.
This most recent iteration shows the diffuse and normal working together a bit better, resulting in something a bit closer to what I envision as the material style for this project. Again, he normal was done by sculpting in Zbrush and I painted a texture based on the normal. I'd like to add some more color variation in the strokes of the diffuse color to get that feeling of mixed paint and unexpected hues to make up an overall impression of a color. Bark is a naturally rough material and I'm still trying to figure out the role of the roughness map in my material, how much it might be needed for something like this, or if it could be painted in a certain way to enhance the look I'm trying to get. For example, maybe a patchy brush stroke roughness map with hard-edged transitions between strokes would provide an interesting painterly variation when light hits it. This is my next step in experimenting.
Problems with this right now: 1. The branch mesh I'm using as a test a bit too sculpted on its own and most of the deformation of it should be left to the spline. I will also need maybe a few different branch meshes that can be interchanged for the sake of variety. 2. There are currently no parameters controlling how these branches are placed, other than how many of them there should be. So, in the future, there will need to be parameters that control the tendencies of the branches (angle, twisty-ness, length) as well as parameters for intelligently placing them so that some aren't clumped together, or colliding with each other. 3. There's an odd seam between the cylindrical pieces on the trunk that I need to figure out. 4. I want the trunk to be able to split into two large primary branches rather than go all the way up. 5. Still working on my method for placing the additional mesh planes with brush strokes along the spline meshes. CONCEPTSThinking a bit on how I can make some interesting and unexpected trees. Here are some surreal variations on trees- one ties in industrial elements like pipes, the other forms some sort of pseudo house structure. More paintings defining my spaces are in the works. WORK LOGSculpting for normal map stylization: 13 hours
Painting diffuse/roughness maps to develop painterly style: 5 hours Testing custom lighting in materials and post processes: 8 hours Sketching and painting concepts: 2 hours Blog: 30 minutes |