With the exciting release of Unreal Engine 4, I've spent the last two weeks making over what I've done with my crane game so far in UDK in Unreal Engine 4. In that time, I've surprisingly accomplished much more than I've gotten done all semester, and the project is starting to take form as a game!
Since this is such a short project, I've needed to allocate my time wisely towards the features that actually make the game a crane game. Until now, I've spent a lot of time on figuring out things in order and getting stuck on seemingly large problems that are actually menial in the large scheme. A strategy I've been trying to go with is hopping around a bit more and getting the less important things to a good enough level to call complete, leaving more time to focus on the highest priority features.
Although I enjoyed learning UnrealScript and programming, there was a lot of initial work to set up the coding environment and understand all of the functions, how to use them, which classes to extend, how to communicate between the classes, etcetera. The node-based visual programming system that the new engine offers, called Blueprints, is much easier to understand, get running, and test/debug (you are able to compile the graphs in engine). The architecture makes it easy to search for nodes contextually, create and access variables between classes, and reference objects that are created in engine. Essentially, it's an amped up Kismet that works with classes and not just the level's events. Overall, it makes a one semester game a bit more manageable.
I've had a lot of success working with Blueprints so far. I remade the bounding box function to dynamically take in a bounding box mesh, get the bounding box min and max coordinates for the X and Y axes, and set the limits of the player movement to not exceed these coordinates. This was much easier to do with Blueprints than it was with UnrealScript, because it was much easier to pass the coordinate variables between the classes.
I've implemented the idea I was trying to figure out with UnrealScript, which is to constrain the claw to the mover box using a physics gun/physics handle. The content examples provided with Unreal Engine 4 are an excellent resource, so my Blueprint is just a modified version of the physics gun that the character uses in the Physics content example. At the beginning of the level, I set a timer to immediately perform a function that traces for and grabs the claw.
Key bindings are much more easily modified and set in engine as well. Previously, bindings were set by altering the DefaultInput ini file. Now there are input nodes that let you connect them to what happens when they are triggered or released. I've bound the raising and dropping of the claw to the scroll wheel of the mouse.
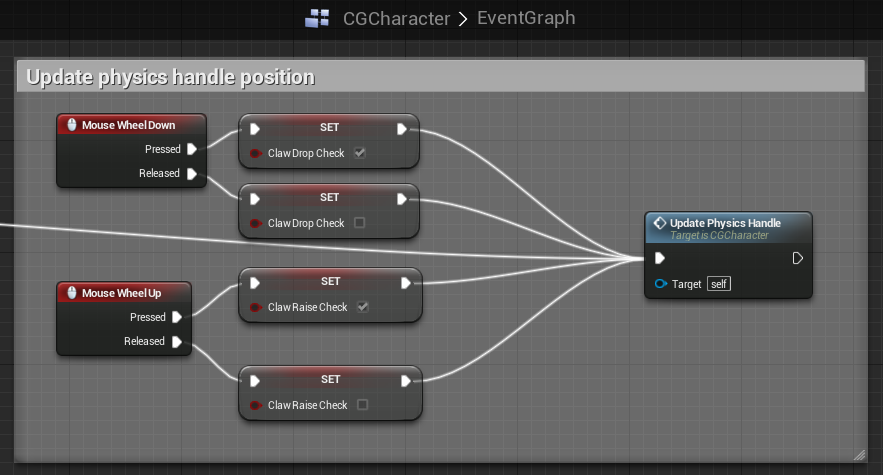
Update physics handle is a function that updates the location of the physics handle every tick, and also whenever the mouse wheel is scrolled up, down, or released.
The drop and raise are essentially just changing the Z coordinate of the physics handle's location, but keeping it in sync and updated every tick with the XY movement of the mover box. The location of the physics handle is calculated first every tick, and then the drop and raise functions are performed afterwards and overwrite the Z coordinate of the physics handle.
The camera is currently working almost completely to my liking - invert horizontal movement and look at rotation. Initially, I had tried to make the Camera component within the Character blueprint, but I realized that if I did this, the camera would always be attached at an offset distance to the player. So, I removed all Camera components from the character Blueprint and made the Camera in a Blueprint of its own and dragged it into the level. Then, I set the view target to the Camera component within my Camera Blueprint upon Event Begin Play.
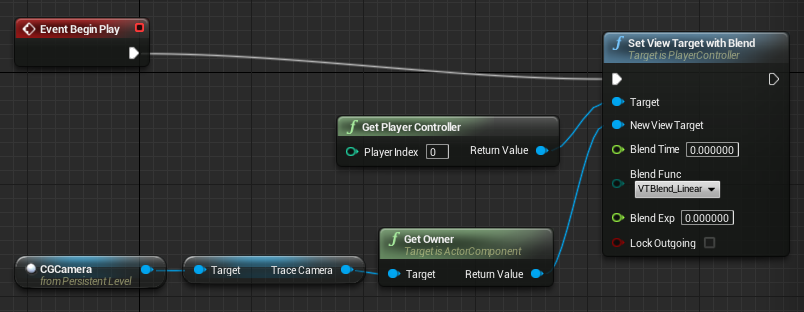
Setting the default camera to the Camera component in my CGCamera Blueprint.

Construction of the camera - the world location is set to the vector variable I created, so that the initial location can easily be adjusted and not hard coded.
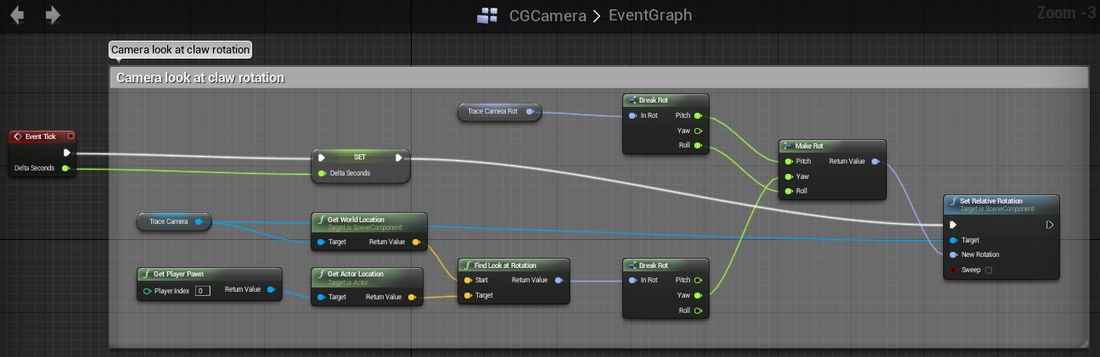
Updating the Camera's rotation every Tick to a combination of the Yaw from the look at player rotator and the Yaw and Roll from a predefined variable.
The camera look at rotation is updated every Tick. It takes the current location of the Camera and the current location of the player, and calculates the rotator needed to aim the start object at the end object (the Find Look at Rotation node.) I found this node by looking at Unreal Engine's Blueprint Content Example of a spotlight that follows the player. I then set the rotation of the camera to a rotator that combines the Yaw from the look at rotation with the initial rotation variable I set to have a defined, unchanging Pitch and Roll value. (The Pitch is always set to aim downward at a predefined angle that does not move, and Roll is always 0.)
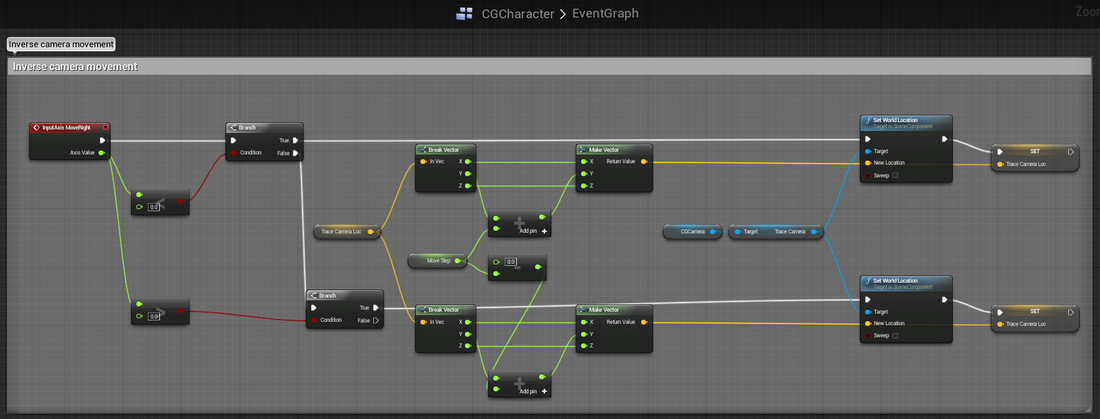
Inverse movement of the camera - adds a step amount to move right every time the player movement input is < 0 (left), and adds a negative step amount to move left every time the player movement input is > 0.
The inverse movement of the Camera is calculated in the Character Blueprint, because it was the only way I found to update the location when the player had an axis input (MoveRight, MoveForward.) Using these within a class references itself, and was checking for input to the Camera when it was in the Camera Blueprint instead of the player.
This graph checks upon MoveRight input if the player is moving right or left ( > 0 or < 0 ). If moving left (< 0), it adds a step predefined in a variable to the Y axis, making the camera go right. If moving right (> 0) it adds a negated version of the step to the Y axis, making the camera go left.
This graph checks upon MoveRight input if the player is moving right or left ( > 0 or < 0 ). If moving left (< 0), it adds a step predefined in a variable to the Y axis, making the camera go right. If moving right (> 0) it adds a negated version of the step to the Y axis, making the camera go left.
The string/cable between the mover box and the claw was made easier by UE4's new Cable Actor, which fills exactly the role I needed. The cable is merely a detail between the mover box and the claw, which are attached to each other using a physics handle. The Cable Actor allows an attachment to an object (the mover box) and an end location (updates with the movement of the claw). It also enables setting the width of the cable, the material, the length, and more parameters.
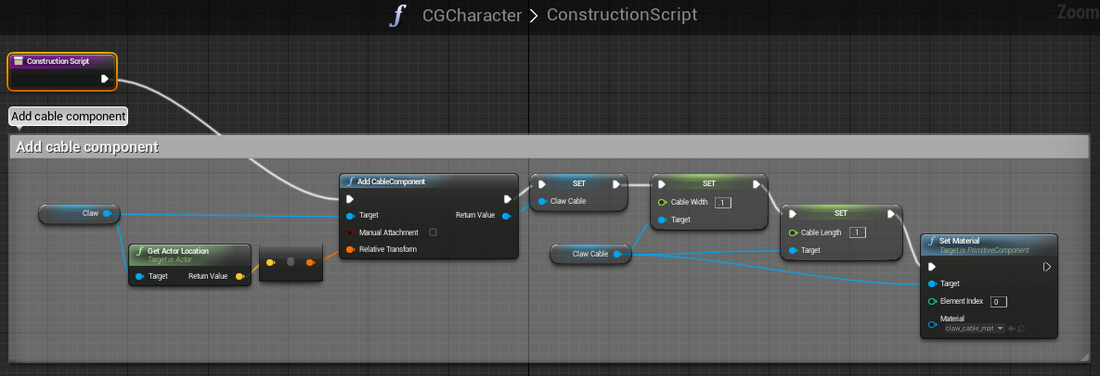
The Cable Component is added in the Construction Script for CGCharacter so that it is created once on the construction of the class, and various parameters are initialized here. I added the cable component to the claw, so that its end is attached consistently relative to the location of the claw. I couldn't get the cable width to be quite small enough for my needs, so I set the material to a custom material that pushes the normals in, making it appear thinner.
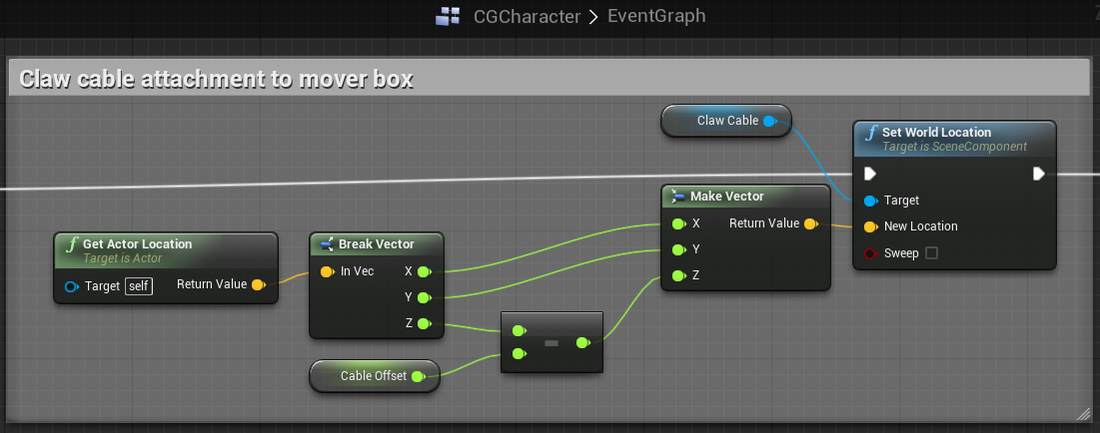
This is the graph showing the end location of the cable updating every Tick. It is consistently offset by the Cable Offset in my case, since the pivot of the mover box I am attaching it to is at the top of the mesh, and I need the cable end to be pinned at the bottom of the mesh.
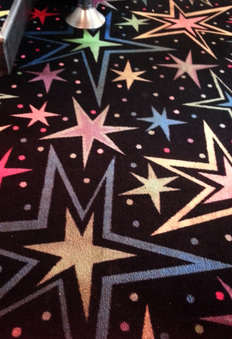
I created a carpet texture using SVGs in Substance Designer. I could have just as easily done this in Photoshop, but doing this all in Substance Designer allowed me to hook it up to a tile generator node, and tile my design randomly a few times, then overlay a finer noise for the carpet texture, all while still being able to easily modify the shapes, sizes, and colors I chose. My goal was to make an appropriately cheesy carpet pattern, reminiscent of arcades and bowling alleys. In a bit more time I might add some popcorn kernels and crumbs embedded into the carpet, as well as subtle hints of soda stains. For now, it sets the mood to my liking.

Arcade carpet texture diffuse.
| 
The cellphone reference photo I took and based my carpet design off of.
|
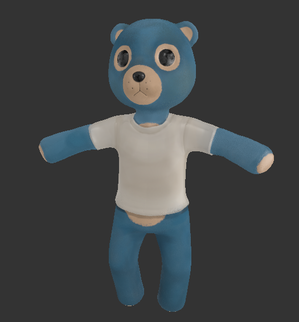
I've been working with Allegorithmic's newly released Substance Painter for texturing some assets. UE4 and other engines are beginning to move towards physically based shaders. The maps I primarily need to create for assets are color, specular, normal, height, and roughness. Substance Painter allows for painting and previewing these channels real-time on a 3D mesh.
So far, I've retopologized, UVed, baked normal maps for, and started to paint Mr. Snuggle Wuggle using Substance Painter. I am a bit behind on making prizes to populate the machine, but that's not a huge concern. One soft body prize will be good enough to use in testing my claw grab.
The initial high-poly, sculpted Snuggle. Some 600k polygons.
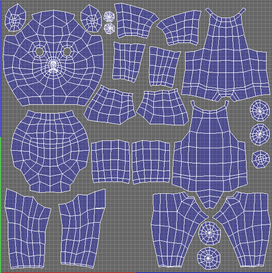
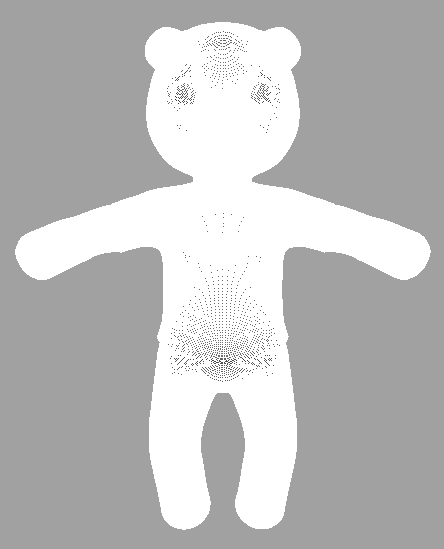
UV maps, unwrapped using 3D Coat.
| 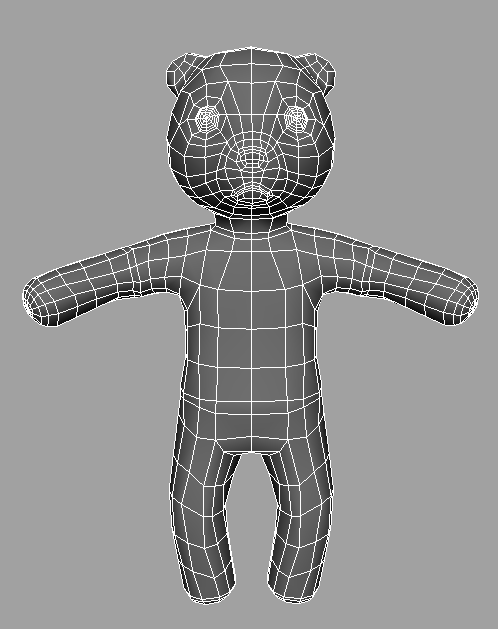
Low-poly Snuggle. Retopologized using 3D Coat.
|
| 
|
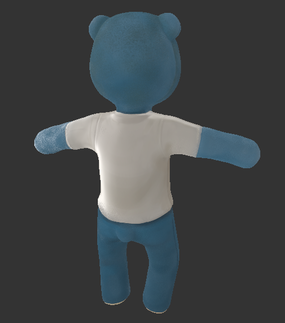
Still a lot more dirt and sadness to paint here, but just a preview of what I've been working on. I've been painting on the high poly version, since Substance Painter projects what you've painted to the lower poly mesh when you load it in.
I've designed a simpler claw to save myself the headache of getting too carried away with figuring out a properly functioning, realistic mechanism before I can figure out how to get it moving around and grabbing. A simplified claw style also works a bit better with the more fun aesthetic I want to get out of this project.
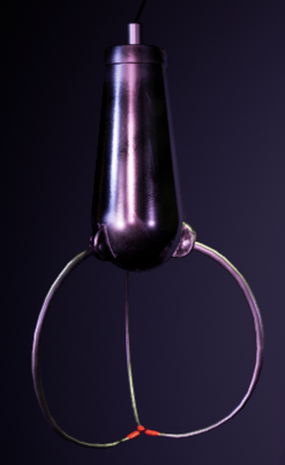
| The new claw design. After getting my test claw model and rig set up as a functioning Physics Asset in UE4, I decided to remodel it higher poly, with a revised scale for the new engine. This is my first time working with physically based shaders. The metal for the claw is basically a chrome - metallic, high specular, and low roughness. I painted the roughness map using Substance Painter to get smudges and little dings, scratches, and scuffs in the metal. They aren't highly noticeable from a distance because I didn't want it to be too prominent. Keeping the claw very reflective seems to give it a good 90's arcade feel. I also added in welding detail on the hinge extensions as a normal map -- a subtle detail, but all that matters is that I know it's there. |
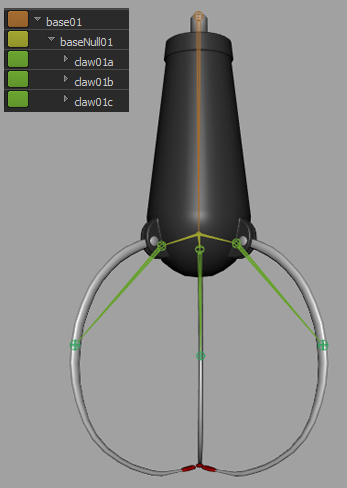
| I have very little experience rigging, but this is my simple claw rig. Basically there is a joint at the very top of the claw, a center "null" joint (not weighted to anything, just an intersection), which branches into the joints that control the rotation of the three claw fingers (a, b, c.) The base is all one mesh, and each of the claws are one mesh, but for rigging I Mesh > Combined them all into one. I soft bound the joints to the mesh, but since it's mechanical, I paint weighted each part 100% to its respective joint, and 0% to everything else. This ensures there's no weird, organic bending happening. In order to help me select the individual mechanical parts for paint weighting, I selected the UVs on the UV layout, converted the selection to vertices, and flooded the value of those vertices with the paint weight value I needed. |
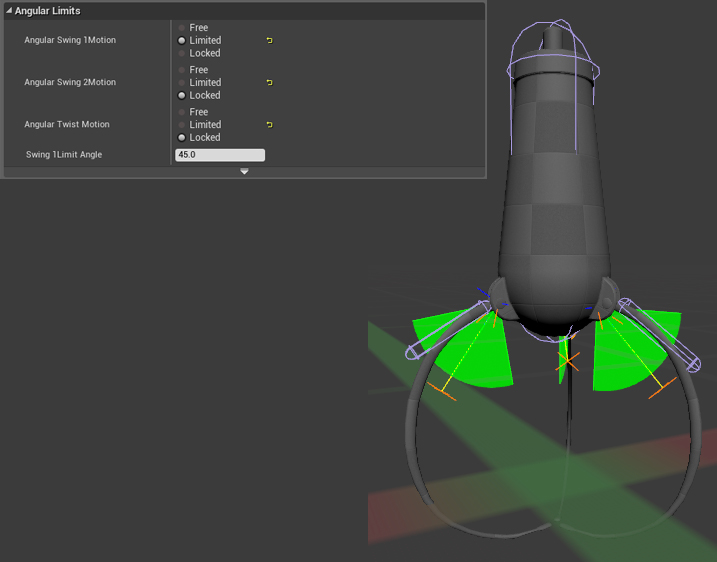
| I then exported this rig and its mesh as an FBX, and imported it to UE4 as a Skeletal Mesh. I created a Physics Asset of the Skeletal Mesh. The new PhAT editor in UE4 is much more intuitive to use, though it was nice to have the background of working with it in UDK. I set up the claw rig with bodies in UE4's PhAT Editor. I essentially needed each claw to be constrained like a hinge, swinging only on one axis. |
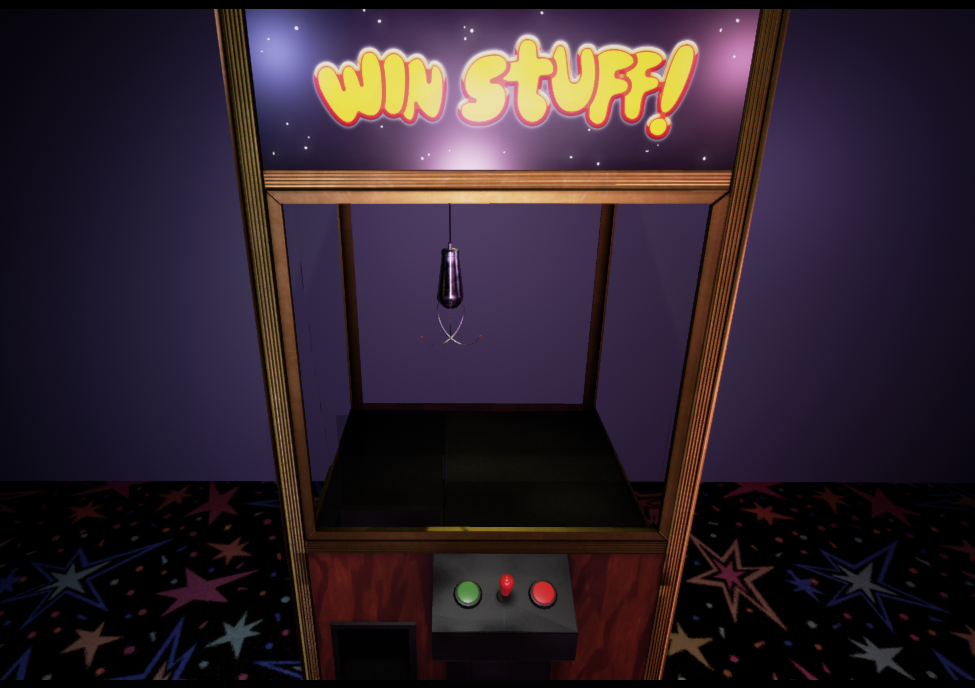
The overall look of the game has come a long way in the past week or two, and I'm pleased that it's starting to resemble my initial concept art. This is still a WIP and by no means final. There's lot more fixing and tweaking to do with the textures, shaders, and lighting. I'm still figuring out how to get the glass material set up to reflect the scene. I'd like for the glass material to have plenty of fingerprints and reflections of neon lights in the arcade. I also plan to have arcade machines to the left and right of it, with flickering light changes on the screens. At this point, I might keep the crane machine up against the wall, but I plan to come up with something visually interesting - either a fun wallpaper or posters, or both.
The approach I want to take for grabbing with the claws is to import animations for each of the claws that would move it in to its fullest extent, and combine that with a physics blend, so that the claw animation is stopped by physics forces when colliding with another object. This is the next hurdle I'll be focusing on in the coming weeks, which is why you see the claws not yet properly functioning in the picture.
Video to come shortly!
Video to come shortly!
