After putting together a visual showcase for last week, I've decided to switch gears for a bit to focus on the interactive component of this project, which is my intended end product. All of the dream events featured in the cinematic are distance based, and so they happen automatically as the player moves forward. This is works well for a movie, but for a game, it is a bit linear and passive. I've been revisiting the work I did several months back to create a volumetric painting system using Unreal Engine 4's Canvas Render Target 2D. Additionally, I've started to design a very simple character and its movement controls.
CHARACTER + 3D CURSOR
My initial idea was that the character would be a flying character set up in third-person. The camera would aim to look at a 3D cursor that is at the projected 3D location of your current mouse position. To control the character, you would use W A S and D. When the character would move forward, it would move forward in the direction of the camera's aim, towards the 3D cursor.
After testing this out, it felt pretty hard to control. I've always found flying controls in games to be the trickiest to get the hang of -- and they are definitely difficult to make intuitive as well. Additionally, I couldn't work out a camera arrangement that prevented the character from blocking a good chunk of the environment.
I decided instead to make the character act as a 3D cursor, which feels much more effective already. This also is much clearer and easier to control the painting mechanism, where the 3D cursor/character acts as the paintbrush. Now, the orb character flies to the projected location of your mouse in the world, while the player camera remains stable. The player camera is still controllable with WASD and will rotate to look at the cursor, but it is grounded.
SETUP
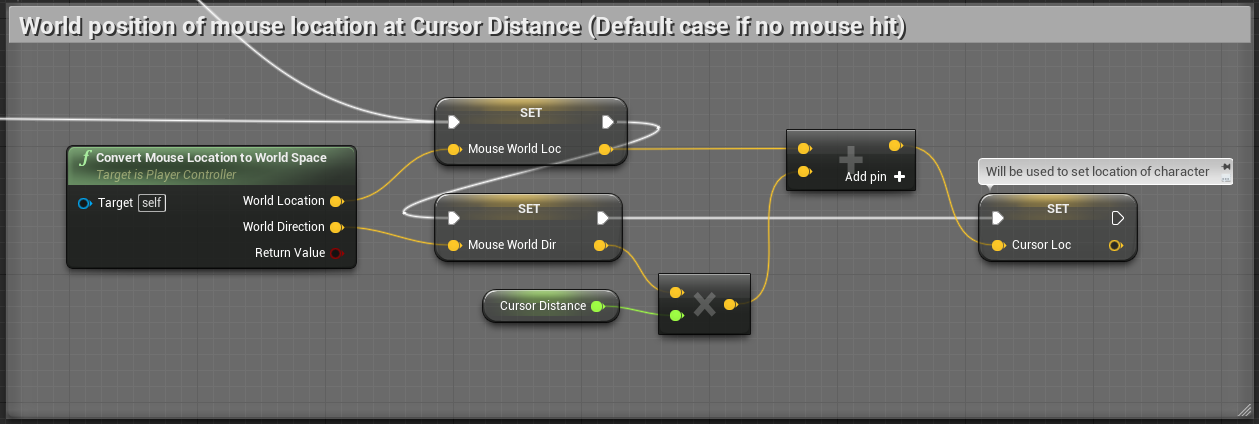 | The 3D cursor is set up mostly in the Player Controller class. To enable the mouse events, I've checked the Mouse Interface features in the Player Controller settings. The base feature of the 3D cursor is that the mouse's 2D location needs to be projected into 3D space. I've used a node called Convert Mouse Location to World Space. This node alone doesn't put the location in the correct spot though. You can multiply the Direction vector from this node by a user-specified distance, and then add that to the Mouse Location. This essentially puts your cursor at the specified distance from the initial mouse location by moving it out along the direction vector. (See below.) |
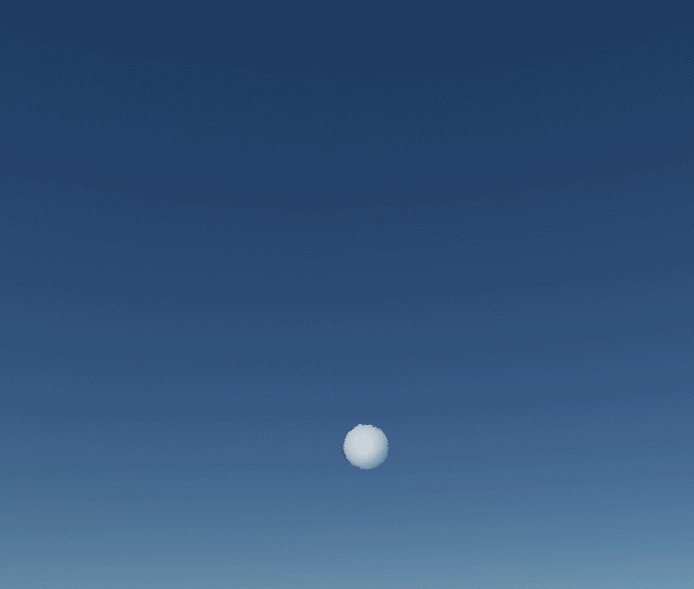
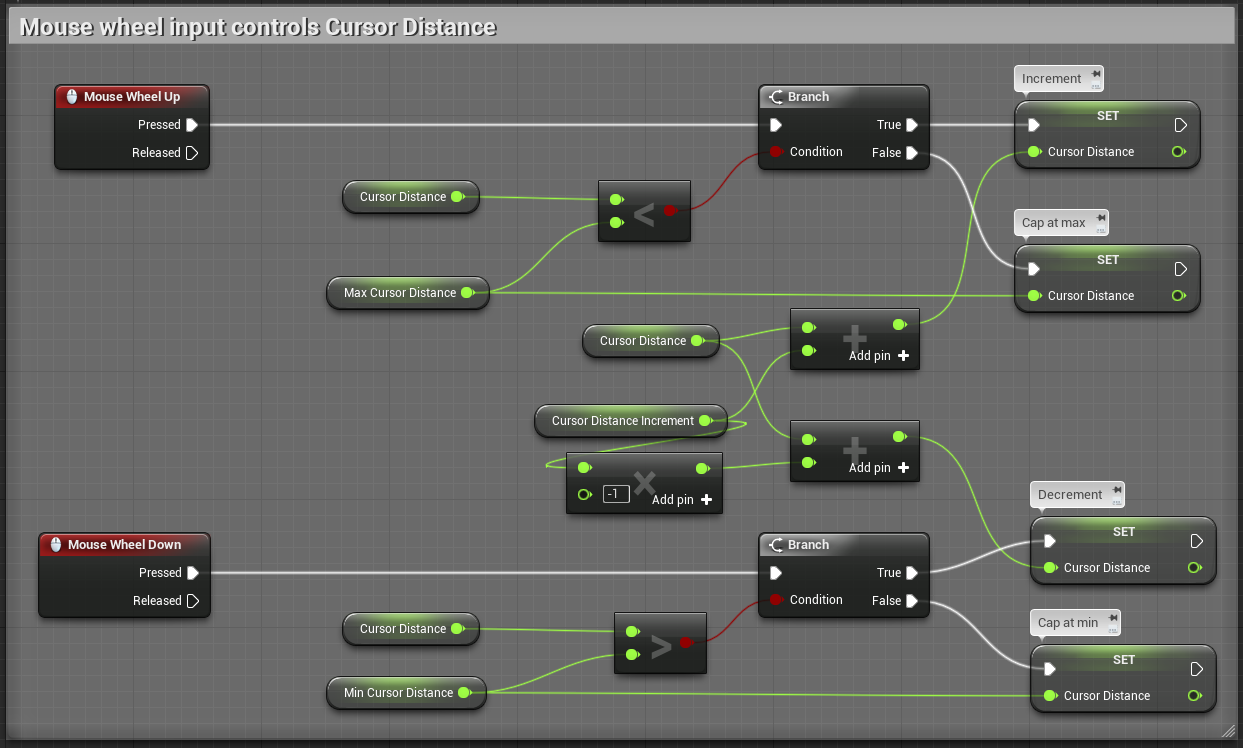 | For testing purposes, I had attached a sphere to the cursor location to be able to easily visualize where it was in 3D space. As an additional control, I mapped the Mouse Wheel input to be able to increment and decrement the Cursor Distance variable, within a certain range so it is capped at a min and max distance. |
Upon testing this, especially with the painting mechanism I am implementing (since the 3D cursor serves as the brush for painting), I realized it would help a lot to be able to have the cursor "stick" to nearby surfaces, essentially detecting anything in its path within a certain radius. Without this function, you would really have to guess where invisible, paintable objects are by just clicking around aimlessly in world space.
On every tick, I've made this the first thing that the Player Controller class checks. This makes it so, if there is an object hit under the mouse, it takes precedence over the default free-floating cursor. The node Get Hit Result Under Cursor by Channel checks for and returns any object hits under the mouse cursor.
On every tick, I've made this the first thing that the Player Controller class checks. This makes it so, if there is an object hit under the mouse, it takes precedence over the default free-floating cursor. The node Get Hit Result Under Cursor by Channel checks for and returns any object hits under the mouse cursor.

The most basic way to implement this is to then simply set the 3D cursor location to that exact resulting hit location. However, getting a hit under the mouse doesn't account for how far that hit away is from the 3D cursor location in world space. This makes it difficult to break your 3D cursor away from objects that your cursor may unintentionally be on top that are far away, due to perspective. My solution is to get the world location of the character and find its distance to the hit location. If the distance is greater than the user-specified threshold, then the cursor location defaults to the free-floating 3D cursor.
Additional things I'd like to implement here are some more visual indicators - perhaps when your cursor sticks to an object that is invisible, I could add a decal to the surface of that object.
There isn't much more that goes on in the Character class, but it does need to be set to the cursor location. You can grab the Cursor Location variable from the Player Controller class by getting the Player Controller and casting it to your specific Player Controller class.

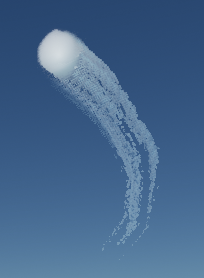
I've used a VInterp To node to interpolate from the current location of the character to the current cursor location. This makes for much smoother movement, and adds the effect of the cursor following/lagging behind where you are mousing to. My character also has ribbon particles trailing behind it, so this allows the particles to trail for a bit longer.
DESIGN
Here is a very rough first pass of my idea for a look for the character that I have been testing with. I imagined it as a light orb because I feel like this is reminiscent of neurons, synapses, and electrical brain activity. I also wanted its look to allude to the dominant painting theme that defines both the visual style and interactive function in this dreamscape world.

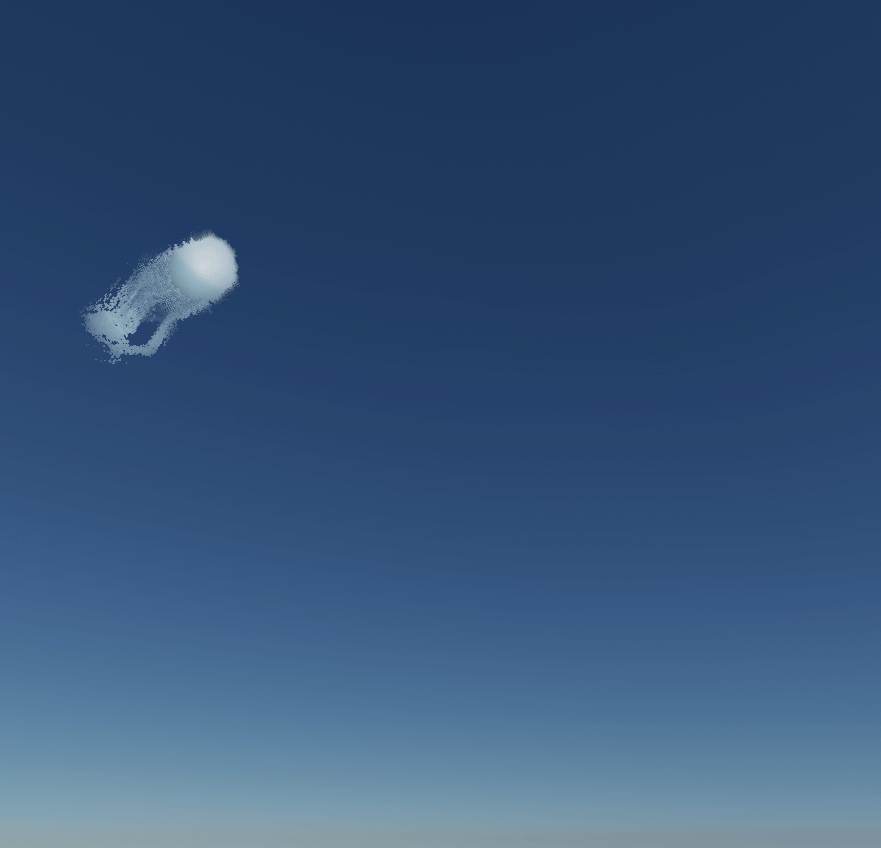 | The Character Blueprint contains a Particle System that moves along with the location of the character meshes. This Particle System uses the Ribbon Type Data to emit as a ribbon trail. It is emitted from the sphere character mesh by using the Bone/Socket Location module in Cascade to hook it up to the joint of the character skeletal mesh. This example of the character moving on the left shows a (slightly choppy due to the screenshot capturing process) example of how the particles follow behind. |
| Ribbon particles apply materials such that the leftmost part of the texture is towards the start of the ribbon trail and the rightmost side of the texture is towards the end of the trail. So, I've used a painted brush stroke texture as the opacity map, but I've blended it with a linear gradient that becomes more black towards the right side of the opacity mask. This makes it so the particle trail dwindles towards the end of the trail. (See right.) |  |
VOLUMETRIC PAINT SYSTEM
My project idea started with the idea of painting in world space to reveal different worlds/objects. This is a concept I want to carry through to my final product. Early on in my progress, I had done some testing with Unreal Engine 4's Canvas Render Target 2D Blueprints.
 | This is my progress so far in implementing this feature. As of now, it is working pretty well to my liking, though there is a lot of potential to explore here, as this is just a test with a simple sphere. |
Here are some features I've added this week:
In a few releases of Unreal, the Canvas Render Target 2D was causing crashes, but this has thankfully now been resolved, which allowed me to continue working with them.
- Left mouse button applies paint.
- When applied, paint stays permanent.
- Objects can have paint only partially applied/be revealed in parts.
- Paint can be cleared completely (mostly for testing purposes at the moment.)
- Brush size is adjustable.
In a few releases of Unreal, the Canvas Render Target 2D was causing crashes, but this has thankfully now been resolved, which allowed me to continue working with them.
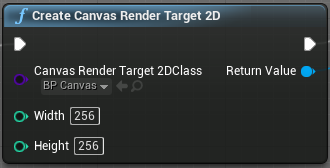 | I also realized that the Create Canvas Render Target 2D node cannot be created within a Construction Script. Doing so resulted in an error that prevented me from saving the map, due to graphs being linked to objects in an external map. Instead, create it on Event Begin Play and the problem is solved. |
