This week I've made a lot of progress on the systems that are going to be key in achieving my goals and making my dreamscapes.
TREES
This week I stared developing a construction script for my customized, procedural trees that are going to be based around spline components. At it's base level, I'm generating this tree in segments of meshes that follow along a spline. I'm also procedurally generating additional meshes/planes on top of the base structure of the tree that have a hand-painted brush stroke texture for an opacity mask. These trees are a really great first test subject for working with principles of procedural construction and achieving a customized look.
To start, I've just been working with the trunk and haven't created the algorithm for the placement of additional branches along the trunk. Here's a look into the functionality so far.
To start, I've just been working with the trunk and haven't created the algorithm for the placement of additional branches along the trunk. Here's a look into the functionality so far.
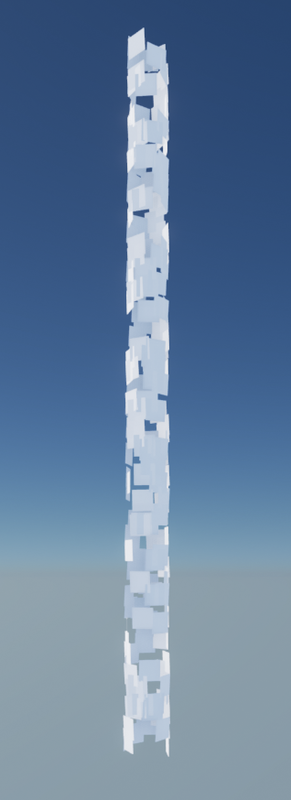
GENERATING SEGMENTS ALONG SPLINE
 ROTATING SEGMENTS TO FOLLOW SPLINE SCALING SEGMENTS | Nothing too fancy here. Basically, it calculates the bounds of an input mesh and places the next mesh at the distance along the spline that the previous one ends. It uses a while loop to continue doing this as long as the current distance along the spline is less than the total length of the spline. With this, I've used a tube as my input mesh. This is also pretty simple. Just rotating the mesh to the current rotation at the distance along the spline. The effect opens a lot of possibilities though. |
 | Something I'll need for a tree is to be able to scale down the meshes as the spline continues. So, the user defines a scale range, and a max scale. The base starts at the max scale and calculates each time a segments is placed how much of the scale range to subtract from the current scale based on the percentage of the current distance along the spline out of the total spline length. The problem with this, initially, is that it leaves increasingly large gaps between the placement of the meshes as they continue scaling down further along the spline. This is because the placement is determined by the initial bounds of the mesh. This can be fixed by multiplying the Z distance of the bounds by the current scale multiplier. |
GENERATING PLANES RANDOMLY ALONG THE CIRCUMFERENCE
 | 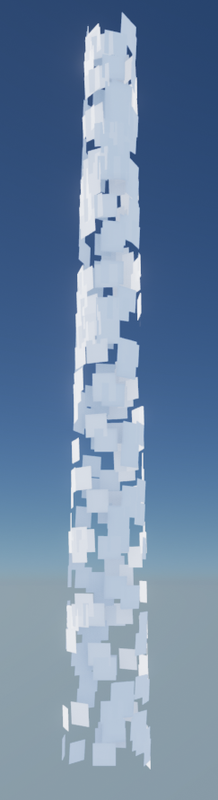 | Something I want specifically for my trees is a really custom painted look. I'm looking to break up the silhouette of the mesh. I can do this by adding extra meshes that have brush stroke opacity masks on them. So, something I need to do is be able to randomly generate planes along the circumference of a cylinder that follows the spline. I've added a user defined parameter for how many of these planes are to be generate per segment (the density of the planes.) I used the mathematical formula to find a random point around the circumference, with the radius being determined by the current scale of the cylinder segment. |
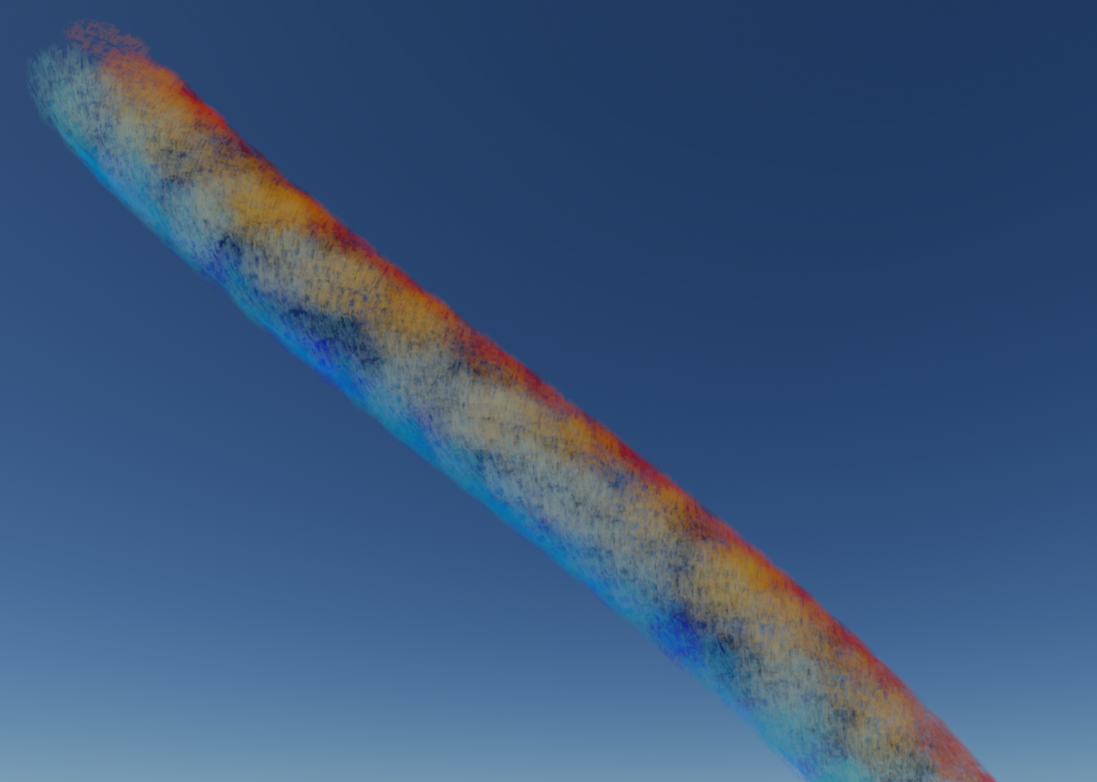
ROTATING PLANES TO FOLLOW SPLINE
 | You'd think this would be easy, but this has been the most difficult step yet. I've run into quite a few hurdles that stumped me for a while, and it's getting pretty close to how it should be. But properly offsetting the location of these planes from the center hasn't been an easy task. I'm still working out the kinks of this (you can see where things get a bit tangly after the spline curves.) I have another method I'm trying underway, so updates on this soon. |
APPLYING MATERIALS
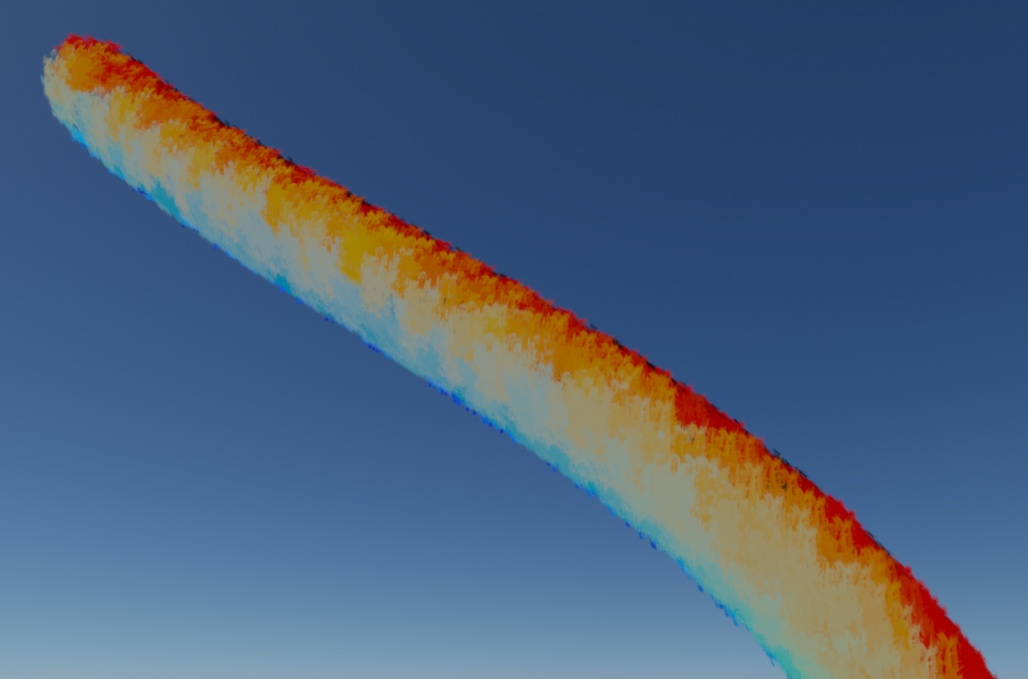
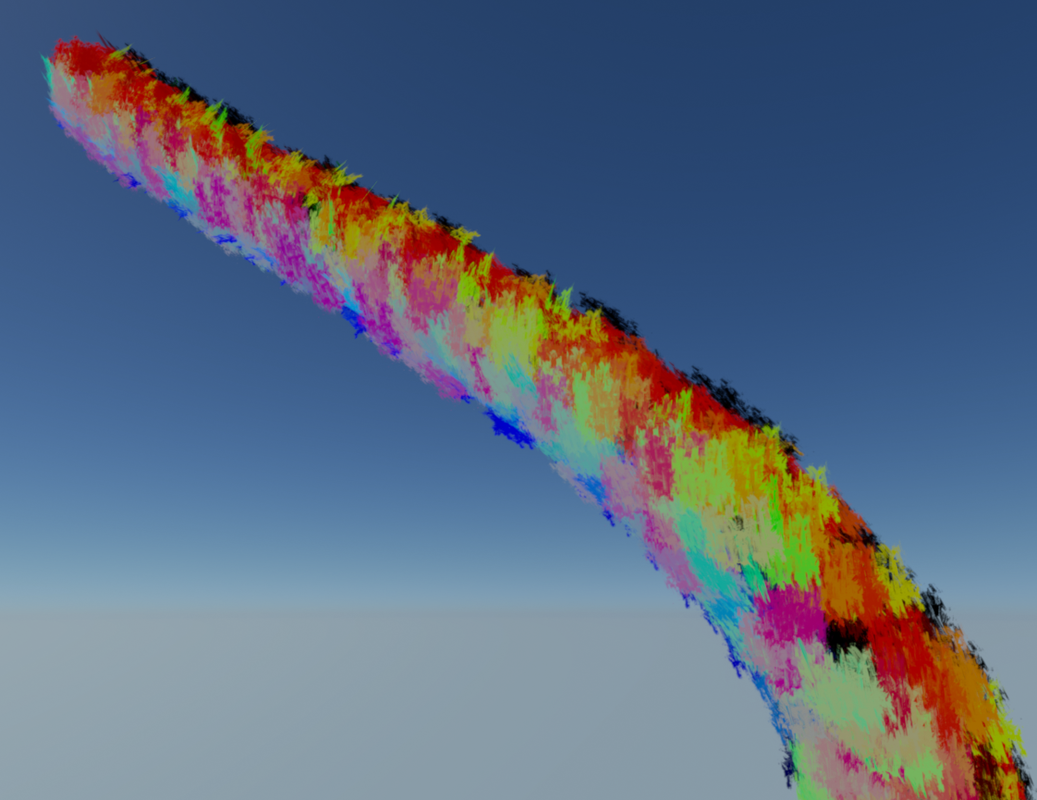
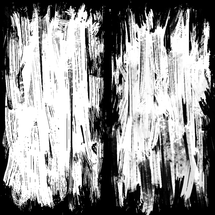 | Here are some examples of some effects I might be able to achieve when materials are applied to these planes. As of now, I've painted two different black and white masks with brush stroke patterns. For variation, it determines which mask to use by using the sine of the Z world position as the alpha for a lerp between the two textures. The color right now is just the vertex normal of the mesh, for the sake of demonstration and differentiating the color of the planes. |
These are pretty early tests and I haven't done too much with them yet. The next steps here are to work on finding a method that balances a brush stroke abstraction with the proper amount of lighting, color, and depth information. A simple color with the brush stroke opacity mask is too abstract for the style I'm going for, so to achieve more material definition there will of course need to be diffuse, normal, and roughness information. I'm also thinking of developing a custom lighting method within the materials -- using a custom light vector from a Blueprint to control the effect of lighting in the material. I spent a bit of time breaking down some of the methods used in Epic's Stylized Demo. Even though the style of this demo is more like a toony illustration than an impressionist look, it works with some of the same concepts I'm trying to execute here and is a good reference for what's been done in this area.
WORLD CANVAS
The world canvas fake volume painting system is working! Here are a few pictures demonstrating what it does so far. Hopefully soon I will be documenting a more broken down explanation showing the Blueprints and materials for this.
WRITING TO THE CANVAS TEXTURES DYNAMICALLY
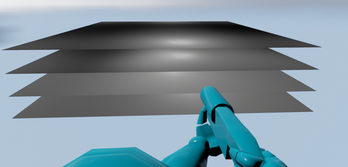 UPDATING THE CANVAS TEXTURES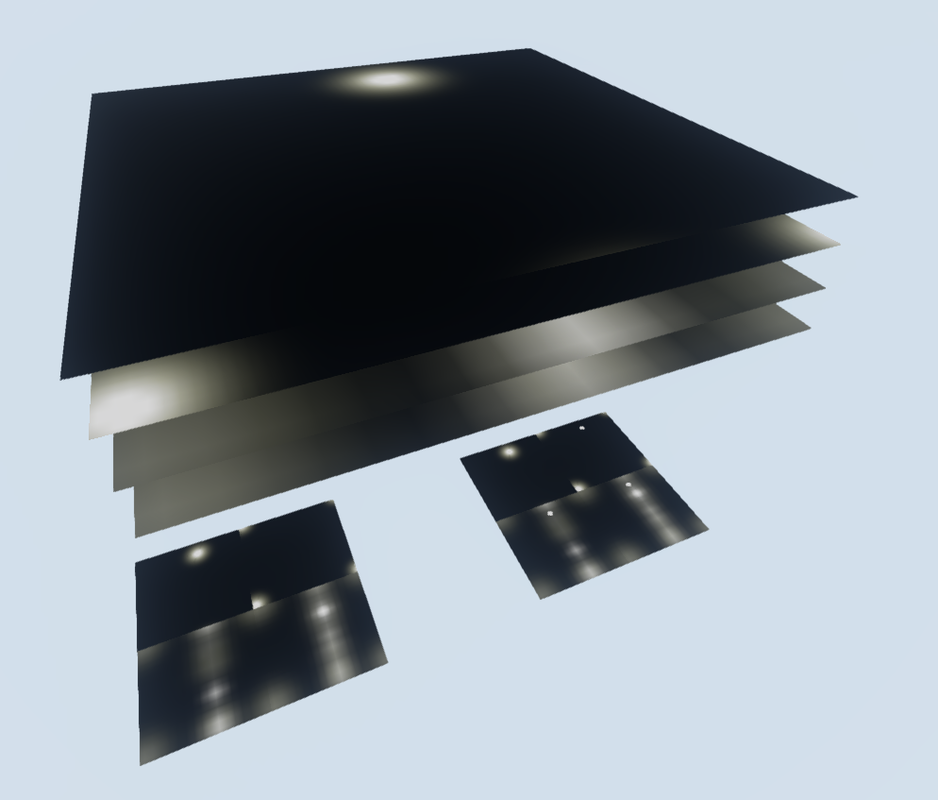 INTERPOLATING BETWEEN THE CROSS SECTIONS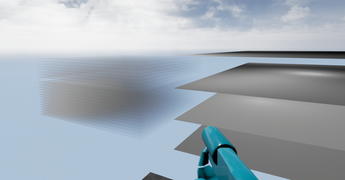 | You can "paint" white on black textures. There are 4 different planes with these dynamic canvas textures at different heights. The height of a traced hit from the player's weapon socket is matched to the closest plane on the Z axis. Then, the hit in X and Y are translated from world space relative to the world canvas Blueprint, to texture space. In order to be able to draw to this and keep the last area you painted, rather than just having a white circle stamp follow your reticle around the texture and dump the last stroke, it keeps where you have drawn the last stamp. These planes are arranged in two 2x2 grids of planes and Scene Capture 2D cameras capture these compiled planes orthographically to two render target textures. The materials applied to each of these grids reference each other's render target textures, passing them back and forth (essentially recursively.) The only difference between the two materials is that one of the materials adds both the current frame to the last frame, whereas the other only references the last frame. With the two cameras alternating updating every other frame, this is what makes it possible to keep the previous frame and add the next one. The textures for each cross section plane are laid out in a 2 x 2 square and captured to a render target texture using a Scene Capture 2D camera. Finally, this compiled texture is fed into a shader that interpolates the value in between these planes (using a flipbook texture that shifts the UVs to the corresponding texture for its depth.) This can be used as a mask within any material. In my case, every material should incorporate this to be able to be painted. I visualized the fake paintable volume with a series of stacked cross sectional planes. |
NEXT STEPS
Now imagine this smooth opacity mask could be broken up and made into a more interesting visual transition if it were multiplied with a brush stroke pattern - maybe even an animating one to make the border even more undulating and ambiguous. Additionally, instead of having these planes represent the entire world space, I'd like to set it up to move based on the current player location -- if you reach the bounds of that area's canvas, the planes will move and your location will be the new center of these bounds. In this way, I can get a better texture resolution per area while keeping it less resource intensive.
CONCEPTS
 | Another quick concept I did this week. Trying to develop the idea of this ambiguous cave/rock formation structure in a dark, sandy, beach like setting. These rocks could work on a similar system to my trees. |
| Here's another concept of how I might incorporate some man-made structures into a dreamy landscape. I found this picture I had taken a while back of an interesting house with a door on the second floor and a bridge running from it into a hillside. I thought this was such an interesting and peculiar visual, and it reminded me of a scene in a dream I once had. I'd love to break up this structure into parts and have those scattered across the landscape as well. | 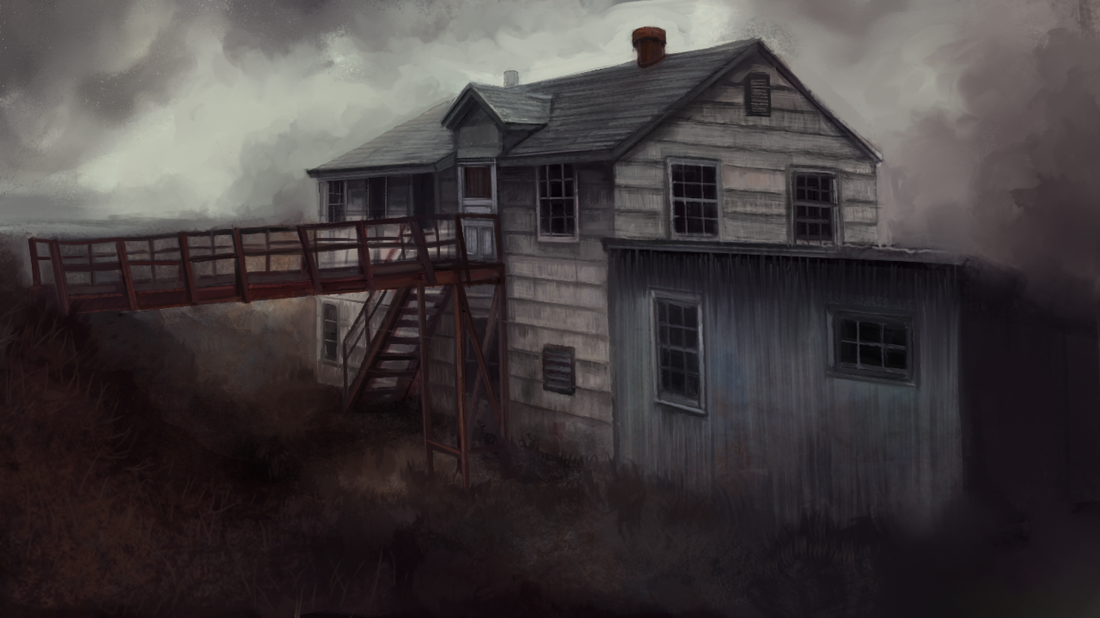 |
SOME MORE INSPIRATION
It was recommended to me to check out this surreal game LSD: Dream Emulator, where the game is based on the creator's dream journal. Although it was made in 1998, there are quite a few things to be said about this game and what it was able to achieve with such ancient 3D graphics. It's surprisingly dynamic for its time - the way you navigate through these dream environments is not set in stone and changes based on what path you take. I'm not sure how in depth and variable the gameplay is, but it certainly feels pretty organic. The soundtrack is also dictated by numerous sets of patterns played in variable tones. For a game of its time, it ventures into some pretty new territory.
My project will probably be quite a bit less psychedelic and disturbing, since I'm going more for meditative and awe-inspiring. However, both this game and my project are in a format centered around environmental exploration. The main mechanism in this game is that the player is linked or transported to different environments by bumping into objects. My idea is similar, but takes this to the next level by showing this environment transform into another one around you. I also find it interesting how some environments seem recurring but not the same - they share the essence of that environment, but are slightly different. This is something I'm also looking to achieve.
Anyway, it's maybe one of the weirdest things I've seen, but also pretty awesome. I think you'll just have to scrub through this yourself:
WORK LOG
Tree system: 16
World canvas system: 5
Material tests: 2
Research: 1
Painting: 2
Blogging/work breakdown and blog response: 3
Some additional hours picking apart LSD Dream Emulator.
World canvas system: 5
Material tests: 2
Research: 1
Painting: 2
Blogging/work breakdown and blog response: 3
Some additional hours picking apart LSD Dream Emulator.
