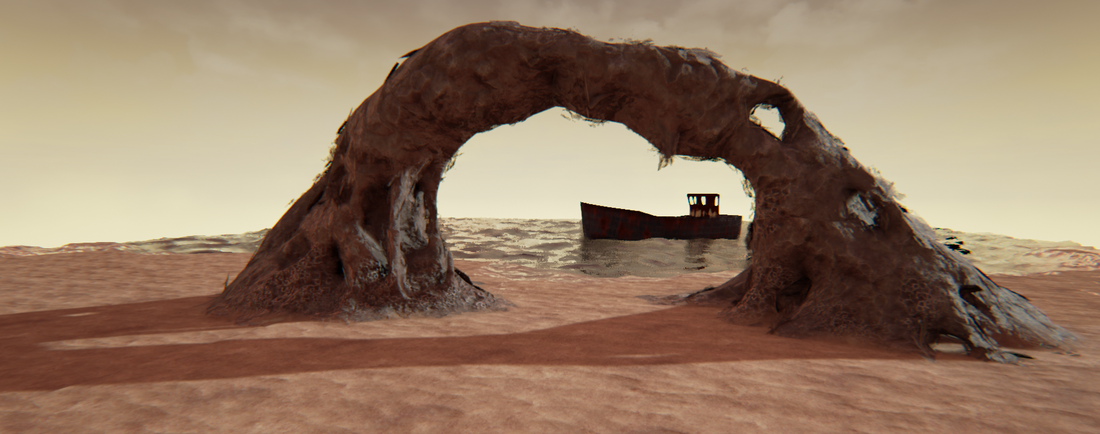

I've been working on putting together a test map to see some of my pieces coming together. It helps to get a sense of the space, mood, and color I've been imagining.
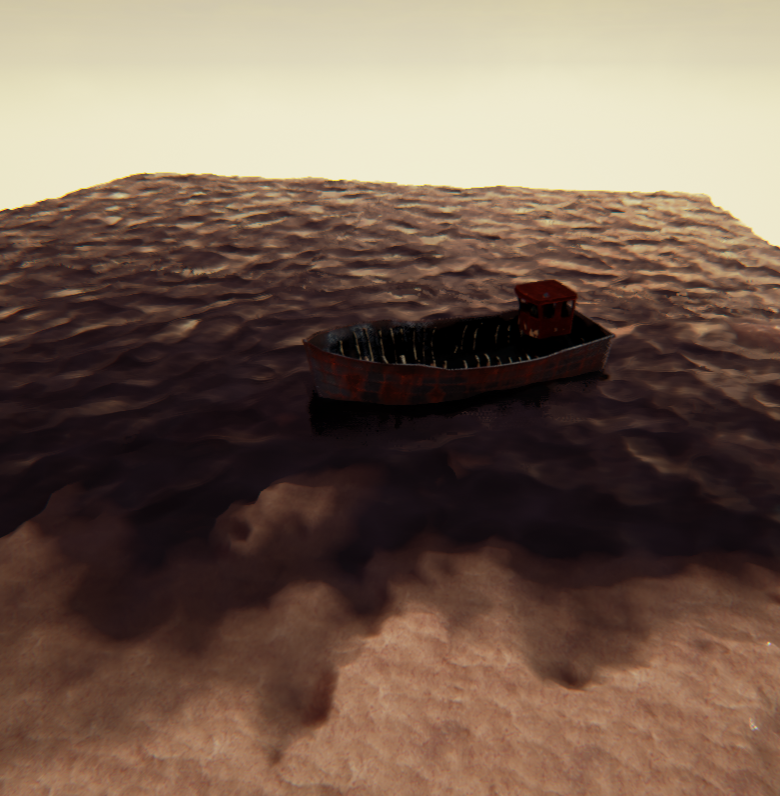
I'm starting to get a believable look to the water, though I haven't yet worked out how to incorporate the painted look. I feel like there is a lot of opportunity for some nice foam paint particles off of the peaks of waves.
To control the movement of the wave, I implemented the Gertsner wave into my material. Here is some interesting information on the Gertsner wave.This tutorial did an even more wonderful job breaking down the math formula for the Gertsner wave and its translation into the Unreal material editor. I was a bit unsatisfied with the resulting mathematically calculated normal map, so I added my own custom normal, panning across the waves as they are displaced.
For this sequence, these waves will start building as you come closer to the boat and the shoreline. The sand will ripple forward as it swallows up the increasingly chaotic sea. Meanwhile, rust is growing all over the surface of the boat as it deteriorates away to its skeleton left in the sand. I've also hooked up the boat bobbing up and down at a controllable height and speed. Although both viable solutions, this is done through controlling the World Position Offset of the boat materials, rather than by a translation of the mesh within a Blueprint.
Materializing objects using the visual particle paint style as a functional mechanism
I had a thought that the particle paint that makes up the visual style of objects could also serve as a functional component to materialize objects in front of you. Imagine as you walk forward there are loose, brush stroke particles floating in the air, gathered vaguely in the form of an object's silhouette. As you come closer, these particles could suck in to the final shape of the object and the full mesh could dither/fade into existence.
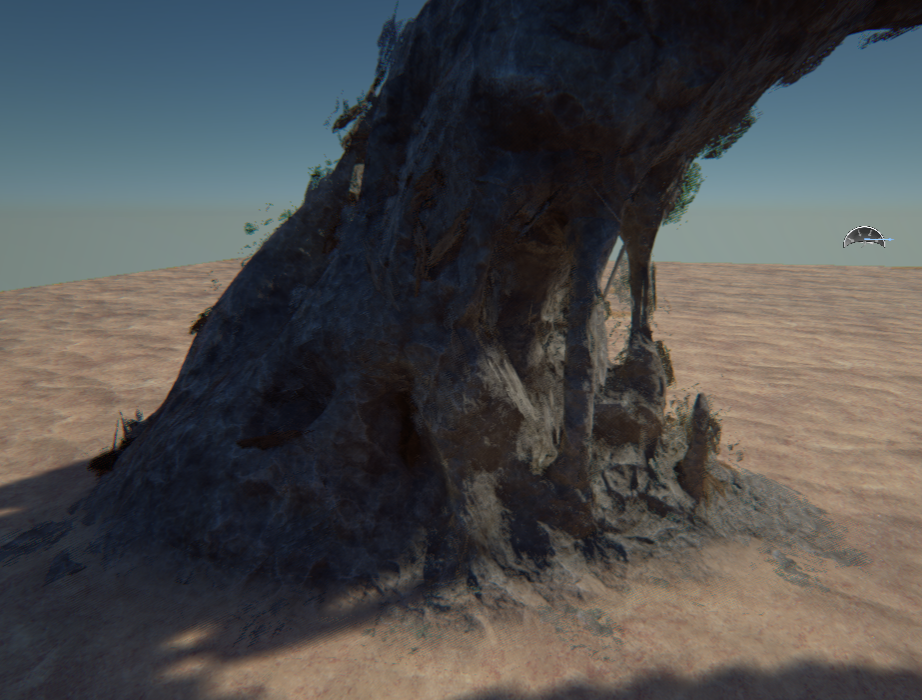
Since the mesh particles are emitted on the surface of the base mesh, they follow the surface normal of that mesh. So, when the particles have velocity, they can move along that surface normal, inward or outwards. Here's a quick test I did to suck the particles inward towards the shape of the rock arch.
I've been debating the amount to which I want the player to be able to control their surroundings. If I make this a bit more active in gameplay, rather than just having things happen as you move around, it could make for a really interesting interactive experience. I have been thinking along the lines of an environment shifting and transforming around you as you explore in a dream-like way, but it might be interesting to experiment with the idea of your control in a dream, especially when you become conscious you are dreaming.
Seamless blending
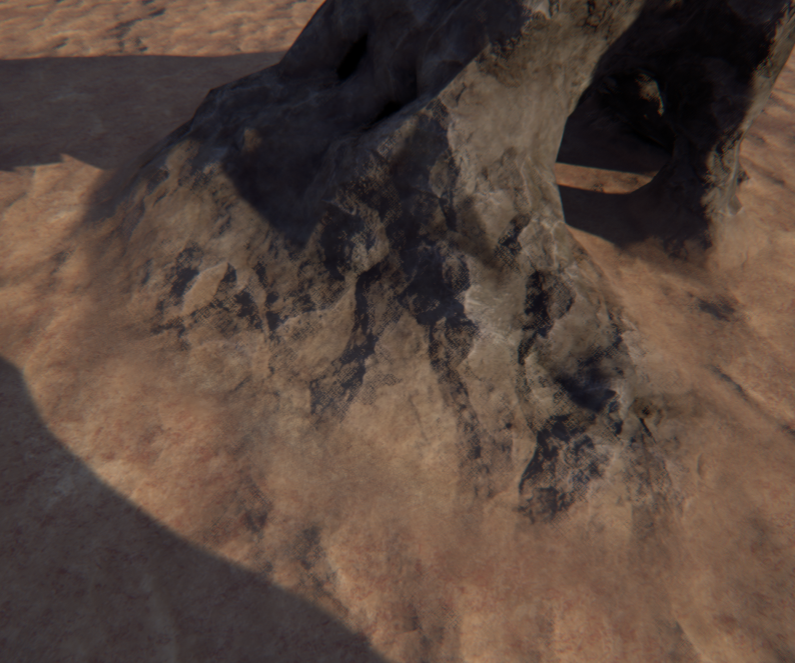

I've successfully made a seamless blend between the rock arch and the sandy ground. To do this, I UV mapped the bottom three rows of faces on the rock arch to UV set 2. The UVs for these three rows stretch to fit the 0-1 space. I use a linear gradient applied to UV set 2 that masks the material blend between the sand and the rock material. I use the gradient also to dither out the opacity of the rock arch mesh at the very bottom where it meets the sand. This completely gets rid of any hard line between the two separate meshes. To stylize this transition, I could go further and break up the linear gradient mask with a rougher, brush stroke texture.
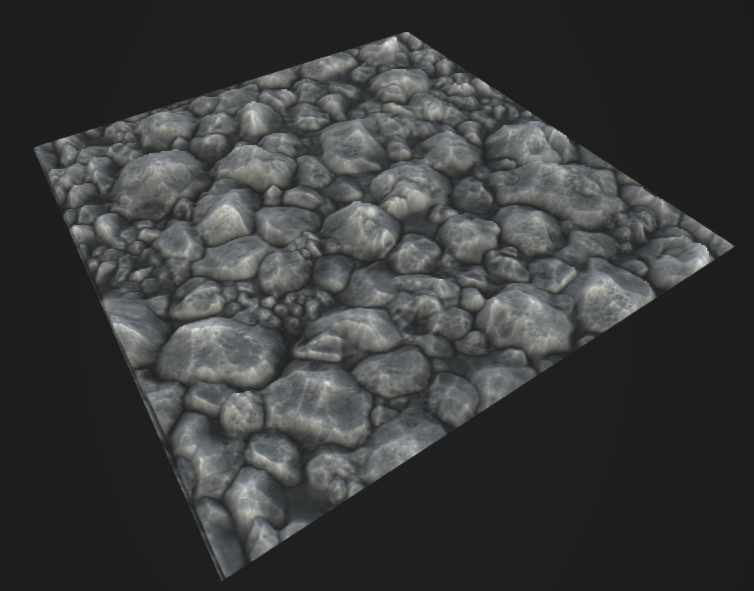
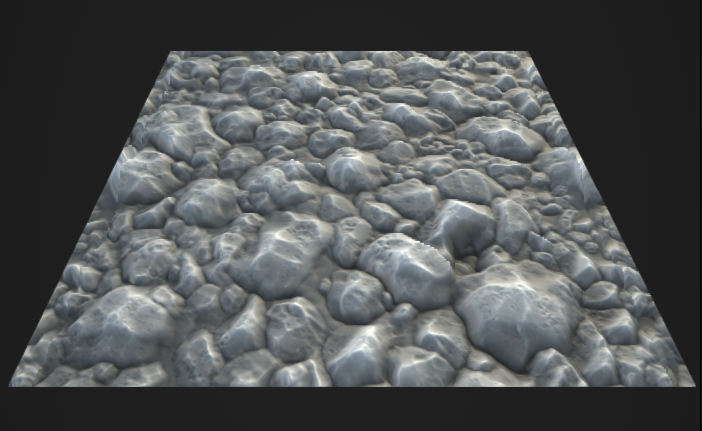
Rocks in the sand
I wanted to create tiling materials for larger rocks and pebbles to vertex paint on the sandy landscape to add a bit of texture to the endless sandscape. These rocks would be blended with the base sand using their height maps. Seeing some shores with rockier areas got me thinking that this landscape would look more visually interesting and tie the big rock arches into the ground with some rocks peeking out of the sand.
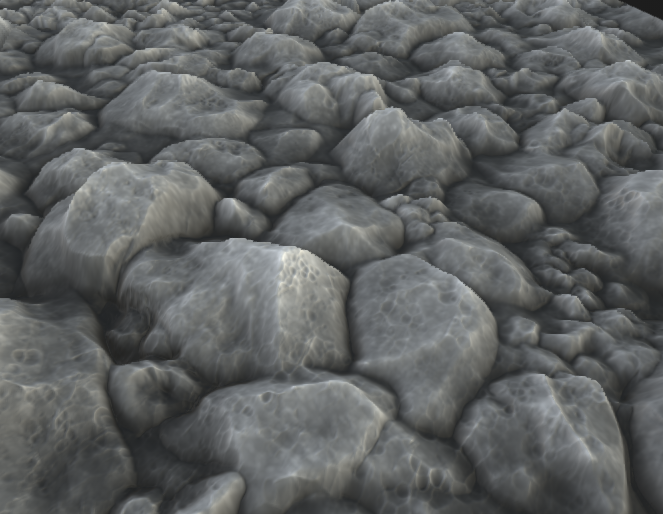

Using Substance Designer to create procedural alphas for sculpting in ZBrush
These are possibly some of the most successful normal/height maps I've created. After attempting to sculpt many a tiling texture tirelessly, I've finally figured out strategies for making the process a little less painstaking but still customized rather than automated.
When sculpting in Zbrush, using different alphas on your brushes is very helpful for achieving forms quickly. I've personally never enjoyed using default alphas. Painting custom alphas in Photoshop can prove to be a difficult task. Even though you may think you're painting smooth gradients of grayscale, it's a bit hard to control the values that signify different heights, so it can get a bit messy and it's not very versatile to modify. Grabbing height maps from photos can sometimes work, but my problem with this method is that, since photos have lighting information baked in, they can't ever really provide the true relief of an object. Additionally, photos almost come with too much busy information and too many artifacts, and they only really work for a photo real style. Grabbing alphas from something you've sculpted in Zbrush is an awesome tool, but I have had trouble working this way because I can get overly carried away in specific detail while an alpha is supposed to serve as a generalized, reusable brush. Having overly distinguishable features might nullify the reusability of that alpha.
Substance Designer, which I use frequently for creating tiling texture maps, is a great tool for the job of making alphas for Zbrush. Here are a few of the alphas I created to sculpt these rocks.

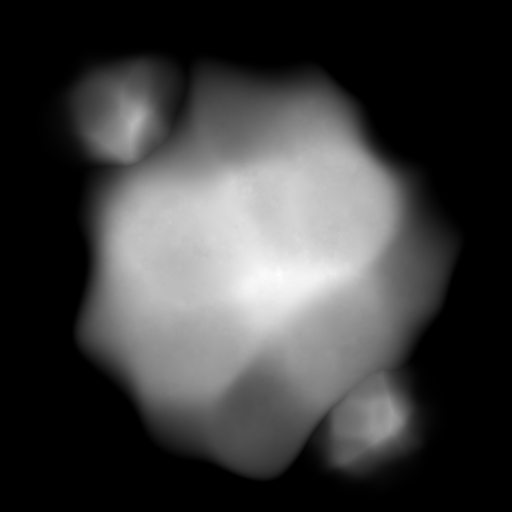

I particularly enjoy this method because it's a great blend of hand-crafted and procedural, which is something I strive for in my technique.
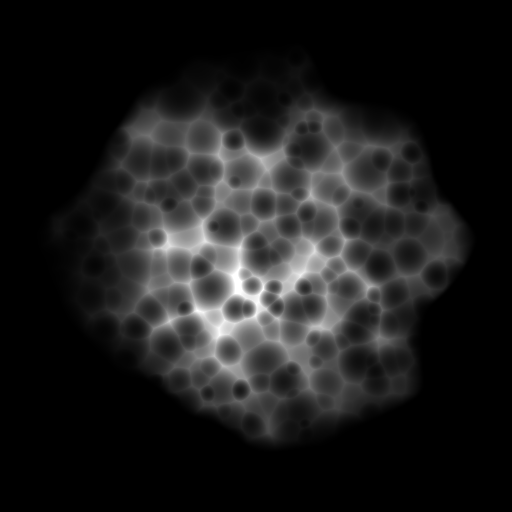
To create these, I take a Paraboloid shape and I warp it (using Mosaic Grayscale) a bit by a Perlin Noise Zoom (which allows me to control the size of a blurry, generalized noise that works well for larger warping deformations.) This makes the circle gradient a bit more uneven in shape.
Next, I use Tile Generator (grayscale) with a Paraboloid as the shape to tile. By using Max rather than Add Sub for the blending method, and setting the scale to 4+, these paraboloid shapes "collide" with each other and only take the max values where they collide, creating sort of a bubble shape and hard crease in between them. I also dial up Luminance Variation to get some value variation. I invert the resulting tile generated noise so that it is brighter in areas where there are the hard creases formed by the maxed out transition point between the paraboloids. Now, when I multiply this noise over top of the original Paraboloid shape I've warped, it will create some sharp, rock-like peaks. Auto leveling is also an important step to make sure your values are full 0-1 for the height map.
This chain can be repeated to create different rocks by varying the random seed and other parameters. By using the Transformation 2D and setting the tiling parameter to be Absolute and changing the dropdown from H and V tiling to No Tiling, you can place and scale the resulting rock shape anywhere on your texture canvas. This can be blended with other rocks with the Max (Lighten) method as well.
