

Continuing my tests with the Particle Paint method I've been developing has been really exciting! I love experimenting with my tools to enable new aesthetic possibilities.
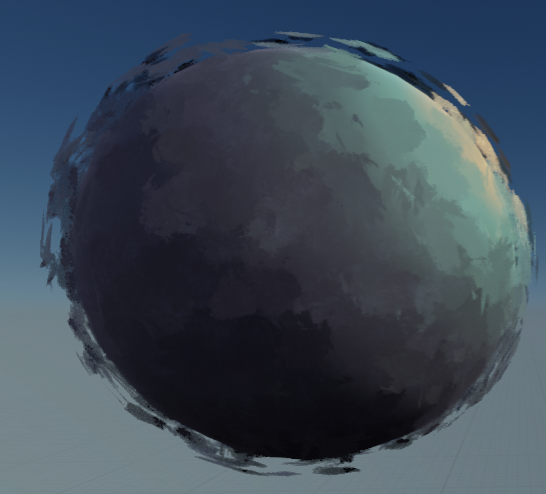
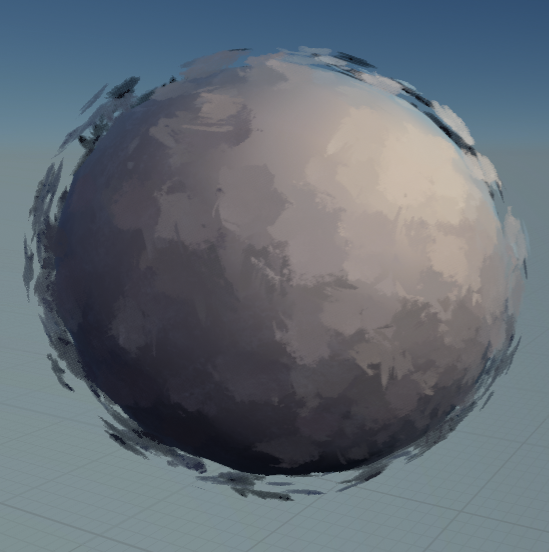
In most of these tests, I've used the light vector from a directional light to create a gradient of color from warm to cool within the material for the particles. The goal is to emulate the warm/cool contrast of light and shadows that many paintings utilize so well. I wanted to do this in a more artistic way than simply coloring lights, which would provide a smooth falloff across the surface of the object.
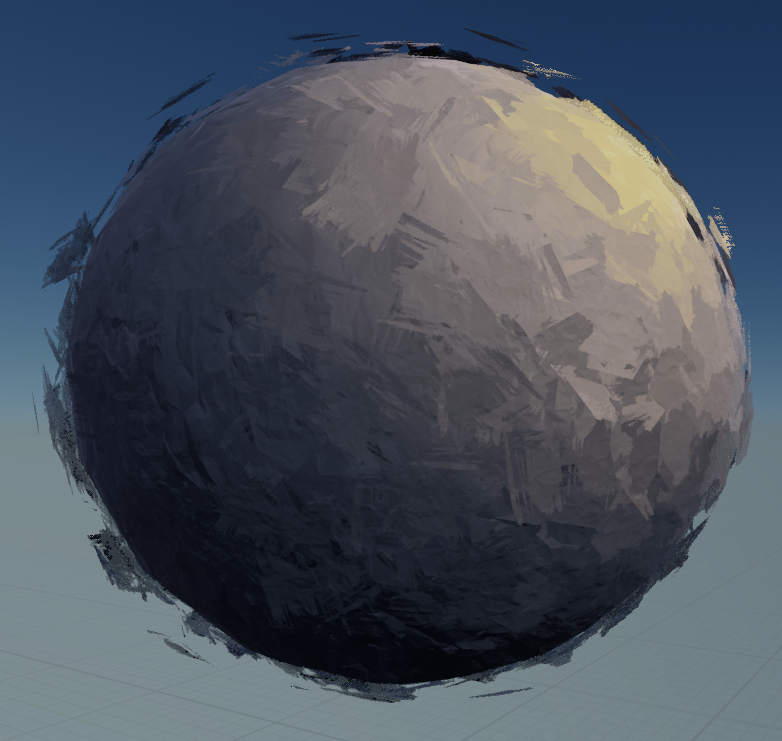
When I'm painting, I like to break down form into planar facets to simplify how a light will hit that surface. This thought process I use for painting objects is simulated well by the particle paint method because these
brush strokes exist in 3D space on planes that follow the surface of the object. But essentially, these planes are generalizing the form of the object, just like many painters, myself included, do while painting. This stepped, rather than smooth, textural gradient has a lot of character to it. The overlapping of the particle paint planes really emulates the layering of real paint strokes. When translated into a three-dimensional world, this overlapping has a pretty interesting quality of abstraction.
In most of these tests, I've used the light vector from a directional light to create a gradient of color from warm to cool within the material for the particles. The goal is to emulate the warm/cool contrast of light and shadows that many paintings utilize so well. I wanted to do this in a more artistic way than simply coloring lights, which would provide a smooth falloff across the surface of the object.
When I'm painting, I like to break down form into planar facets to simplify how a light will hit that surface. This thought process I use for painting objects is simulated well by the particle paint method because these
brush strokes exist in 3D space on planes that follow the surface of the object. But essentially, these planes are generalizing the form of the object, just like many painters, myself included, do while painting. This stepped, rather than smooth, textural gradient has a lot of character to it. The overlapping of the particle paint planes really emulates the layering of real paint strokes. When translated into a three-dimensional world, this overlapping has a pretty interesting quality of abstraction.
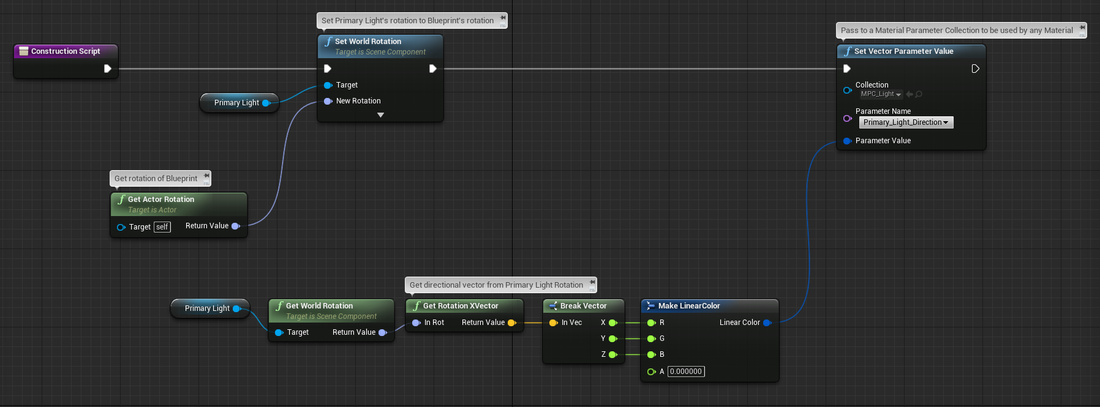
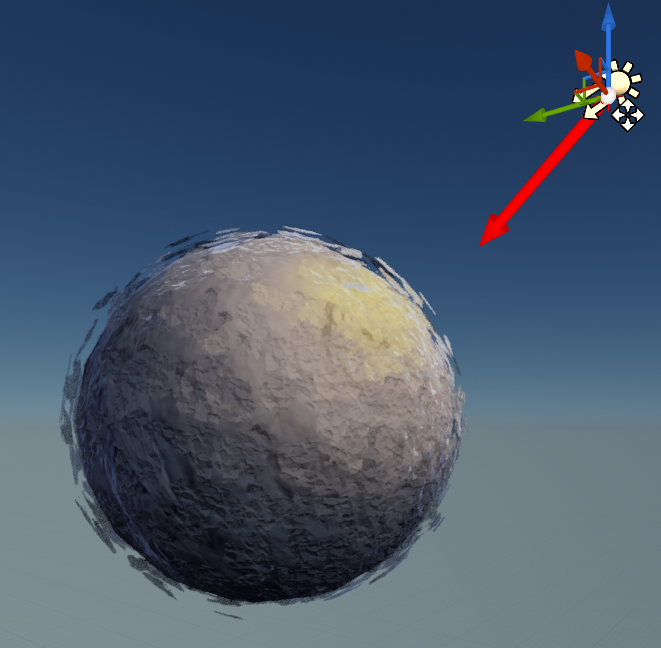
This is the setup for my custom light Blueprint that passes its directional vector to a Material Parameter Collection. This parameter can be used in any material. This Blueprint contains a Directional Light. The rotation of the Directional Light is set by the rotation of the Blueprint. By getting the Rotation XVector, we can compare the alignment of the light's directional vector with the vertex normal of any surface within a material.
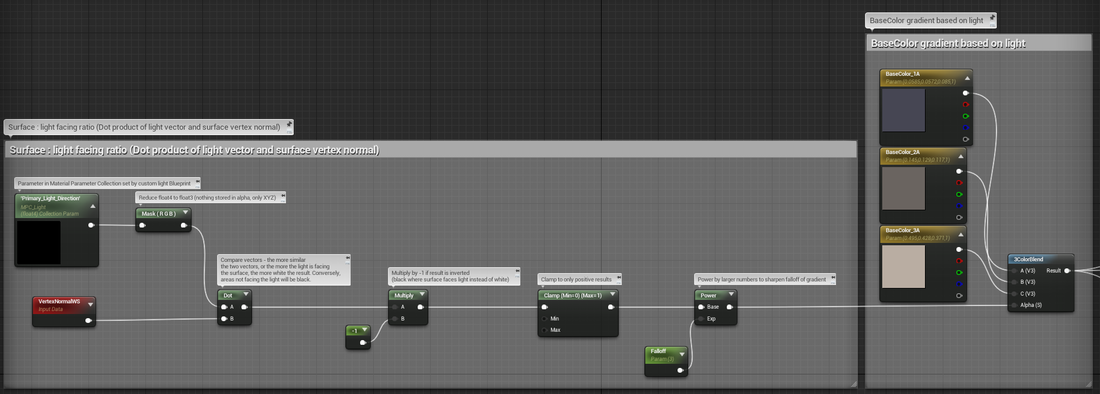
This is part of the chain for the setup of the material for my particles. I take the Dot product of the light vector and the vertex normal vector to compare the degree to which they're facing each other. As the normal of the particle's plane becomes more and more in line with the light vector, the light is hitting that plane more directly.
The Dot product will put out values of 1 where they are facing each other and values of 0 where they are perpendicular. This makes a gradient falloff on the surface from white to black until the "terminator."
The Dot product will put out values of 1 where they are facing each other and values of 0 where they are perpendicular. This makes a gradient falloff on the surface from white to black until the "terminator."
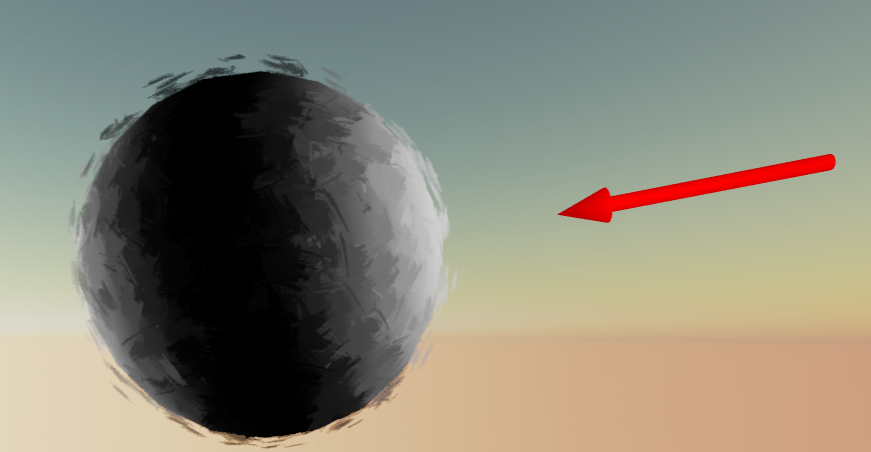 | The one caveat is that, the Dot product needs to be clamped from 0 to 1 so it doesn't yield the negative results (if the surface normal is aligned with the light vector, but in the negative direction.) You can see this happening in this image, where the opposite side of the sphere is white as well. |
At the end, I power the clamped result to control the sharpness of the falloff of the gradient. This can be tweaked to personal preference.
After that, I've fed the 0-1 gradient into the alpha of a 3ColorBlend node. This allows me to map 3 colors to the low, mid, and high ranges of this gradient. Here I have them as simple constant RGB colors, but anything can be plugged into the 3ColorBlend. I could even blend in a different BaseColor texture at different points on this light falloff. Perhaps I want to use texture map that has some speckly detail in the higher ranges where the light hits most, and a rougher, blockier looking texture map in the shadows. These are some things I'll be experimenting with soon to see how I can achieve some artistic abstractions of material definition that respond dynamically to light.
After that, I've fed the 0-1 gradient into the alpha of a 3ColorBlend node. This allows me to map 3 colors to the low, mid, and high ranges of this gradient. Here I have them as simple constant RGB colors, but anything can be plugged into the 3ColorBlend. I could even blend in a different BaseColor texture at different points on this light falloff. Perhaps I want to use texture map that has some speckly detail in the higher ranges where the light hits most, and a rougher, blockier looking texture map in the shadows. These are some things I'll be experimenting with soon to see how I can achieve some artistic abstractions of material definition that respond dynamically to light.
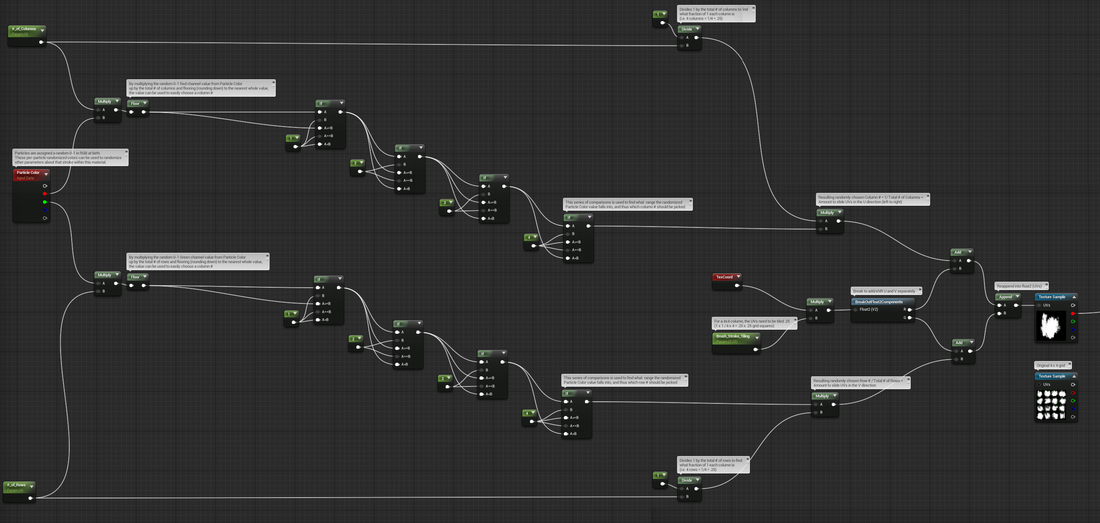
This is a material graph I set up to randomize the brush stroke type (the opacity mask used for the material) per particle. I wanted to randomize parameters for particles within their material without having to make a different Dynamic Material Instance assigned to each particle. So, I decided to use the Particle Color attribute, determined by Initial Color in Cascade.
A side note: to set particles to be a random color at birth, make sure that in Cascade you use a Distribution Vector Uniform for Start Color to set a Min and a Max color (I used 0,0,0 as min and 1,1,1 as max.) Also, if you're using this in the same way I am, to drive material parameters for static particles, delete any Color Over Life modules. They override the random birth color of the particle.
The comments I've made on this material graph best explain this graph, but basically I've set up the randomly determined values in the Red and Green channels of the Particle Color to correlate to a Row # and a Column # on a 4x4 texture grid for brush stroke masks. The UVs of the texture grid are tiled .25 to crop to the size of one grid square on a 4x4 grid, and the U and V are shifted independently to the resulting Row and Column #. From there, this resulting mask can be plugged into anything, but I've used it as my opacity mask to determine the per particle stroke "texture."


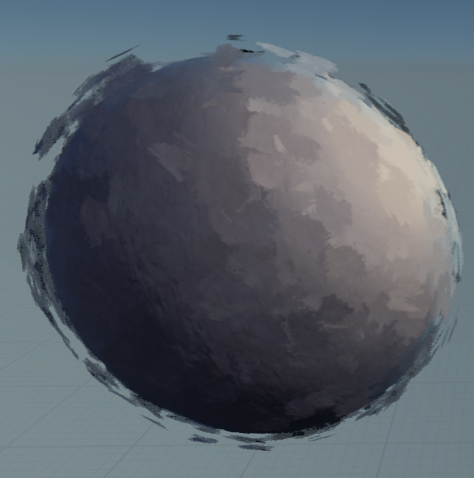
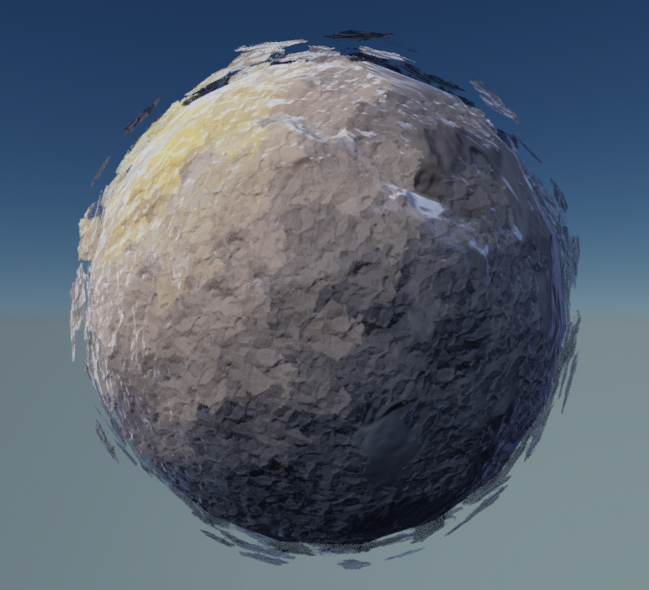
If you look carefully, these three screenshots show the randomized brush strokes being used.
Something else I've been working with is using World Position Offset to rotate the planes along the "edge" of the mesh (dependent on viewing angle) to face the player's camera. Although the edge I'm getting from pushing the particle planes out from the mesh using radial velocity (the Sphere module in Cascade) isn't terrible, it can sometimes reveal the thin, non-dimensionality of planes perpendicular to your viewing angle.
It looks like I could pass the Camera aim vector from the player Blueprint to a material parameter and compare that to the vertex normal of the planes in the same way I have the compared the light vector to the vertex normal with a Dot product. The more perpendicular the planes, the more black the resulting value from the Dot product can be. And so, I can use that as a mask for a RotateAboutAxis operation that plugs into World Position Offset.
It looks like I could pass the Camera aim vector from the player Blueprint to a material parameter and compare that to the vertex normal of the planes in the same way I have the compared the light vector to the vertex normal with a Dot product. The more perpendicular the planes, the more black the resulting value from the Dot product can be. And so, I can use that as a mask for a RotateAboutAxis operation that plugs into World Position Offset.


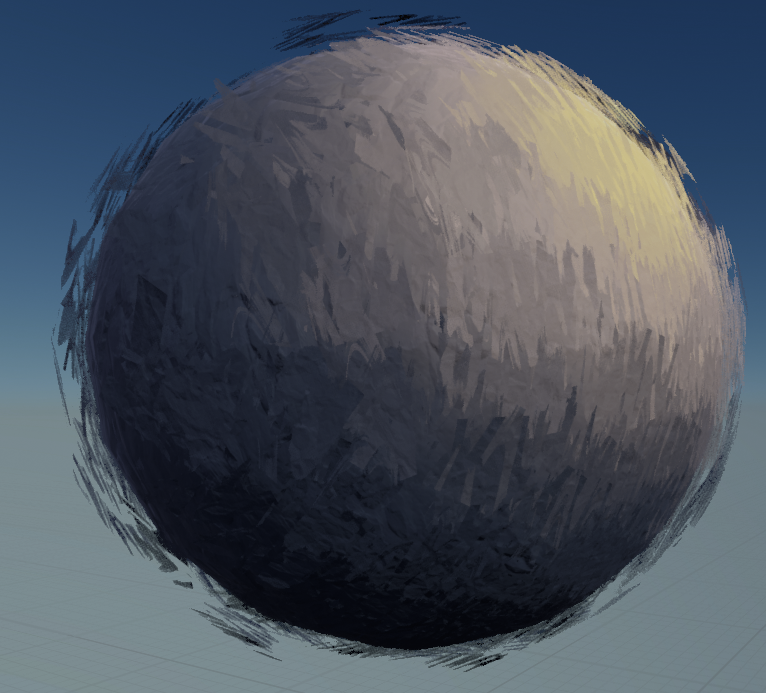

I threw on a normal map I had loaded in to see what kind of results that might yield with this technique. The bit of lighting information and relief it gives the paint strokes is nice, though I like the look of it a bit subtler.
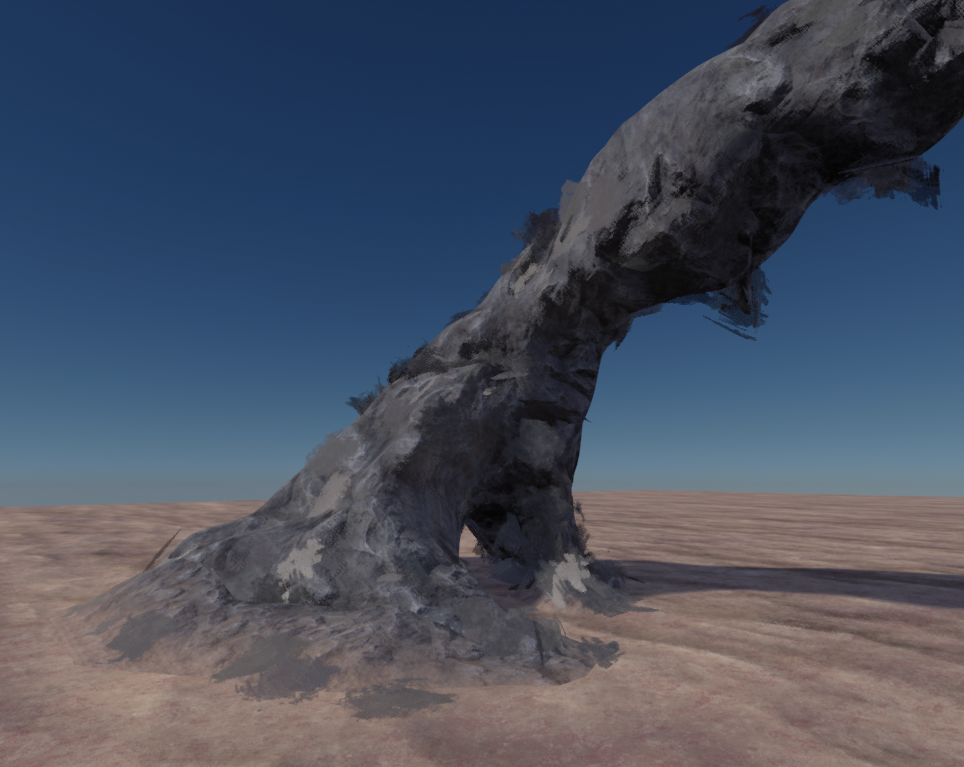
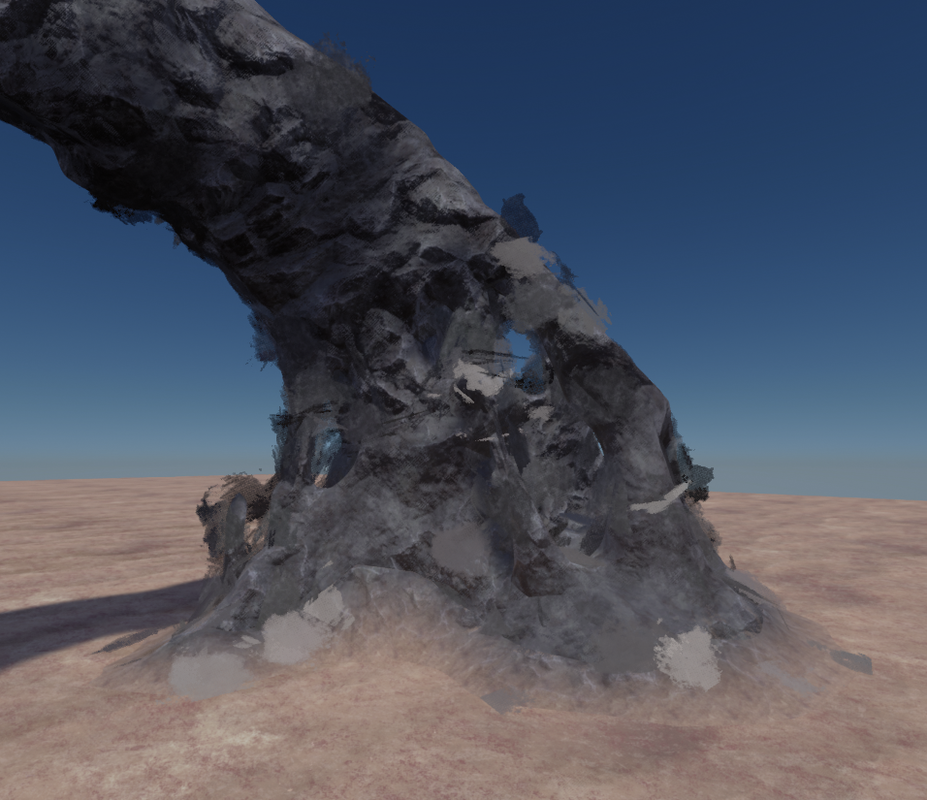
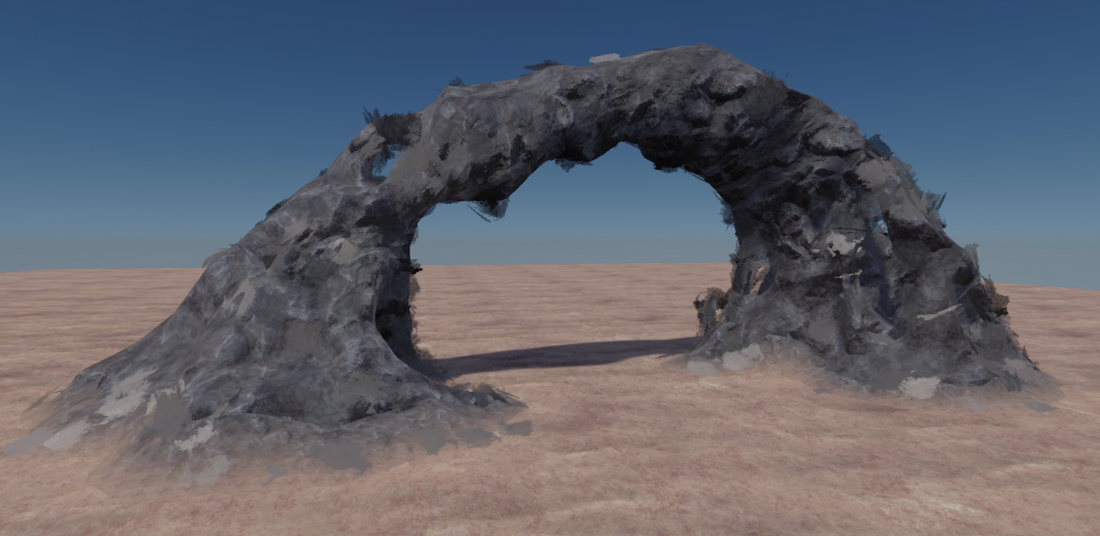

Here's an early preview. I tried applying the particle paint to a mesh that wasn't a sphere, and the results weren't bad, but there are so many ways I have yet to explore to implement this thoroughly with different types of meshes and more complex forms. Even so, the results are definitely interesting. I'm enjoying the textural differentiation it's adding to the rock by simplifying the information in the areas that the particles overlap.
I'm also developing my workflow for systematizing all of this. I'm establishing a central Blueprint that contains my main Particle Paint particle system. I'm parameterizing the Cascade Particle System and connecting those parameters to user-defined Blueprint variables, so that the particle system is easily customized per instance.
I'm also developing my workflow for systematizing all of this. I'm establishing a central Blueprint that contains my main Particle Paint particle system. I'm parameterizing the Cascade Particle System and connecting those parameters to user-defined Blueprint variables, so that the particle system is easily customized per instance.
