In the past couple of weeks I have been working on a few side projects dealing with augmented reality. The past summer I was on a project that gave me some experience working with recent developments in augmented reality for smartphones.
Recently, a couple of other students and I were recruited by one of my professors to work on an augmented reality project that would debut at ImagineRIT. The (very important) people attending the ImagineRIT VIP lunch would receive a badge with "special features" that could be unlocked by downloading an AR app and pointing a smartphone or tablet camera at the badge. The special feature of the badge was that, once the image on the badge was recognized by the augmented reality app, it would trigger a video to pop up and play, tracked to the badge in real life.
I was responsible for coming up with the 2D design of the badge that would serve as the trigger image, as well as one of the videos that would play when triggered.
 The VIP badge design I created, a pawprint formed by the iconic ImagineRIT bubbles from the original ImagineRIT logo design. | 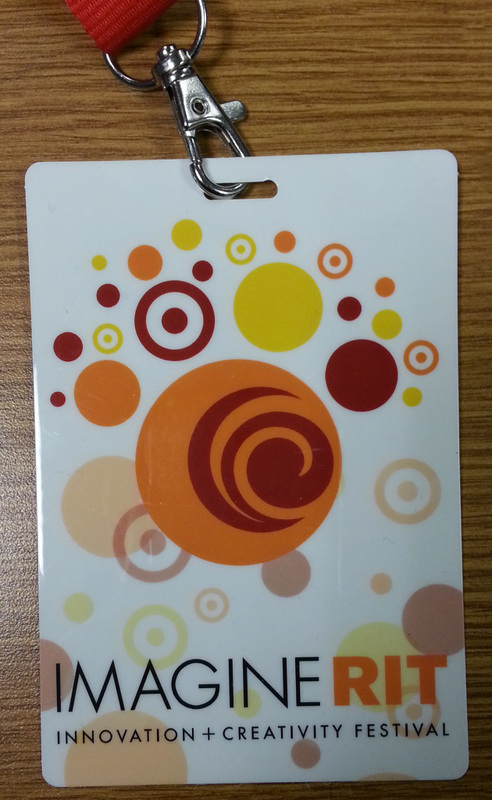 The final, printed version of the ImagineRIT VIP badge. |
Our first draft of our idea for the augmented reality portion of this badge was to incorporate 3D assets and recreate the RIT tiger statue and the wall it stands on. This would allow people to pivot around a virtual 3D object using their device.
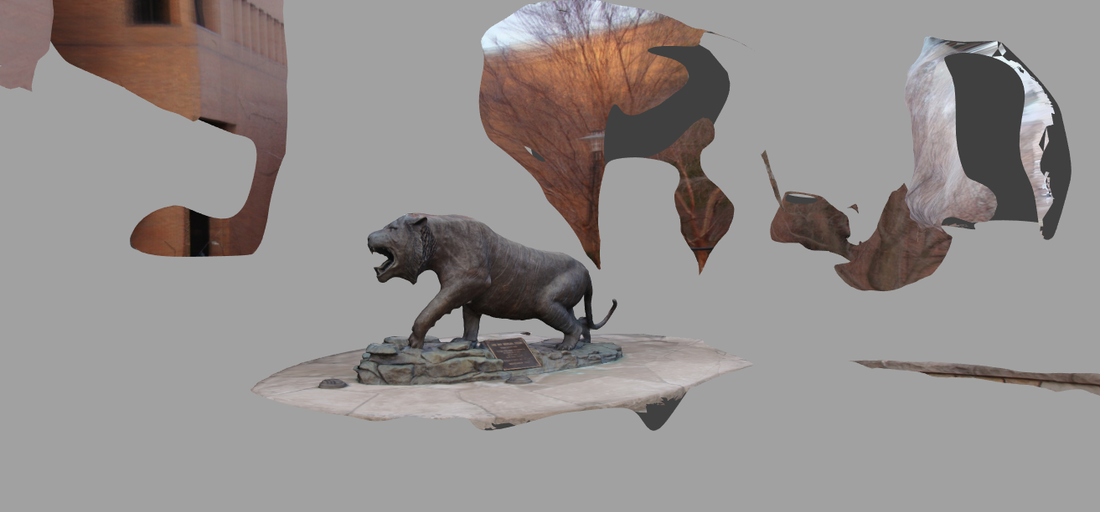
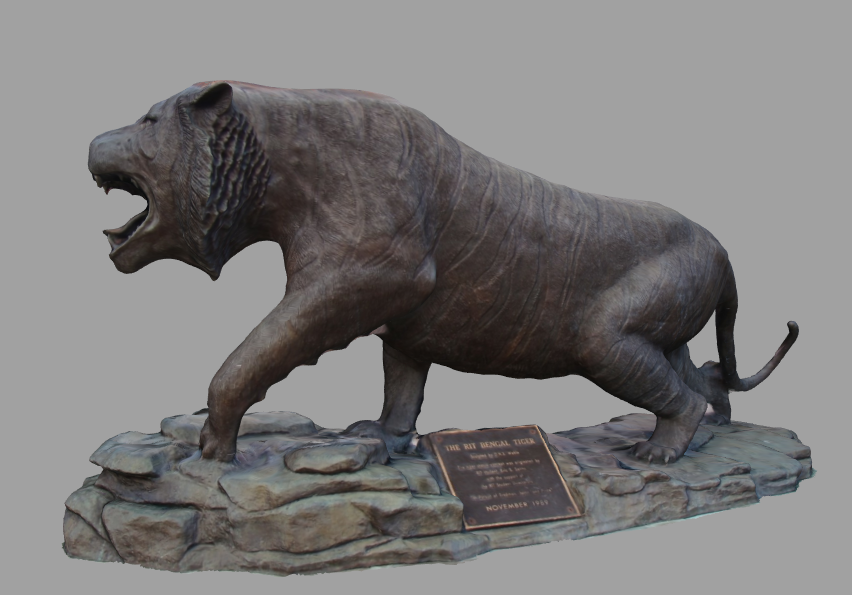
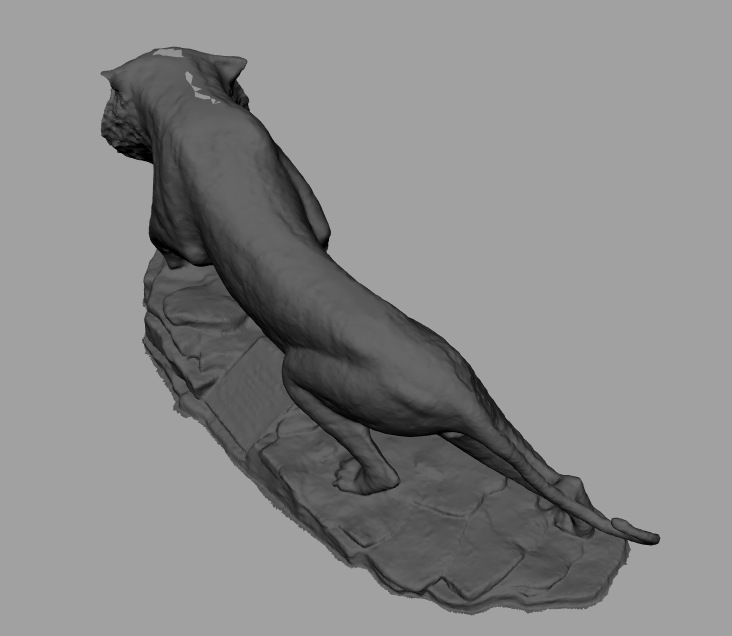
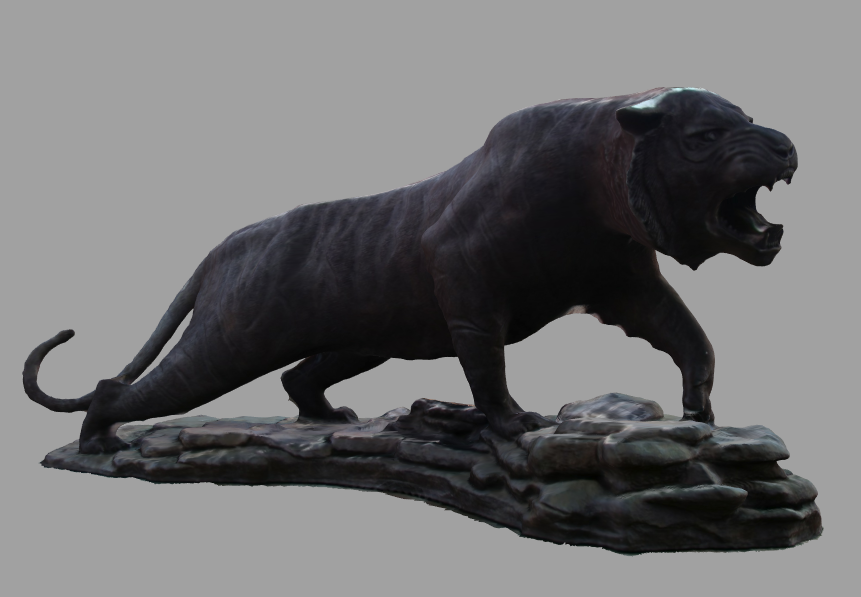
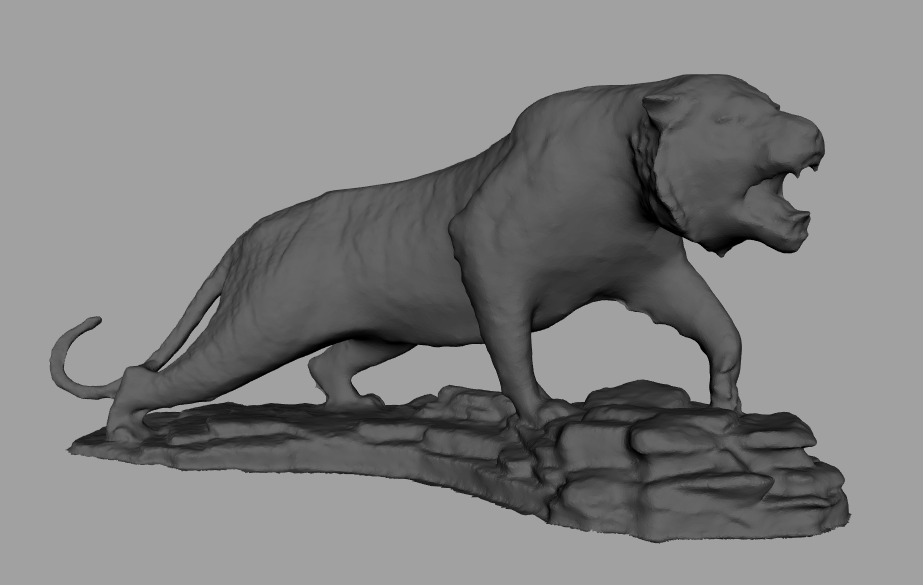
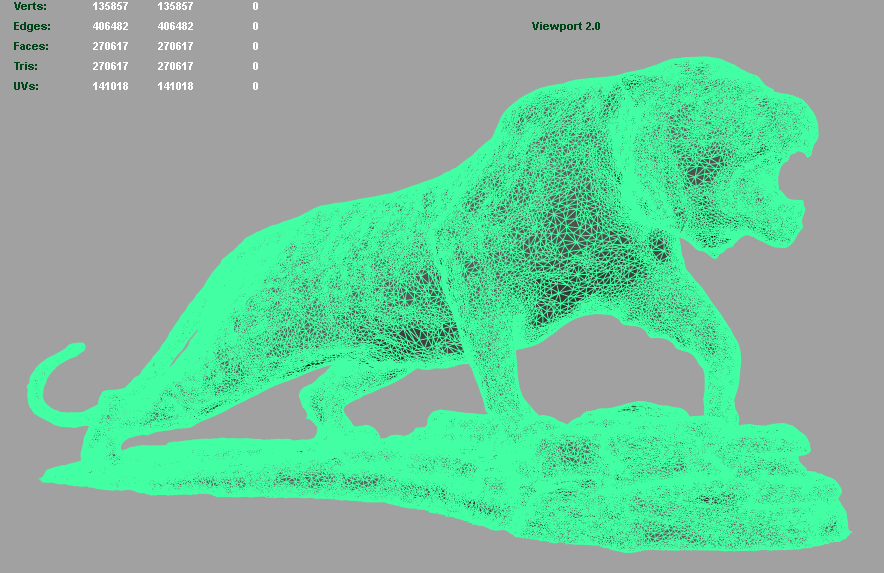
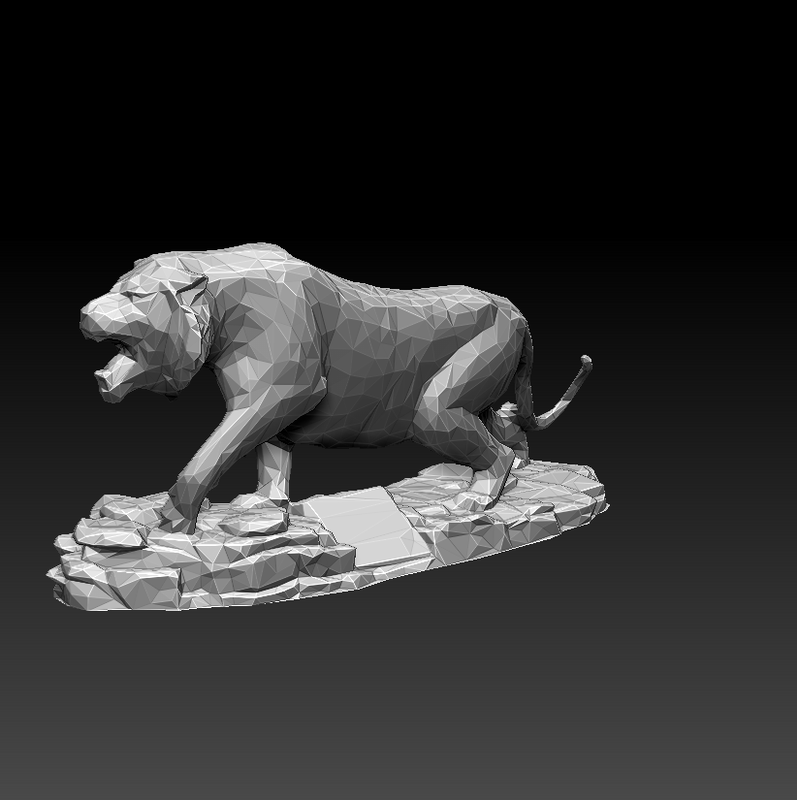
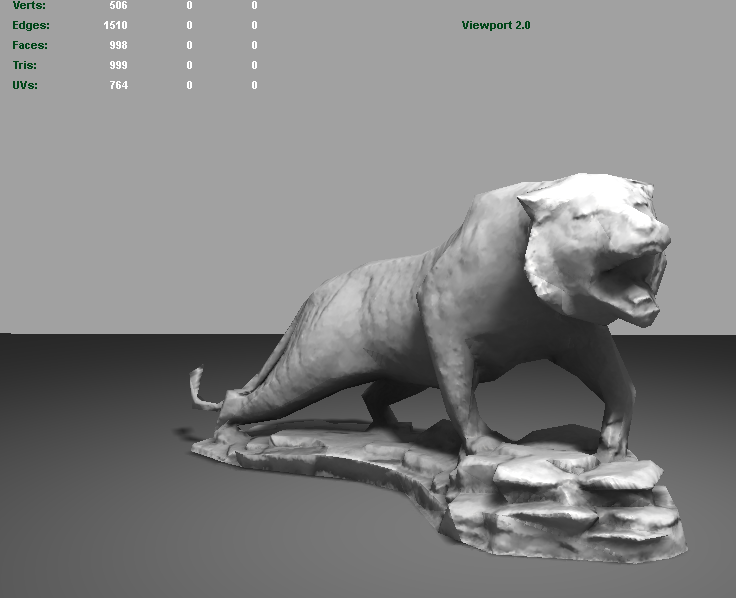
For to-life accuracy, I used Autodesk's 123D Catch to capture the RIT tiger statue in 3D. I was amazed with the results and did a bit of work afterwards to ready it for mobile (cleaning up the mesh and decimating the polygons, UVing.) I was going to go on to create my own diffuse, specular, and normal maps for the tiger, but testing its success led me to not continue on this endeavor. Our augmented reality app was a skinned version of Aurasma, so we were working through Aurasma's servers. The 3D model did not track well with the already printed badge design.
Here are some screenshots of the process. 123D Catch gives you an obj that is very dense in polygons and often results in some of the background environment being captured as well. It comes with the real life photo texture applied (although to very patchy UVs.) It does an outstanding job of capturing the form of the model, it just needs a bit of cleaning and optimization for usability.
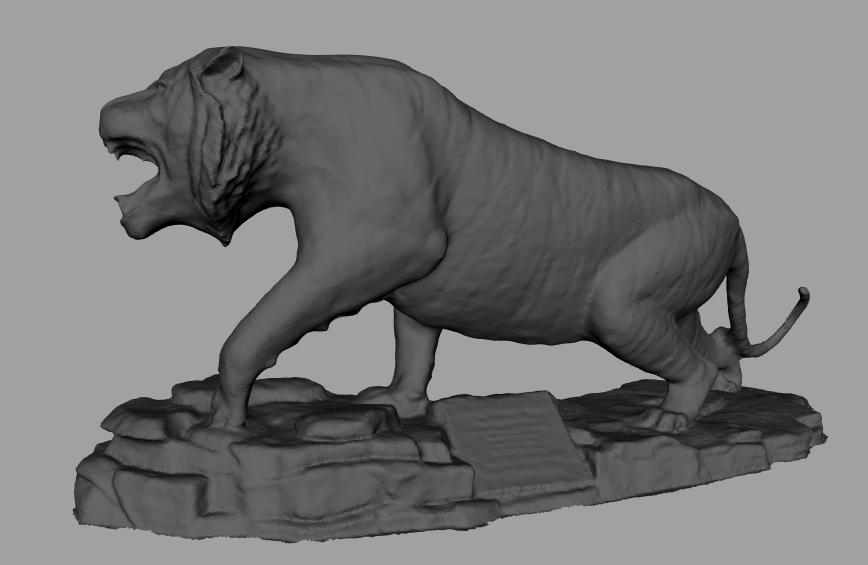
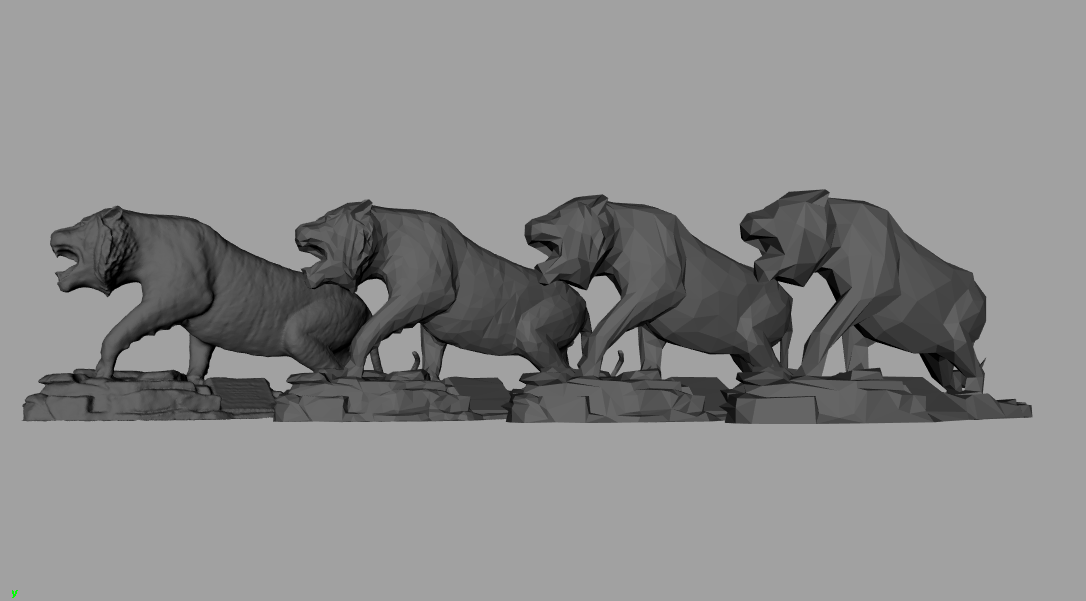
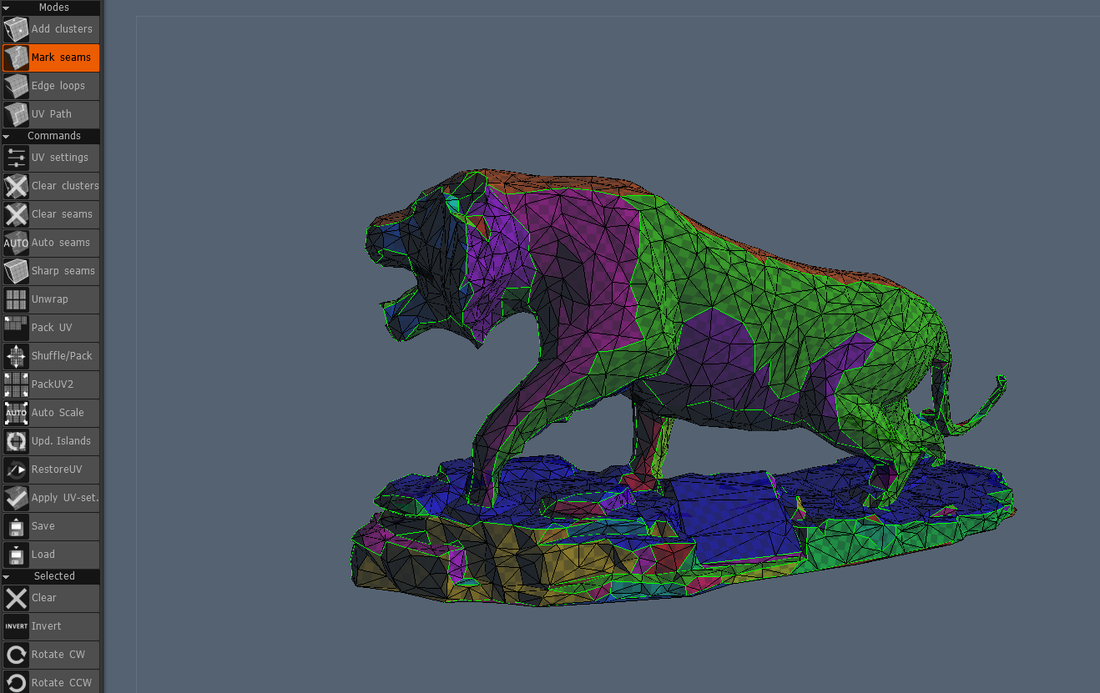
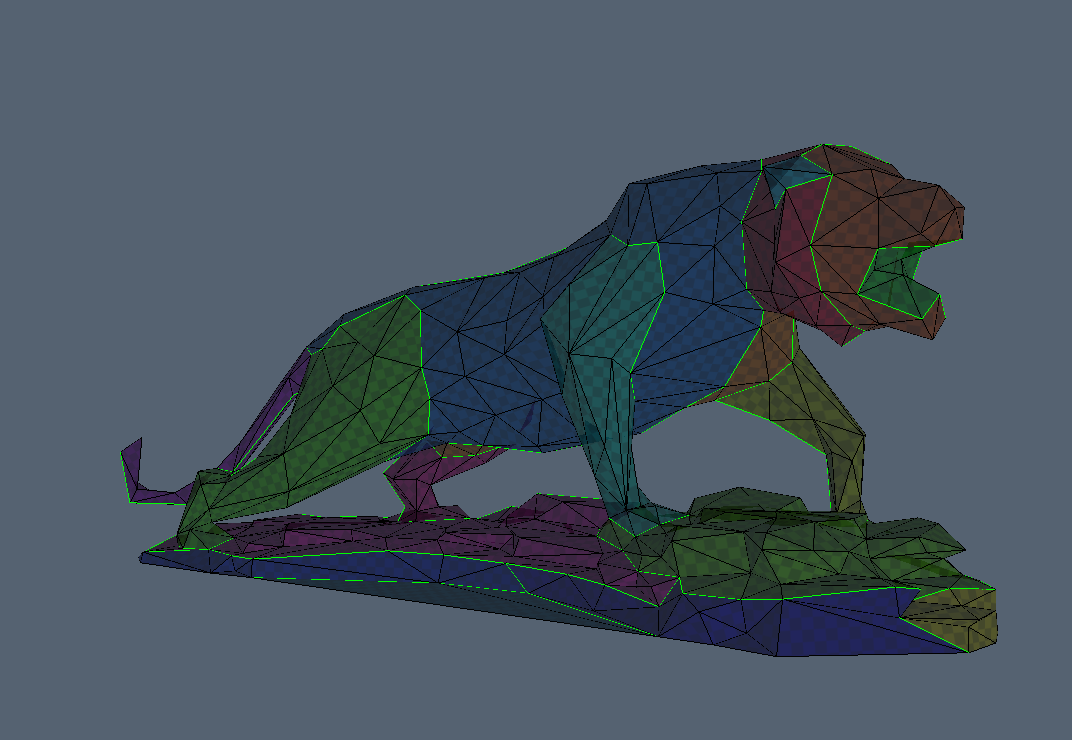
I chose to reduce the polygons using Decimation Master in Zbrush because of its ability to retain the form in the parts that matter and lower polygons significantly in areas that don't. Overall, I think it does a great job keeping the silhouette of the model. I figured I could afford to lower the polygon count to about 1,000. With the normal map applied, it is barely distinguishable, especially from the distance and size you would view it from on a phone.
For to-life accuracy, I used Autodesk's 123D Catch to capture the RIT tiger statue in 3D. I was amazed with the results and did a bit of work afterwards to ready it for mobile (cleaning up the mesh and decimating the polygons, UVing.) I was going to go on to create my own diffuse, specular, and normal maps for the tiger, but testing its success led me to not continue on this endeavor. Our augmented reality app was a skinned version of Aurasma, so we were working through Aurasma's servers. The 3D model did not track well with the already printed badge design.
Here are some screenshots of the process. 123D Catch gives you an obj that is very dense in polygons and often results in some of the background environment being captured as well. It comes with the real life photo texture applied (although to very patchy UVs.) It does an outstanding job of capturing the form of the model, it just needs a bit of cleaning and optimization for usability.
I chose to reduce the polygons using Decimation Master in Zbrush because of its ability to retain the form in the parts that matter and lower polygons significantly in areas that don't. Overall, I think it does a great job keeping the silhouette of the model. I figured I could afford to lower the polygon count to about 1,000. With the normal map applied, it is barely distinguishable, especially from the distance and size you would view it from on a phone.
With less than a week left on the project, myself and two other students designed video animations that would play when the front and back of the badge were triggered.
Here is the final animation I created in After Effects.
Here is the final animation I created in After Effects.
In January, I went on a trip to Italy with a group of students in the Honors program of my art college (College of Imaging Arts and Sciences at RIT.) We spent two weeks there and visited Rome, Florence, Naples, Herculaneum, Pompeii, Sorrento, and Siena. It was such an amazing time and I am so glad I had the privilege of traveling there, especially with such a great group!
In our time there, we had to come up with ideas for independent projects related to Italy and our experiences there. My idea was to take Autodesk 123D Catch captures of various sculptures I saw in Italy. Originally, I was going to create a virtual museum environment to present them in. Throughout the semester, my project idea evolved. Having worked with augmented reality quite a bit in the past year, I decided to bring the resulting 3D models to smartphones and tablets.
I used Metaio's Creator software to bring in my finalized, cleaned up and reduced models. Creator is essentially a drag and drop program that allows you to bring in any sort of media (3D model, picture, or video). You can pair it with the image that would trigger the AR media to appear, and upload it to a channel on Metaio's server. This is where the image recognition calculations are done and where it is made accessible via QR code on their augmented reality browser app called Junaio. Once you download Junaio for smartphone or tablet on either Android or iOS, you can scan the QR code, point your camera at the trigger image, and see the 3D models I created pop up, tracked to the trigger image on your phone's camera display.
I thought this was a great medium to present these models in because it is easily accessible to people and allows them to pivot around the model as if it were actually there in real life, emphasizing the three dimensionality of the models.
You can try out the book, or digital PDF, of the trigger images I created that allow you to scan the QR codes with your device and see the classical Italian sculptures! Instructions are included.
| giovinazzodeanna_123ditaly.pdf |
